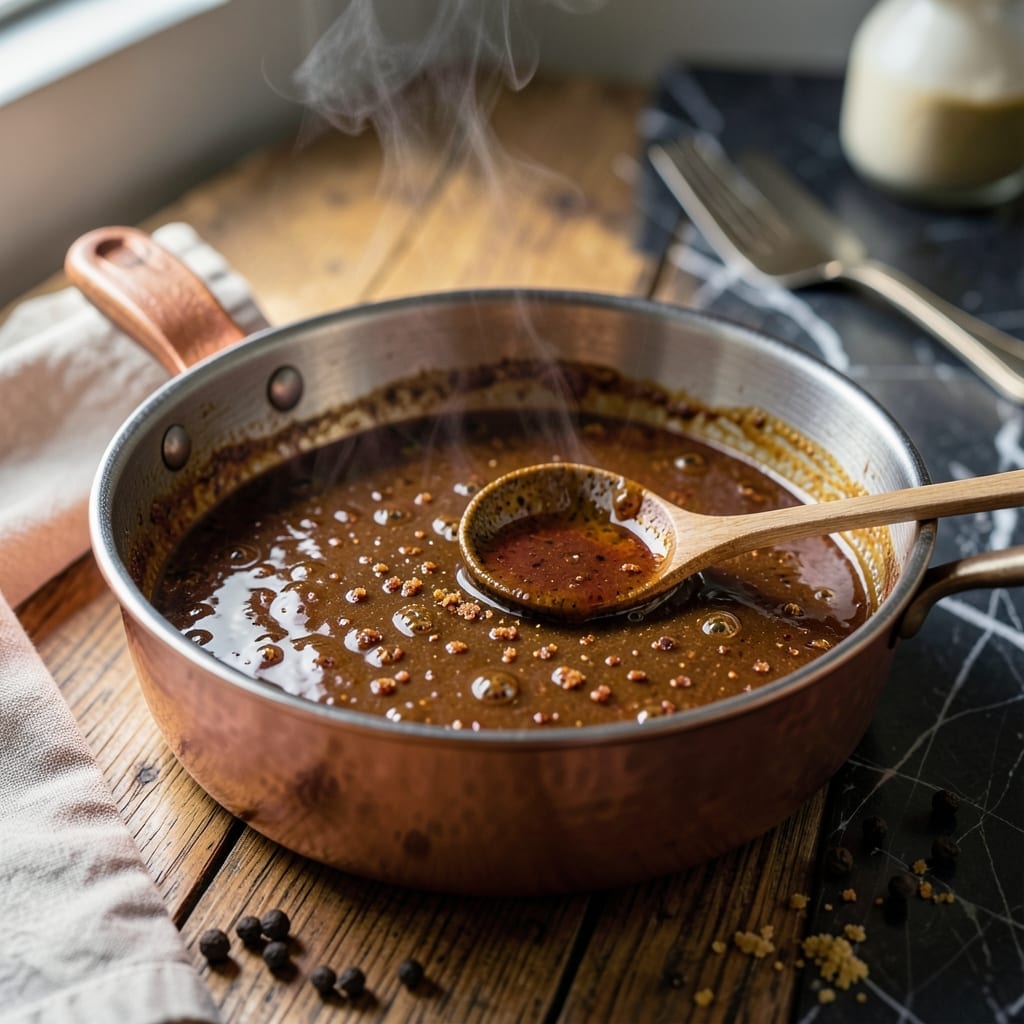
This vinegar-based sauce delivers the classic tangy kick that defines Cornell-style barbecue. I developed my version after years of perfecting the balance between sweet, sour, and savory notes.
It pairs perfectly with grilled chicken, bringing that signature restaurant-quality flavor to your backyard cookouts. The simplicity of the ingredients makes it easy to customize to your taste.
Ingredients for Cornell Barbecue Sauce
Nine simple ingredients for that classic tangy, sweet, and savory Cornell-style flavor you love.
| Ingredient | Amount | Notes |
|---|---|---|
| Cider Vinegar 🍏 | 2 cups | Apple cider vinegar preferred |
| Ketchup 🍅 | 2 cups | High-quality for best flavor |
| Brown Sugar 🍚 | ½ cup | Light or dark variety |
| Dry Mustard 🌶️ | 1 tbsp | Ground mustard powder |
| Salt 🧂 | 1 tbsp | Kosher or sea salt |
| Black Pepper 🌶️ | 1 tsp | Freshly ground preferred |
| Paprika 🌶️ | 1 tsp | Sweet or smoked variety |
| Cayenne Pepper 🔥 | ½ tsp | Adjust for heat preference |
| Worcestershire Sauce 💧 | 1 tbsp | Adds depth of flavor |
[recipe_ingredient_scaler]
The vinegar is the soul of this sauce. Apple cider vinegar gives that signature tang—don’t substitute white vinegar. Most grocery stores carry good options, but I like Bragg for consistency. Ketchup quality matters too—Heinz or Annie’s work well, but avoid the budget brands. The brown sugar balances the acidity; light or dark both work, but dark adds a hint of molasses richness.
No cider vinegar? Rice vinegar with a splash of apple juice gets you close. Short on ketchup? Tomato paste thinned with water and a touch of sugar works in a pinch. The Worcestershire adds umami depth—Annie’s vegetarian version if you want to keep it meat-free. Cayenne can be adjusted or omitted, but the paprika is key for that classic color and mild warmth.
This keeps beautifully in the fridge for 2-3 weeks in a sealed jar. The flavors meld and deepen over time, so making it a day ahead is ideal. For longer storage, freeze for up to 6 months—just thaw and stir before using.
Why You’ll Love This Recipe
- 5-Minute Mix: I just dump everything in a saucepan—no chopping, no fuss—and it’s ready before the grill heats up.
- Tangy Sweet Balance: That kick from the cider vinegar and the warmth of brown sugar make it irresistibly complex but still kid-approved.
- Slathers on Everything: I’ve used it on ribs, chicken, even as a dip for fries. Honestly, it’s my secret weapon for leftovers.
- Pantry Staples Only: No special trips to the store—just ketchup, vinegar, and a few basics I always have on hand.
Step-by-Step Instructions for Cornell Barbecue Sauce
Here’s the method. Straightforward, tested, works every time.
Step 1: Combine the Vinegar and Ketchup Base
In a medium saucepan, pour in the 2 cups cider vinegar and 2 cups ketchup. I use a heavy-bottomed pan to prevent scorching as the mixture reduces. Whisk these together until fully combined and smooth.
Place the saucepan over medium heat and bring to a gentle simmer. You’ll see small bubbles forming around the edges—that’s your signal the mixture is ready for the next ingredients. Don’t let it come to a rolling boil at this stage.
Step 2: Add Sweet and Spicy Elements
Stir in the ½ cup brown sugar, 1 tablespoon dry mustard, 1 tablespoon salt, 1 teaspoon black pepper, 1 teaspoon paprika, and ½ teaspoon cayenne pepper. The brown sugar should dissolve completely as you stir.
Watch for the mixture to thicken slightly and the spices to become fragrant—this usually takes about 3-4 minutes. The color will deepen as the sugar caramelizes. If you’re sensitive to heat, start with less cayenne and adjust to taste later.
Step 3: Incorporate the Worcestershire Sauce
Add the 1 tablespoon Worcestershire sauce and stir well. This ingredient adds a savory depth that balances the tanginess of the vinegar. The sauce will take on a richer, more complex aroma at this point.
Continue simmering for another 5-7 minutes, stirring occasionally to prevent sticking. You’ll notice the sauce beginning to coat the back of a spoon—that’s how you know it’s thickening properly.
Step 4: Reduce to Desired Consistency
Lower the heat to medium-low and let the sauce simmer gently for 15-20 minutes. The goal is to reduce it by about a quarter, creating a glossy, slightly thick sauce that clings to a spoon.
Taste and adjust seasoning if needed, though I find the original proportions hit the perfect balance of tangy, sweet, and spicy. The sauce should have a vibrant red color with a slight sheen from the natural sugars.
Step 5: Cool and Store
Remove the saucepan from heat and let the sauce cool to room temperature. It will thicken slightly more as it cools. I like to transfer it to a glass jar once cool—this makes storage easier and lets me see that beautiful color.
The sauce keeps well in the refrigerator for up to 2 weeks. For best results, let it sit for at least 24 hours before using to allow the flavors to meld together completely.
Pro Tips For Making Cornell Barbecue Sauce
- Simmer Low and Slow: Keep the heat at a gentle simmer—boiling the vinegar and ketchup too hard can make the sauce separate or turn bitter. I learned this the hard way after my first batch tasted more like vinegar candy than barbecue sauce.
- Dissolve the Sugar: Mix the brown sugar with a splash of the cider vinegar before adding it to the pot. Sounds weird, but it works—prevents those stubborn sugar clumps that never quite melt.
- Skip the Aluminum: Use a stainless steel or enamel pot, not aluminum. The vinegar can react with aluminum and give your sauce a metallic tang that ruins the flavor.
- Rest Before Using: Let the sauce cool to room temperature before tasting or using. The flavors meld and mellow—especially the dry mustard—after about 30 minutes off the heat.
Storing and Reheating This cornell barbecue sauce
Fridge Storage
Transfer cooled sauce to a clean, airtight container—I prefer glass mason jars for their non-reactive properties. Store in the refrigerator at 40°F or below for up to 2 weeks. The flavors actually improve over the first few days as they meld together. ❄️
Freezer Storage
For longer storage, freeze in pint-sized jars or heavy-duty freezer bags. Leave ½ inch headspace for expansion. It’ll keep for up to 6 months without quality loss. I like using ice cube trays for portion control—just pop out what you need.
Thawing Method
Move frozen sauce to the fridge 24 hours before use. For quick thawing, submerge the sealed container in cold water, changing the water every 30 minutes. Never thaw at room temperature to prevent bacterial growth.
Reheating Tips
Gently warm on the stovetop over low heat in a small saucepan. Stir frequently to prevent scorching. If it’s too thick, thin with 1-2 tablespoons water or vinegar. Avoid boiling to preserve the balanced flavors I worked so hard to perfect. 🔥
Room Temperature Use
Once thawed or refrigerated, the sauce can sit at room temperature for up to 2 hours during your cookout. For longer events, keep it in a cooler with ice packs. The vinegar’s acidity helps preserve it, but don’t push your luck.
Nutrition Facts
Frequently Asked Questions
Can I use white vinegar instead of cider vinegar?
White vinegar works in a pinch, but apple cider vinegar gives the authentic tangy flavor. For best results, stick with cider vinegar for that classic Cornell taste.
How long can I store homemade sauce in the fridge?
Properly stored in an airtight container, it keeps for 2-3 weeks in the fridge. The flavors deepen over time, making it taste even better after a few days.
What’s the best way to adjust the spice level?
Start with ½ teaspoon cayenne as written, then add more in ¼ teaspoon increments to taste. Remove a small amount to test before adding extra spice.
Can I make this sauce ahead of time?
It’s best made 1-2 days ahead. This gives the flavors time to meld together for a more complex, well-balanced taste.

Trained in classic French technique but raised on slow-cooked ribs and spicy rubs, she blends culinary skill with smoke and soul.
- Recipe for Fried Pork Chops With Flour: Crispy Crust and Juicy Centers - October 3, 2026
- Octopus Recipe Pan Fried: Crispy Edges With Tender Bites - October 3, 2026
- Recipe For Fried Pork Chops In An Iron Skillet: Crispy Crust With Juicy Centers - October 3, 2026