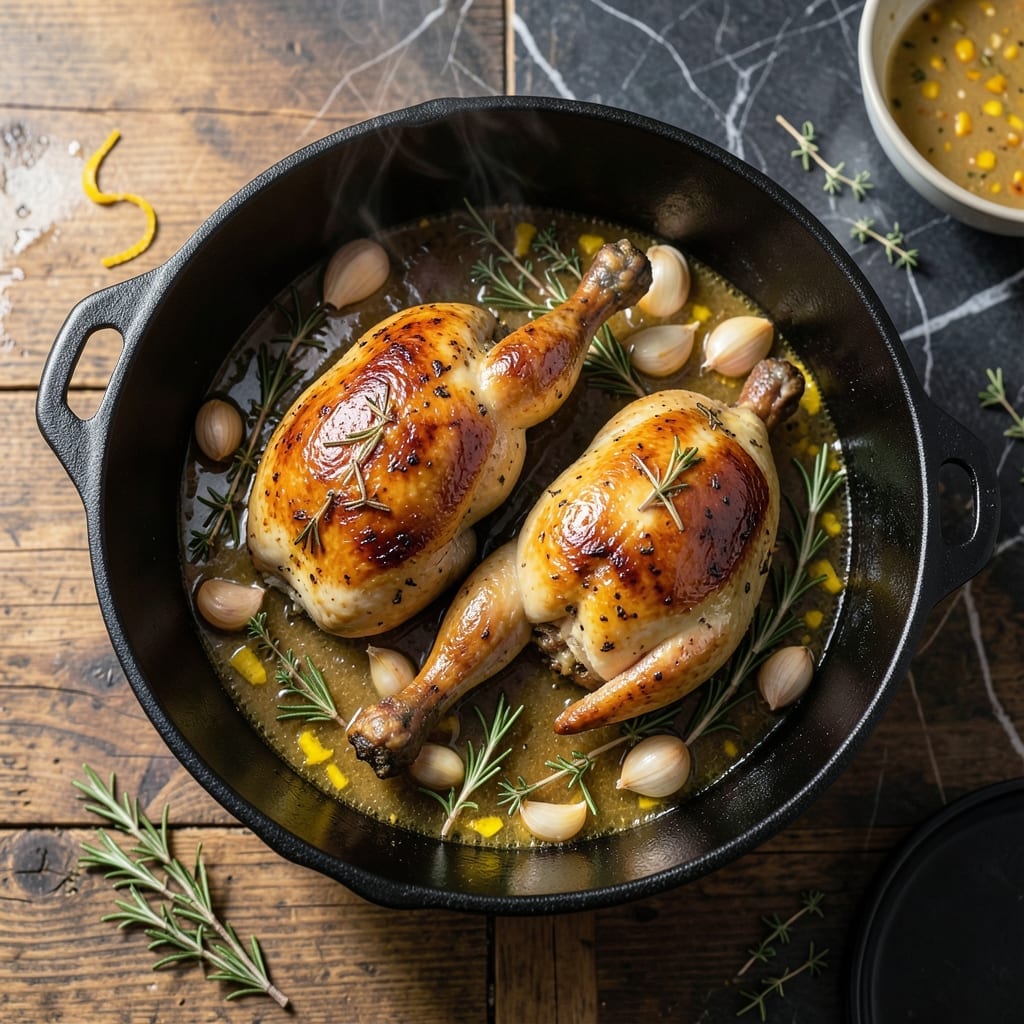
My Dutch oven method transforms Cornish hens into a golden, crisp-skinned masterpiece with juicy, herb-infused meat beneath. The heavy pot ensures even cooking and locks in moisture for tender results.
This technique delivers restaurant-quality birds with minimal effort. The herb butter under the skin guarantees every bite bursts with flavor, while the Dutch oven creates the perfect environment for that coveted crisp finish.
Ingredients for Cornish Hen Recipe Dutch Oven
Transform Cornish hens with herb butter, fresh herbs, and simple aromatics for restaurant-quality results.
| Ingredient | Amount | Notes |
|---|---|---|
| Cornish Hens 🍗 | 2 whole | Thawed if frozen, patted dry |
| Unsalted Butter 🧈 | ½ cup | Softened for herb butter |
| Fresh Rosemary 🌿 | 2 tbsp | Finely chopped for herb butter |
| Fresh Thyme Leaves 🍃 | 2 tbsp | Stems removed, chopped |
| Garlic Cloves 🧄 | 4 cloves | Minced for herb butter |
| Kosher Salt 🧂 | 2 tsp | Diamond Crystal preferred |
| Freshly Ground Black Pepper 🌶️ | 1 tsp | Coarse grind for best texture |
| Lemon 🍋 | 1 whole | Zested and juiced |
| Olive Oil 🫒 | 2 tbsp | Extra-virgin for searing |
| Chicken Stock 🍲 | ½ cup | Low-sodium preferred |
| Carrots 🥕 | 4 whole | Peeled, cut into chunks |
| Celery Stalks 🥬 | 3 whole | Cut into large pieces |
| Yellow Onion 🧅 | 1 whole | Quartered for aromatics |
| Fresh Parsley 🌿 | ¼ cup | Chopped for garnish |
[recipe_ingredient_scaler]
The Cornish hens are the centerpiece—opt for fresh, never frozen if possible. Whole Foods or local butchers often carry the best quality. The herb butter demands high-fat European-style butter (like Plugrá or Kerrygold) for superior flavor and texture. For the herbs, organic rosemary and thyme from the produce section deliver the most vibrant aroma.
No fresh herbs? Dried at one-third the amount works in a pinch, though fresh is ideal. Short on garlic? Garlic powder at half the quantity can substitute. The lemon can be swapped for lime or orange zest for a citrus variation. The chicken stock is flexible—vegetable stock or even water with a bouillon cube works.
Store fresh herbs wrapped in damp paper towels for up to 5 days. The herb butter can be made ahead and refrigerated for 3 days. Leftover cooked hens keep well in the fridge for 4 days—reheat gently to preserve crisp skin.
Why You’ll Love This Recipe
- One Pot Wonder: I love that everything cooks in the Dutch oven—hens, butter, and herbs all in one go.
- Buttery Herb Heaven: The rosemary and thyme infuse into the skin with that garlic butter, making every bite rich and aromatic.
- Dinner Party Star: It’s my go-to for impressing guests without the fuss of a whole turkey.
- Leftovers for Days: Honestly, the leftovers make the best sandwiches or quick meals the next day.
Step-by-Step Instructions for Cornish Hen in Dutch Oven
This method ensures perfectly crisp skin and juicy, herb-infused meat every time.
Step 1: Prepare the Herb Butter and Season the Hens
Combine the 0.5 cup Unsalted Butter, 2 tbsp Fresh Rosemary, 2 tbsp Fresh Thyme Leaves, 4 cloves Garlic Cloves, 1 tsp Freshly Ground Black Pepper, and the zest of the 1 whole Lemon in a bowl. Mix until the herbs are evenly distributed throughout the butter.
Pat the 2 whole Cornish Hens completely dry with paper towels. Gently separate the skin from the breast meat on each hen and spread half of the herb butter mixture underneath. Rub the remaining herb butter all over the exterior of the hens. Season generously with the 2 tsp Kosher Salt, ensuring even coverage inside and out.
Step 2: Sear the Hens for Golden Crisp Skin
Heat the 2 tbsp Olive Oil in a large Dutch oven over medium-high heat until shimmering. Place the hens breast-side down in the hot oil. Sear undisturbed for 5-6 minutes until the skin turns a deep golden brown and releases easily from the pan.
Carefully flip the hens and sear the other side for an additional 4-5 minutes. The skin should develop a rich, golden color with crisp edges. Transfer the hens to a plate and set aside momentarily.
Step 3: Roast with Aromatics and Vegetables
Reduce the heat to medium and add the 1 whole Yellow Onion, 4 whole Carrots, and 3 whole Celery Stalks to the Dutch oven. Sauté for 3-4 minutes until the vegetables begin to soften and develop some color.
Return the hens to the Dutch oven, placing them breast-side up on top of the vegetables. Pour the 0.5 cup Chicken Stock and the juice of the 1 whole Lemon into the pot. Cover with the lid and transfer to a preheated 375°F oven.
Step 4: Finish Cooking and Rest
Roast the hens in the oven for 45-50 minutes, basting occasionally with the pan juices. The hens are done when the internal temperature at the thickest part of the thigh reaches 165°F and the juices run clear.
Remove the Dutch oven from the oven and transfer the hens to a cutting board. Tent loosely with foil and let them rest for 10-15 minutes to allow the juices to redistribute. This resting period ensures the meat remains moist and tender.
Step 5: Serve with Garnish
Spoon the roasted vegetables and pan juices onto a serving platter. Place the hens on top and garnish with the 0.25 cup Fresh Parsley. The skin should be crisp and golden, while the meat inside remains succulent and infused with the herb butter flavors.
Carve the hens at the table for an impressive presentation, ensuring each serving includes a portion of the crispy skin and tender meat.
Pro Tips For Making Cornish Hen Recipe Dutch Oven
- Preheat the Dutch Oven: Start with a screaming hot Dutch oven—about 5 minutes over medium-high heat—to get that golden, crispy skin on the Cornish hens. I learned this the hard way after pulling out pale, sad birds that looked like they’d been steamed instead of roasted.
- Butter Under the Skin: Gently loosen the skin over the breasts and thighs, then tuck small pats of unsalted butter, rosemary, and thyme leaves underneath. It’s messy, but this is what makes the meat juicy while the herbs infuse every bite.
- Don’t Overcrowd: Resist the urge to cram all the hens in at once—give them space so the heat circulates and they brown evenly. My first attempt had them stacked like sardines, and I ended up with soggy skin and uneven cooking.
- Rest Before Serving: Let the hens rest under foil for 10 minutes after roasting to keep the juices inside where they belong. I used to skip this and wondered why my serving plate was swimming in lost flavor.
Pro Cooking Tips for This Recipe
Dutch Oven Preheating
Always preheat your Dutch oven for 5-10 minutes before adding oil. This creates an even, stable surface for searing. I use my Le Creuset for its superior heat retention—it makes all the difference. 🔥
Skin Preparation
Patting the hens completely dry is non-negotiable for crisp skin. Any moisture will steam rather than sear. I learned this the hard way at my first local BBQ competition—dry skin is the foundation of that perfect golden crust.
Herb Butter Distribution
When spreading the herb butter under the skin, work gently to avoid tearing. Use your fingers to create small pockets for even coverage. The rosemary and thyme will infuse the meat as it cooks.
Searing Technique
Don’t crowd the pot when searing—give each hen space for proper browning. Use tongs to flip, never a fork, to avoid piercing the skin. The Maillard reaction from this step creates those complex, savory flavors we love.
Oven Temperature Control
Maintain a steady 375°F in your oven. If your oven runs hot, check the hens 5 minutes early. I rotate my Dutch oven halfway through for even cooking—my coastal rides taught me patience pays off.
Baste with pan juices every 15 minutes to keep the skin moist while it crisps. 💡
Nutrition Facts
Frequently Asked Questions
What size Dutch oven works best?
A 5-7 quart Dutch oven is ideal for 2 hens. It provides enough space for searing and roasting without crowding. Larger pots may require adjusting the cooking time slightly.
Can I substitute dried herbs for fresh?
Yes, use 1/3 the amount of dried herbs. Fresh herbs provide brighter flavor, but dried work in a pinch. Mix them into the butter to help distribute evenly.
How do I prevent the skin from getting soggy?
Pat the hens completely dry before searing and ensure the Dutch oven is preheated. Avoid overcrowding and baste with pan juices to maintain crispness.
Should I cover the Dutch oven while roasting?
Yes, covering for the first 30 minutes helps trap steam for even cooking. Then uncover to allow the skin to crisp and brown beautifully.

Trained in classic French technique but raised on slow-cooked ribs and spicy rubs, she blends culinary skill with smoke and soul.
- Recipe for Boneless Pork Chops in Cast Iron Skillet: Sear and Baste to Juicy Perfection - October 3, 2026
- Recipe for Boneless Cross Rib Roast: Slow-Roasted Beef with Herb Crust - October 3, 2026
- Hamburgers in Sauce Recipe Crock Pot: Slow-Cooked Savory Delight - October 3, 2026