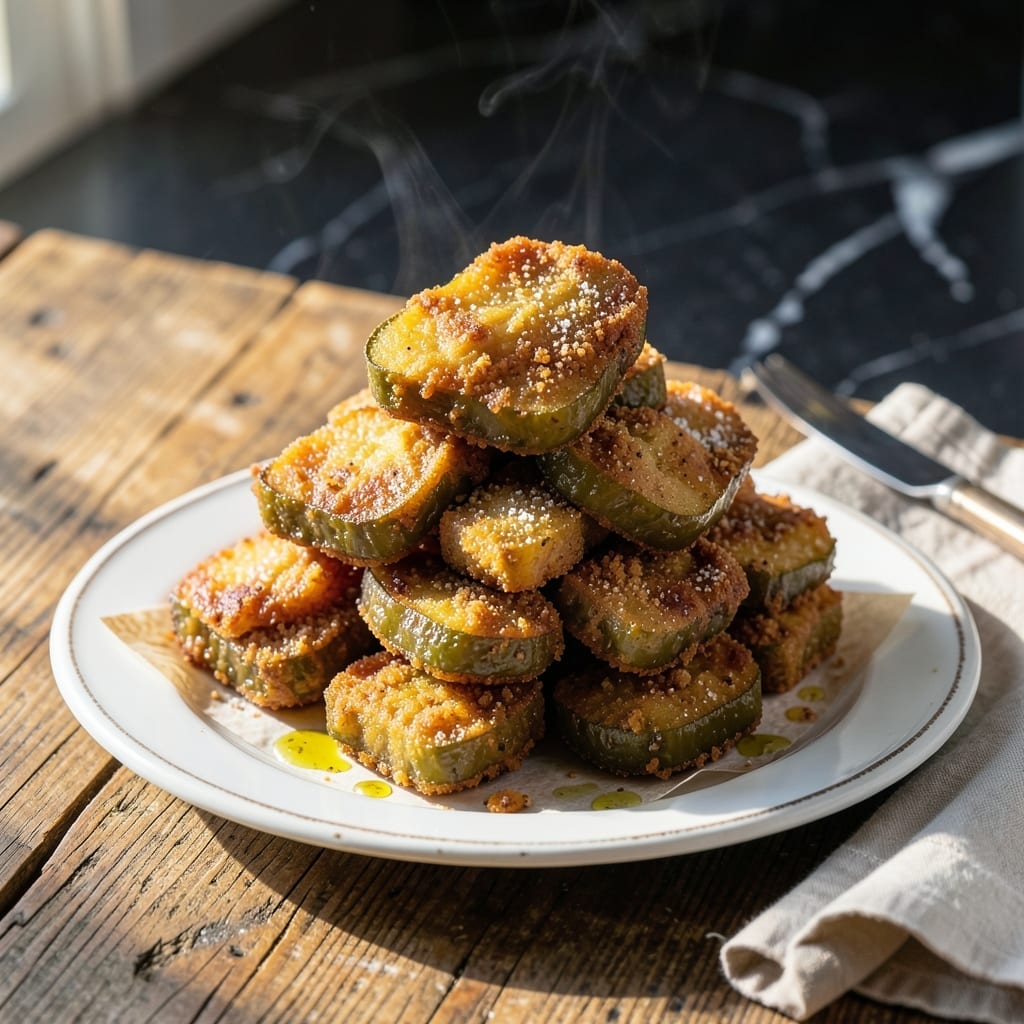
There’s a reason these dill pickle chips disappear faster than any appetizer on the table. The secret lies in achieving that shatteringly crispy coating while keeping the pickles tangy and firm.
My method uses a double-dredging technique with buttermilk and seasoned flour for maximum crunch. The pickles fry up golden in minutes, maintaining their signature zing beneath the crisp exterior.
What emerges is a snack with the perfect balance of salty, tangy, and crunchy—just like your favorite diner starter. The zesty kick comes through in every bite.
Serve immediately with ranch or spicy mayo for the full experience. This technique ensures restaurant-quality results at home.
Ingredients for Cracker Barrel Fried Pickles
Crispy dill pickle chips require just a dozen pantry staples and a double-dredge for maximum crunch.
| Ingredient | Amount | Notes |
|---|---|---|
| Dill Pickle Chips 🥒 | 24 pieces | Drained and patted dry |
| All-Purpose Flour 🌾 | 2 cups | Divided for dredging |
| Cornstarch 🌾 | ½ cup | For extra crispiness |
| Buttermilk 🥛 | 1 cup | Full-fat for richness |
| Large Egg 🥚 | 1 whole | Beaten for binding |
| Garlic Powder 🧄 | 1 tsp | For savory depth |
| Onion Powder 🧅 | 1 tsp | Balances tangy flavors |
| Paprika 🌶️ | 1 tsp | Smoked or sweet variety |
| Salt 🧂 | 1 tsp | Adjust to taste |
| Black Pepper 🌶️ | ½ tsp | Freshly ground preferred |
| Cayenne Pepper 🔥 | ¼ tsp | Optional for heat |
| Vegetable Oil 🫒 | 4 cups | For deep frying |
| Ranch Dressing 🥣 | 1 cup | For serving |
[recipe_ingredient_scaler]
The pickles are non-negotiable—Claussen or Vlasic dill chips hold up best to frying. Their thick-cut variety (found at Walmart or Kroger) maintains that signature snap after cooking. Buttermilk is key for the tangy coating; full-fat buttermilk from a carton delivers superior richness compared to powdered. For the flour, standard all-purpose works, but White Lily gives that Southern diner authenticity.
No buttermilk? Whole milk plus 1 tbsp vinegar gets you 90% there. Out of cornstarch? Arrowroot powder at equal amounts works. The spices can be adjusted—Cajun seasoning at 1 tbsp replaces the garlic, onion, paprika combo. For heat lovers, add 0.5 tsp more cayenne. The oil must hit 375°F—use a candy thermometer for precision.
Fry in batches to avoid lowering the oil temperature. Drain on a rack, not paper towels, to keep them crisp. Best eaten immediately, but leftovers reheat in a 400°F oven for 5-7 minutes. The ranch can be made ahead and stored for up to 1 week in the fridge.
Why You’ll Love This Recipe
- 20 Minute Crunch: Between us, the buttermilk and cornstarch combo fries up crispy in a flash.
- That Tangy Bite: The dill pickle chips stay sharp and juicy under the golden crust.
- Party Starter: I toss these out for game night and they’re gone before halftime.
- Pantry Heroes: All-purpose flour and pickle chips mean I can make these without a special grocery run.
Step-by-Step Instructions for Crunchy Dill Pickle Chips
This method ensures maximum crispiness and that signature zesty kick in every bite.
Step 1: Prepare the Pickles and Breading Station
Begin by thoroughly draining the 24 pieces dill pickle chips and patting them completely dry with paper towels. Any excess moisture will prevent the coating from adhering properly and compromise crispiness.
Set up a breading station with three shallow bowls. In the first, whisk together the 1 cup buttermilk and 1 whole large egg until fully combined. In the second, combine 1 cup all-purpose flour, 0.5 cup cornstarch, 1 tsp garlic powder, 1 tsp onion powder, 1 tsp paprika, 1 tsp salt, 0.5 tsp black pepper, and 0.25 tsp cayenne pepper.
Place the remaining 1 cup all-purpose flour in the third bowl. This two-step dredging process creates an extra-crispy exterior that stays put during frying.
Step 2: Coat the Pickles Evenly
Dip each pickle chip into the buttermilk mixture, allowing any excess to drip off for 2-3 seconds. Then dredge it in the seasoned flour mixture, pressing gently to ensure full coverage. Shake off any excess flour—thick clumps will burn before the pickles cook through.
Transfer the coated pickles to a wire rack set over a baking sheet. This prevents them from steaming on the counter, which would make the coating soggy. Repeat until all pickles are coated. Let them rest for 5 minutes—this helps the coating set and adhere better during frying.
Step 3: Heat the Oil and Fry in Batches
Pour the 4 cups vegetable oil into a deep, heavy-bottomed pot or Dutch oven, filling it no more than halfway. Heat over medium-high heat until the oil reaches 375°F on a deep-fry thermometer. Maintaining the correct temperature is crucial—too cool, and the pickles will absorb oil and become greasy; too hot, and they’ll brown before cooking through.
Working in batches of 6-8 pickles at a time to avoid overcrowding, carefully lower them into the hot oil using a slotted spoon or spider. Fry for 2-3 minutes until golden brown and crispy, turning occasionally for even browning. The pickles should float and sizzle vigorously when first added.
Step 4: Drain and Serve Immediately
Using a slotted spoon, transfer the fried pickles to a paper towel-lined plate to drain excess oil. Sprinkle with a pinch of additional salt while still hot—this enhances the flavor and helps the seasoning stick to the crispy exterior.
Serve immediately while hot and crispy, accompanied by 1 cup ranch dressing for dipping. The contrast of the cool, creamy dressing with the hot, crunchy pickles is what makes this dish irresistible. These are best enjoyed fresh, as the coating will soften over time.
Pro Tips For Making Cracker Barrel Fried Pickles
- Drain the Pickles: Pat those dill pickle chips bone dry with paper towels before dredging—I learned this the hard way after my first batch turned into soggy, greasy pucks.
- Chill the Batter: Let the buttermilk and egg mixture sit in the fridge for 10 minutes before using; it helps the coating cling better to the pickles and fries up crisper.
- Skip the Overcrowding: Fry in small batches—about 6-8 chips at a time—to keep the oil temp steady; otherwise, you’ll end up with limp pickles and a greasy mess.
- Cornstarch Boost: Swap 2 tablespoons of the all-purpose flour for extra cornstarch in your dredge; it’s the thing that actually gives that extra crunch Cracker Barrel is known for.
Essential Equipment for This Dish
Deep Fry Setup
Invest in a 5-quart Dutch oven or heavy pot—I use my Lodge enameled cast iron for even heat distribution. The deep sides prevent oil splatter while maintaining consistent 375°F temperature. A candy thermometer clipped to the side is non-negotiable for precision.
Thermometer Essentials
That candy thermometer needs to handle 400°F+ temperatures safely. I trust Taylor Precision or ThermoWorks brands for durability. Digital versions offer faster readings, but analog works just as well if calibrated properly.
Draining Solutions
A wire cooling rack placed over a baking sheet keeps fried pickles crisp by allowing air circulation. Avoid paper towels—they trap steam and create soggy bottoms. I found OXO’s stainless steel rack at my local Kroger for under $15. 💪
Oil Management
Use vegetable oil or peanut oil for their high smoke points. A 4-cup quantity fills most home pots to the right depth. Never reuse oil more than twice—it degrades and imparts off-flavors that overpower the pickles’ tang.
Safety Gear
Keep a fire extinguisher rated for grease fires nearby and use tongs or a spider strainer for handling. Long sleeves and an apron protect against splatters. I learned this the hard way at my first BBQ competition—safety first, always.
Breading Station
Three shallow bowls or pie plates work perfectly for the dredging process. I prefer glass mixing bowls from Pyrex because they’re easy to clean and show the colors of your coatings clearly. The wide surface area makes dipping efficient. 💡
Nutrition Facts
Frequently Asked Questions
Can I use whole dill pickles instead of chips?
Yes, but slice them into 1/4-inch rounds for even cooking. Whole pickles may not cook through properly and could burst during frying.
Why is buttermilk important in the recipe?
Buttermilk’s acidity tenderizes the coating and adds tang. Its thickness helps the flour mixture adhere better than regular milk would.
What if my oil temperature drops during frying?
Let the oil return to 375°F between batches. Adding too many pickles at once lowers the temperature, resulting in greasy, soggy results.
Can I bake these instead of frying?
Yes, at 425°F for 12-15 minutes, flipping halfway. They won’t be as crispy but will still be tasty with less oil.

Trained in classic French technique but raised on slow-cooked ribs and spicy rubs, she blends culinary skill with smoke and soul.
- Recipe for Boneless Pork Chops in Cast Iron Skillet: Sear and Baste to Juicy Perfection - October 3, 2026
- Recipe for Boneless Cross Rib Roast: Slow-Roasted Beef with Herb Crust - October 3, 2026
- Hamburgers in Sauce Recipe Crock Pot: Slow-Cooked Savory Delight - October 3, 2026