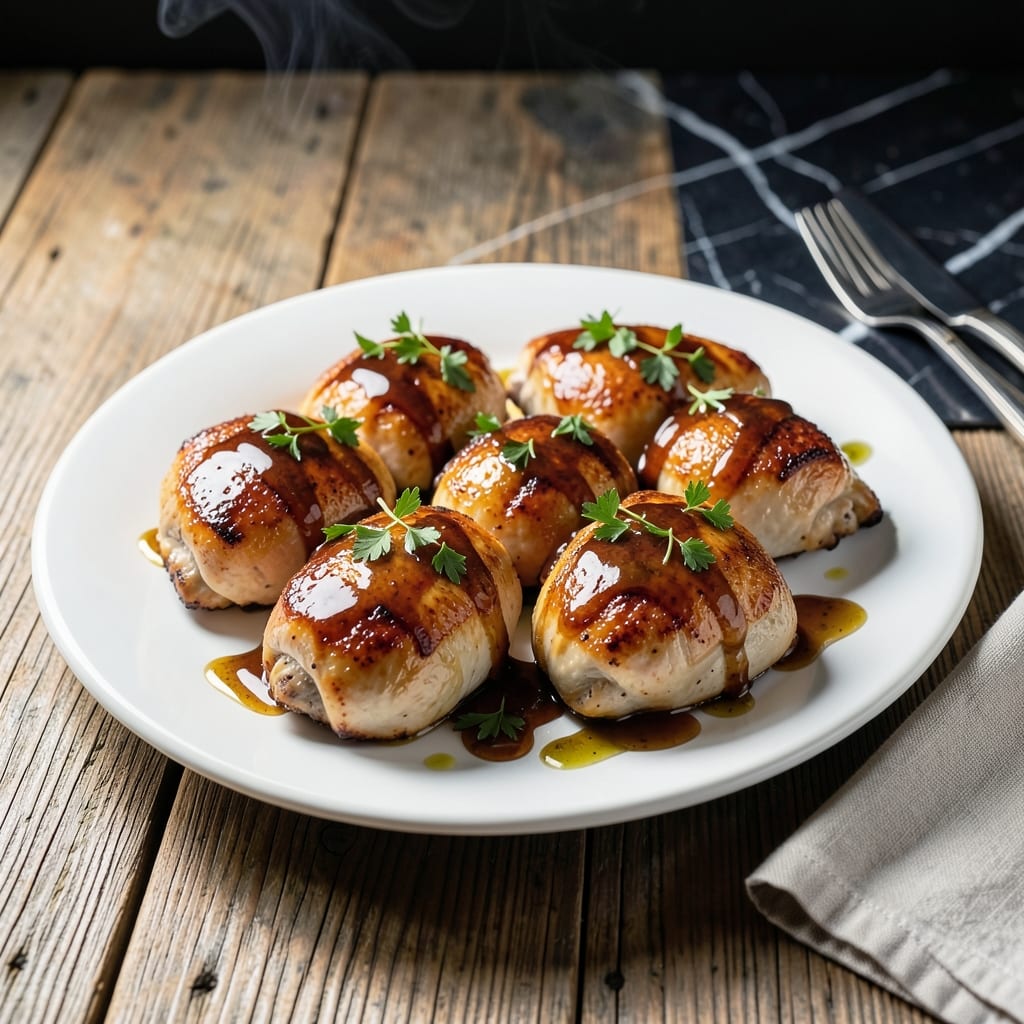
This copycat recipe brings the beloved Cracker Barrel flavor into your kitchen with minimal effort. The secret lies in a simple maple glaze that caramelizes beautifully on tender chicken.
What makes this dish special is the balance of sweetness and savory depth, achieved through a precise combination of maple syrup and spices. The chicken stays juicy while developing a sticky, glossy finish.
You’ll achieve restaurant-quality results with everyday ingredients and 30 minutes of active cooking. The glaze reduces to a perfect consistency that clings to each bite.
Serve with mashed potatoes or roasted vegetables for a complete meal that tastes just like the original. Here’s how to make it.
Ingredients for Cracker Barrel Maple Glazed Chicken
Everyday ingredients create that signature sticky, glossy Cracker Barrel finish at home.
| Ingredient | Amount | Notes |
|---|---|---|
| Boneless Skinless Chicken Breasts 🍗 | 1 ½ lb | Pounded to even thickness |
| Pure Maple Syrup 🍁 | ¾ cup | Grade A or B preferred |
| Dijon Mustard 🟡 | 2 tbsp | Smooth, not whole grain |
| Apple Cider Vinegar 🍏 | 1 tbsp | Balances sweetness |
| Garlic Cloves 🧄 | 3 cloves | Minced for depth |
| Ground Black Pepper 🌶️ | ½ tsp | Freshly cracked preferred |
| Kosher Salt 🧂 | 1 tsp | Diamond Crystal recommended |
| Smoked Paprika 🌶️ | ½ tsp | Adds savory depth |
| Olive Oil 🫒 | 2 tbsp | For searing chicken |
| Unsalted Butter 🧈 | 2 tbsp | For richness in glaze |
| Onion Powder 🧅 | ½ tsp | Enhances savory notes |
| Dried Thyme 🌿 | ¼ tsp | Subtle earthy note |
[recipe_ingredient_scaler]
The chicken quality matters—look for plump, pale breasts without added solutions. Whole Foods or Costco carry excellent options. Pounding to even thickness ensures even cooking and maximum glaze coverage. For the maple syrup, Grade A dark offers more robust flavor than light syrups (the good stuff, not the pancake syrup).
No Dijon? Whole grain mustard works in a pinch—just strain out the seeds. Short on maple syrup? Honey or agave at 1:1 ratio (though maple’s caramel notes are ideal). For extra depth, a pinch of cayenne adds heat without overpowering. The apple cider vinegar is non-negotiable though—it cuts the sweetness perfectly.
The glaze keeps in an airtight container for 5 days in the fridge. Chicken is best cooked fresh but leftovers reheat nicely—microwave with a damp paper towel to retain moisture. Freeze uncooked chicken separately for up to 3 months.
Why You’ll Love This Recipe
- One Pan Wonder: I toss everything in a single baking dish—chicken, maple syrup, mustard, vinegar—and let the oven do the work.
- Sweet & Tangy: The maple syrup and apple cider vinegar create this ridiculously good balance that’s sticky, savory, and just a little sharp.
- Weeknight Hero: I’ve served this for quick dinners, meal prepped it for lunches, and even took it to potlucks. Always a hit.
- Budget Friendly: Between us, chicken breasts on sale plus pantry staples make this dish as kind to my wallet as it is to my taste buds.
Step-by-Step Instructions for Maple Glazed Chicken
Achieve restaurant-quality results at home with this precise, tested method.
Step 1: Prepare and Season the Chicken
Pound the 1.5 lb boneless skinless chicken breasts to an even ½-inch thickness using a meat mallet. This ensures uniform cooking and prevents dry, overdone edges while the center finishes.
Pat the chicken dry with paper towels, then season both sides evenly with the 1 tsp kosher salt, 0.5 tsp ground black pepper, 0.5 tsp smoked paprika, 0.5 tsp onion powder, and 0.25 tsp dried thyme. The spices should adhere well to the slightly tacky surface of the meat.
Step 2: Sear the Chicken to Golden Perfection
Heat the 2 tbsp olive oil in a large skillet over medium-high heat until it shimmers—this takes about 2 minutes. Add the seasoned chicken and cook undisturbed for 5-6 minutes per side, until each piece develops a deep golden-brown crust and releases easily from the pan.
The chicken is ready to flip when the edges appear opaque and the surface is caramelized. Avoid moving the pieces too soon, as this prevents proper searing. Transfer the seared chicken to a plate and tent loosely with foil to keep warm.
Step 3: Create the Maple Glaze
Reduce the heat to medium and add the 2 tbsp unsalted butter to the same skillet. Once melted, add the 3 cloves minced garlic cloves and sauté for 30 seconds until fragrant but not browned.
Pour in the 0.75 cup pure maple syrup, 2 tbsp Dijon mustard, and 1 tbsp apple cider vinegar. Stir to combine and let the mixture simmer for 3-4 minutes until it thickens slightly and coats the back of a spoon. The glaze should be glossy and reduced by about one-third.
Step 4: Finish and Serve
Return the chicken to the skillet and spoon the glaze over each piece, ensuring full coverage. Simmer for an additional 2-3 minutes on low heat, turning the chicken once, until the internal temperature reaches 165°F and the glaze has thickened to a sticky consistency.
Remove from heat and let the chicken rest for 2 minutes before serving. The glaze will continue to set slightly, creating that signature sticky finish. Serve immediately, drizzling any remaining sauce from the pan over the top for maximum flavor impact.
Pro Tips For Making Cracker Barrel Maple Glazed Chicken
- Pound the Chicken: Even thickness means even cooking—I learned this the hard way after too many dry, overdone edges. Aim for ½-inch thickness, and cover with plastic wrap to avoid tearing.
- Reduce the Glaze First: Simmer the maple syrup, mustard, and vinegar for 3-4 minutes before adding it to the chicken. This thickens it just enough to cling instead of sliding right off.
- Skip the Cold Chicken: Pull the chicken out of the fridge 20 minutes before cooking. Cold meat seizes up in the pan, and you’ll end up with tough spots where the glaze didn’t penetrate.
- Use Real Maple Syrup: Sounds obvious, but pancake syrup won’t cut it here. The depth of pure maple is what balances the Dijon’s sharpness—I was skeptical until I tried the swap.
Health Benefits of This Recipe
Lean Protein Power
This dish delivers about 35g of protein per serving, making it excellent for muscle repair and satiety. Chicken breast is one of the leanest protein sources available, with only 3g of fat per 4 oz. I love how it keeps me full for hours without feeling heavy. 💪
Antioxidant Boost
The maple syrup contains manganese and zinc, important antioxidants that support immune function. These minerals work alongside the chicken’s natural selenium content to protect your cells from damage.
Heart-Healthy Fats
The olive oil and Dijon mustard provide heart-healthy monounsaturated fats. These help lower bad cholesterol while the apple cider vinegar may support healthy blood sugar levels after meals.
B Vitamin Rich
Chicken breast is packed with B6 and niacin, which help convert food into energy. These vitamins also support brain function and keep your nervous system running smoothly.
Low Sodium Option
By using kosher salt and controlling the amount, this recipe keeps sodium in check. With about 500mg per serving, it’s much lower than many restaurant versions. I always taste before adding extra salt. ✨
Minimal Added Sugar
While the glaze contains natural sugars from maple syrup, the total added sugar per serving is only about 12g. This is far less than most store-bought sauces or desserts.
Nutrition Facts
Frequently Asked Questions
Can I use chicken thighs instead of breasts?
Yes! Boneless, skinless thighs work well and stay even juicier. Reduce cooking time to 4-5 minutes per side since they cook faster. The glaze pairs perfectly with the richer flavor.
How do I prevent the glaze from burning?
Keep heat at medium when reducing the sauce, stirring frequently. If it thickens too fast, add 1-2 tbsp water and lower heat. The vinegar helps balance sweetness and prevent scorching.
What’s the best way to reheat leftovers?
Warm in a skillet over low heat with a splash of water to loosen the glaze. Cover for 3-4 minutes, flipping once. Microwaving works too—use 50% power in 30-second bursts.
Can I make the glaze ahead of time?
Prepare and store in an airtight container for up to 5 days. Reheat gently before using, adding a splash of water if it’s too thick. Flavor deepens over time.

Trained in classic French technique but raised on slow-cooked ribs and spicy rubs, she blends culinary skill with smoke and soul.
- Recipe for Boneless Pork Chops in Cast Iron Skillet: Sear and Baste to Juicy Perfection - October 3, 2026
- Recipe for Boneless Cross Rib Roast: Slow-Roasted Beef with Herb Crust - October 3, 2026
- Hamburgers in Sauce Recipe Crock Pot: Slow-Cooked Savory Delight - October 3, 2026