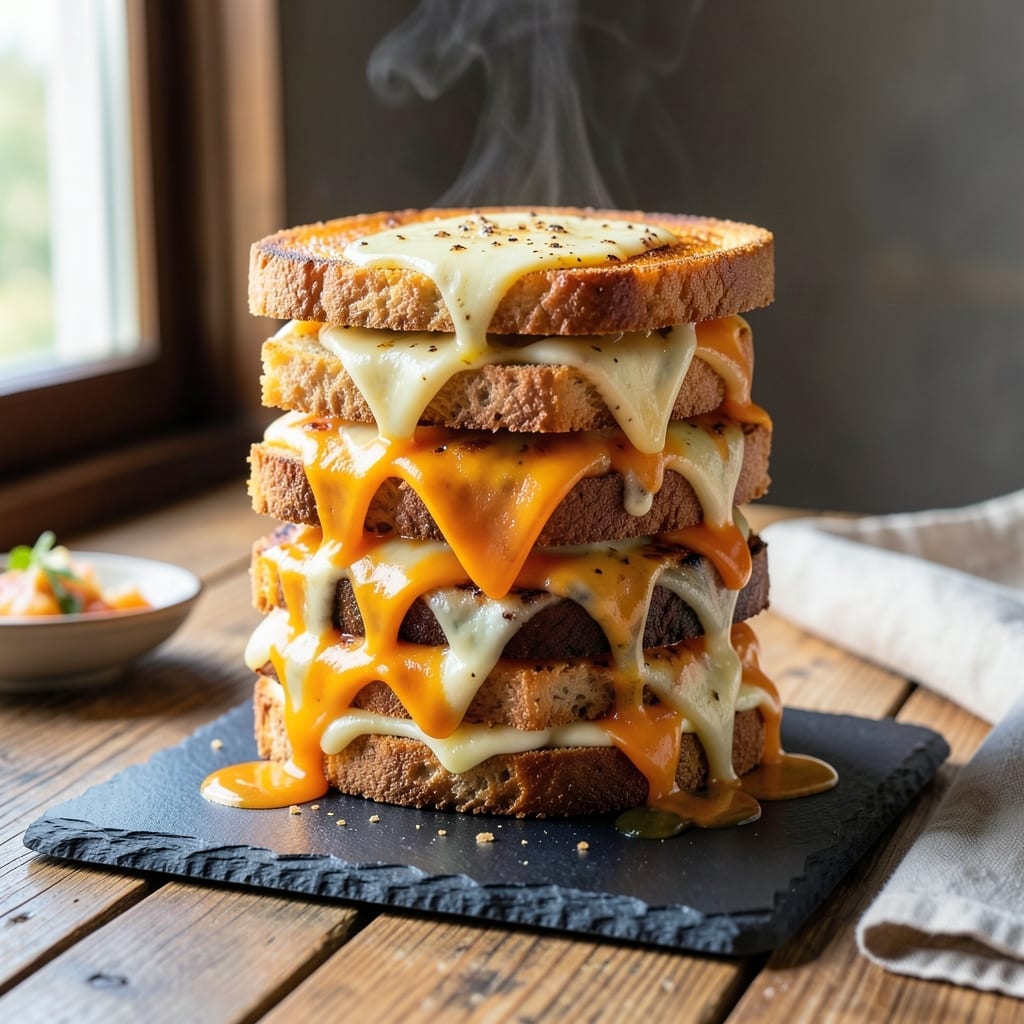
The secret to a crispy grilled cheese lies in the perfect balance of heat, bread, and cheese. I’ve tested countless combinations to achieve that ideal golden crust and gooey center.
Using medium-low heat and buttering the bread just before it hits the pan ensures even browning without burning. The right cheese blend makes all the difference—think sharp cheddar for tang or Gruyère for depth.
This method delivers a sandwich with a shatteringly crispy exterior and a melty interior every time. No fancy tools required—just patience and attention to detail.
Pair it with tomato soup or enjoy it on its own for a satisfying meal that feels like a warm hug.
Ingredients for Crispy Grilled Cheese Sandwich
Thick bread, melty cheese, and a few pantry staples make this sandwich irresistible.
| Ingredient | Amount | Notes |
|---|---|---|
| Sourdough Bread 🍞 | 4 slices | Thick-cut for structure |
| Sharp Cheddar Cheese 🧀 | 4 oz | Freshly grated for melt |
| Gruyère Cheese 🧀 | 2 oz | Shredded for depth |
| Unsalted Butter 🧈 | 3 tbsp | Softened for even spread |
| Dijon Mustard 🟡 | 1 tsp | Optional for tangy kick |
| Mayonnaise 🥫 | 2 tbsp | For extra crisp exterior |
| Garlic Powder 🧄 | ¼ tsp | Sprinkled in butter |
| Black Pepper 🌶️ | ¼ tsp | Freshly ground preferred |
[recipe_ingredient_scaler]
The bread is everything here. Sourdough from a local bakery gives you that crispy crust without getting soggy. I grab mine from Whole Foods—their loaves are consistent. For the cheese, sharp cheddar melts beautifully and adds that tang the intro promises. Gruyère is pricier but worth it for special occasions (the depth of flavor is unreal).
No sourdough? Thick-cut white or rye works too—just avoid anything too spongy. Out of Gruyère? Swiss or Monterey Jack at equal amounts. The mayonnaise trick (spreading a thin layer on the outside) is the secret to ultra-crispy bread. Don’t have Dijon? Yellow mustard at half the amount gets you close, or skip it entirely.
Assemble right before cooking—cheese dries out if it sits. Leftovers? Reheat in a skillet (microwave ruins the crust). Best eaten fresh, but keeps 1-2 days wrapped tight. Freezing isn’t ideal (bread gets gummy).
Why You’ll Love This Recipe
- One Pan Magic: I can go from hungry to satisfied in 15 minutes with just a skillet and these five ingredients.
- Cheesy Perfection: Sharp cheddar and gruyère melt into this gooey, tangy dream with just a hint of Dijon’s kick.
- Lunch or Midnight Snack: Honestly, it’s my go-to for quick meals, late-night cravings, or even a fancy-looking appetizer cut into triangles.
- Budget-Friendly Luxury: Sourdough and two cheeses feel indulgent, but the whole thing costs less than a takeout sandwich.
Step-by-Step Instructions for Crispy Grilled Cheese
Here’s the method for achieving that perfect golden crust and gooey melted center every time.
Step 1: Prep the Bread and Cheese
Lay out the 4 slices Sourdough Bread and spread a thin layer of 2 tbsp Mayonnaise on one side of two slices. The mayo creates a barrier that prevents sogginess and promotes extra crispiness when cooked.
On the unbuttered side of these same two slices, spread 1 tsp Dijon Mustard if using. Then, sprinkle each with half of the 0.25 tsp Garlic Powder and 0.25 tsp Black Pepper. This adds just the right amount of zing.
Divide the 4 oz Sharp Cheddar Cheese and 2 oz Gruyère Cheese evenly between the mustard-side of the bread. The combination of these cheeses gives you both sharpness and a nutty depth.
Step 2: Butter and Assemble the Sandwiches
Take the remaining 2 slices Sourdough Bread and spread the remaining 1 tbsp Unsalted Butter on one side of each. Place these slices, buttered side out, on top of the cheese-topped slices to form two complete sandwiches.
Press down gently to help the sandwiches hold together. The butter on the outside will create that coveted crispy, golden-brown crust when it hits the pan.
Make sure the cheese is evenly distributed so every bite has that perfect melty texture. Uneven cheese means some bites will be all bread, and nobody wants that.
Step 3: Cook Low and Slow for Maximum Crisp
Heat a large skillet over medium-low heat. You want the pan hot enough to melt the butter but not so hot that it burns it. Add the sandwiches, buttered side down.
Cook for 4-5 minutes until the bread is golden brown and the cheese begins to melt. I like to peek underneath with a spatula to check the color. Don’t rush this—low and slow is the secret to even melting without burning.
Flip the sandwiches carefully and cook for another 3-4 minutes until the second side is equally golden brown and the cheese is fully melted. Press down lightly with your spatula to ensure even contact with the pan.
Step 4: Rest and Serve Immediately
Transfer the sandwiches to a cutting board and let them rest for 1-2 minutes. This short rest allows the cheese to set slightly so it doesn’t all ooze out when you cut into them.
Slice each sandwich diagonally if you like that classic diner look. The crust should be crispy enough to hear a slight crunch when you bite in, and the cheese should stretch beautifully with every pull.
Serve immediately while hot and crispy. These are best fresh off the pan, so don’t let them sit too long or the crust will soften.
Pro Tips For Making Crispy Grilled Cheese Sandwich
- Butter the Outside: Spread a thin, even layer of softened unsalted butter all the way to the edges of the sourdough—this guarantees maximum crunch and prevents dry spots.
- Grate the Cheese: I learned this the hard way: shredding the sharp cheddar and Gruyère yourself melts faster and more evenly than pre-shredded, which has anti-caking agents that make the sandwich greasy.
- Low and Slow: Cook on medium-low heat for 3-4 minutes per side—high heat burns the butter before the cheese fully melts inside.
- Mustard Inside: A thin smear of Dijon on the inner slices adds depth without overpowering, and it actually helps the cheese stick together better.
Make-Ahead Tips for This Dish
Prep Ahead Cheese
You can grate and mix your sharp cheddar and Gruyère up to 2 days ahead—store it in an airtight container in the fridge. This saves time and ensures even melting. I often prep cheese blends for the week after my farmers market trips. 💡
Bread Prep
For best results, keep your sourdough at room temperature. If you must prep ahead, lightly toast the bread slices 1 day before and store in a paper bag. This prevents sogginess while maintaining structure.
Butter Mixture
Mix your unsalted butter with garlic powder and black pepper up to 3 days ahead. Store in the fridge and soften at room temperature for 30 minutes before using. This infused butter adds depth to every bite.
Assemble Just Before Cooking
While you can prep components ahead, assemble the sandwiches right before cooking. The bread will absorb moisture from the cheese if left sitting, ruining that crispy texture we all love. Trust me on this one.
Freezing Option
For longer storage, assemble uncooked sandwiches without butter, wrap tightly in plastic wrap and aluminum foil, then freeze for up to 1 month. Cook from frozen in a skillet over low heat with a lid. 🔥
Nutrition Facts
Frequently Asked Questions
Why use mayonnaise on the outside?
Mayonnaise creates a better crust than butter alone. It browns beautifully and prevents sogginess. The fat content ensures even crispiness without burning at medium-low heat.
Can I use pre-sliced cheese?
Pre-sliced works in a pinch, but freshly grated melts better. It lacks the anti-caking agents found in packaged slices, giving you that perfect gooey stretch. Sharp cheddar and Gruyère are ideal.
How do I prevent burning?
Cook on medium-low heat and flip only once. Use a heavy skillet for even heat distribution. Patience is key—4-5 minutes per side ensures golden brown without charring.
What if my sandwich isn’t crispy?
Press the sandwich lightly with a spatula while cooking. Ensure your pan is properly preheated. For extra crunch, add a thin layer of mayonnaise to the outer bread before cooking.

Trained in classic French technique but raised on slow-cooked ribs and spicy rubs, she blends culinary skill with smoke and soul.
- Recipe for Boneless Pork Chops in Cast Iron Skillet: Sear and Baste to Juicy Perfection - October 3, 2026
- Recipe for Boneless Cross Rib Roast: Slow-Roasted Beef with Herb Crust - October 3, 2026
- Hamburgers in Sauce Recipe Crock Pot: Slow-Cooked Savory Delight - October 3, 2026