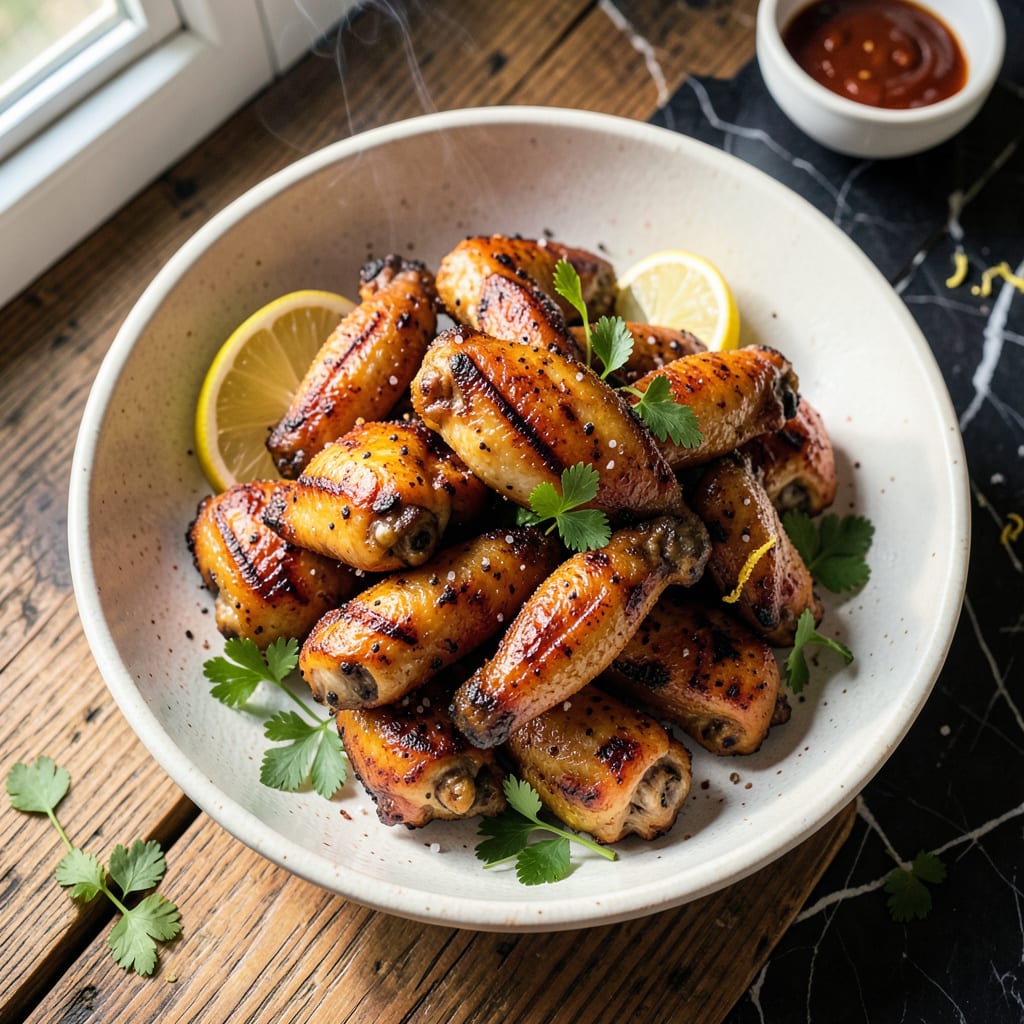
Mastering crispy grilled chicken wings requires precision and patience. The secret lies in drying the skin thoroughly before grilling over indirect heat.
This method ensures a smoky char and juicy interior. I developed this technique after years of perfecting my grill skills at local competitions.
Ingredients for Crispy Grilled Chicken Wings
Precision starts with quality ingredients for these smoky, herb-infused wings ready for the grill.
| Ingredient | Amount | Notes |
|---|---|---|
| Chicken Wings 🍗 | 4 lb | Split into drumettes and flats, patted dry |
| Kosher Salt 🧂 | 2 tbsp | Diamond Crystal preferred for texture |
| Freshly Ground Black Pepper 🌶️ | 1 tsp | Coarse grind for best results |
| Garlic Powder 🧄 | 1 tbsp | Not garlic salt, for seasoning |
| Onion Powder 🧅 | 1 tbsp | Balances savory depth of flavor |
| Smoked Paprika 🌶️ | 1 tsp | Adds authentic smoky char |
| Dried Oregano 🍃 | 1 tsp | Mediterranean variety preferred |
| Dried Thyme 🌿 | 1 tsp | Complements herb-infused juiciness |
| Olive Oil 🫒 | 2 tbsp | For coating wings before grilling |
| Lemon Juice 🍋 | 1 tbsp | Freshly squeezed for brightness |
| Hot Sauce 🔥 | 2 tbsp | Optional, for serving or marinade |
| Fresh Parsley 🌿 | ¼ cup | Chopped, for garnish after grilling |
[recipeingredientscaler]
The chicken wings are the foundation—look for fresh, plump pieces at your butcher or Costco for bulk savings. Split them yourself for even cooking, or buy pre-cut for convenience. Drying the skin is non-negotiable; pat them meticulously with paper towels to ensure crispiness. Kosher salt, particularly Diamond Crystal, adheres better and enhances texture without over-salting.
No smoked paprika? Regular paprika plus a pinch of liquid smoke works in a bind. Fresh herbs can replace dried at a 1:3 ratio (fresh to dried). For extra kick, swap garlic powder for fresh minced garlic—just double the amount. Hot sauce is flexible: Frank’s RedHot is classic, but any vinegar-based sauce adds tang without overpowering the smoky char.
Marinate wings overnight for maximum flavor penetration. Store raw wings in the fridge for up to 2 days before cooking. Leftovers keep 3-4 days refrigerated—reheat in the oven to maintain crispiness. Freeze cooked wings for up to 3 months in airtight containers.
Why You’ll Love This Recipe
- 5-Minute Prep: I just toss the wings with salt, pepper, garlic and onion powder—no marinating, no fuss.
- That Crispy Char: The grill turns the spices into this smoky, caramelized crust I can’t stop sneaking bites of.
- Backyard Star: Honestly, these disappear faster than chips at a cookout—everyone’s hand is in the bowl.
- Leftovers? Still Good: Cold from the fridge the next day, they’re my secret lunch I hide from the kids.
Step-by-Step Instructions for Crispy Grilled Chicken Wings
Master the technique that delivers perfectly charred, herb-infused wings with maximum crispness.
Step 1: Season the Chicken Wings Thoroughly
Pat the 4 lb chicken wings completely dry with paper towels—this is non-negotiable for achieving crispy skin. In a large bowl, combine the 2 tbsp kosher salt, 1 tsp freshly ground black pepper, 1 tbsp garlic powder, 1 tbsp onion powder, 1 tsp smoked paprika, 1 tsp dried oregano, and 1 tsp dried thyme.
Add the wings to the bowl and toss until every piece is evenly coated with the seasoning blend. The spices should cling to the skin, creating a visible, aromatic layer. This step ensures every bite is packed with smoky, herb-infused flavor.
Step 2: Marinate for Maximum Flavor Penetration
Drizzle the 2 tbsp olive oil and 1 tbsp lemon juice over the seasoned wings. Toss again to distribute the liquid evenly, ensuring each wing glistens with a light coating. The oil helps the seasoning adhere, while the lemon juice tenderizes the meat slightly and adds brightness.
Let the wings marinate at room temperature for 20-30 minutes. This allows the salt to begin breaking down the proteins, resulting in juicier meat. Don’t skip this step—it’s the difference between good wings and extraordinary ones.
Step 3: Grill Over Indirect Heat for Even Cooking
Preheat your grill to medium-high heat (around 400°F). Set up for indirect grilling by turning off one burner or banking coals to one side. This creates a hot zone for crisping and a cooler zone to finish cooking without burning.
Arrange the wings on the grill grates over the cooler side, skin-side down. Close the lid and cook for 20 minutes. Resist the urge to flip or move them—this allows the skin to render fat and begin crisping. You’ll see the edges start to turn golden brown when they’re ready for the next step.
Step 4: Crisp the Skin Over Direct Heat
Move the wings to the hot side of the grill, turning them occasionally to ensure even charring. Cook for 8-10 minutes, watching closely as they can go from perfectly crispy to burnt quickly. The skin should be deep golden brown and slightly blistered in spots, with a noticeable smoky aroma.
If flare-ups occur, move the wings back to the indirect heat briefly. The goal is consistent char without incinerating the seasoning. Use tongs to flip them—never a fork, which pierces the skin and lets precious juices escape.
Step 5: Rest, Garnish, and Serve Immediately
Transfer the wings to a clean platter and let them rest for 5 minutes. This allows the juices to redistribute, ensuring every bite is moist. While still hot, drizzle with the 2 tbsp hot sauce if using, and sprinkle with the 0.25 cup fresh parsley for a pop of color and freshness.
Serve immediately while the skin is at its crispest. The contrast of the smoky, charred exterior and the herb-infused juiciness inside is what makes these wings unforgettable. Any leftovers (unlikely) can be reheated in a 400°F oven for 5-7 minutes to revive the crispness.
Pro Tips For Making Crispy Grilled Chicken Wings
- Dry the Wings: Pat the wings completely dry with paper towels before seasoning—this guarantees crispy skin instead of steamed, soggy results. I learned this the hard way after too many limp wings.
- High Heat First: Start grilling over direct high heat for 3-4 minutes per side to render fat and set the skin, then move to indirect heat to finish cooking through.
- Skip the Overcrowding: Leave space between wings on the grill; crowding drops the temperature and steams them instead of crisping. Sounds obvious but I still catch myself trying to fit just one more.
- Double Season: Toss the wings with another light sprinkle of salt and spices right after they come off the grill while they’re still hot and oily—it sticks better and layers the flavor.
Storing and Reheating Leftovers
Refrigerator Storage
Let your wings cool completely before storing—this prevents condensation from making the skin soggy. I use glass containers with tight lids to keep them fresh for up to 4 days in the fridge. The flavors actually deepen overnight as the herbs meld together. ❄️
Freezer Storage
For longer storage, freeze cooked wings in a single layer on a baking sheet first, then transfer to quart-sized freezer bags. This prevents them from sticking together. They’ll stay good for up to 3 months—perfect for meal prep or last-minute gatherings.
Oven Reheating
Preheat your oven to 400°F and spread wings on a wire rack over a baking sheet. This setup allows air circulation on all sides. Reheat for 8-10 minutes until the skin crisps back up and internal temp hits 165°F. I always check with my ThermoWorks thermometer for precision.
Air Fryer Method
For a quicker option, arrange wings in a single layer in your air fryer. Cook at 375°F for 5-6 minutes, shaking halfway through. The results are nearly as good as fresh off the grill. 🔥
Serving Leftovers
If the wings lose some crispness, a quick toss in a dry skillet over medium-high heat for 2-3 minutes per side works wonders. Finish with a fresh sprinkle of chopped parsley to revive the aroma and color.
Nutrition Facts

Trained in classic French technique but raised on slow-cooked ribs and spicy rubs, she blends culinary skill with smoke and soul.
- Recipe for Boneless Pork Chops in Cast Iron Skillet: Sear and Baste to Juicy Perfection - October 3, 2026
- Recipe for Boneless Cross Rib Roast: Slow-Roasted Beef with Herb Crust - October 3, 2026
- Hamburgers in Sauce Recipe Crock Pot: Slow-Cooked Savory Delight - October 3, 2026