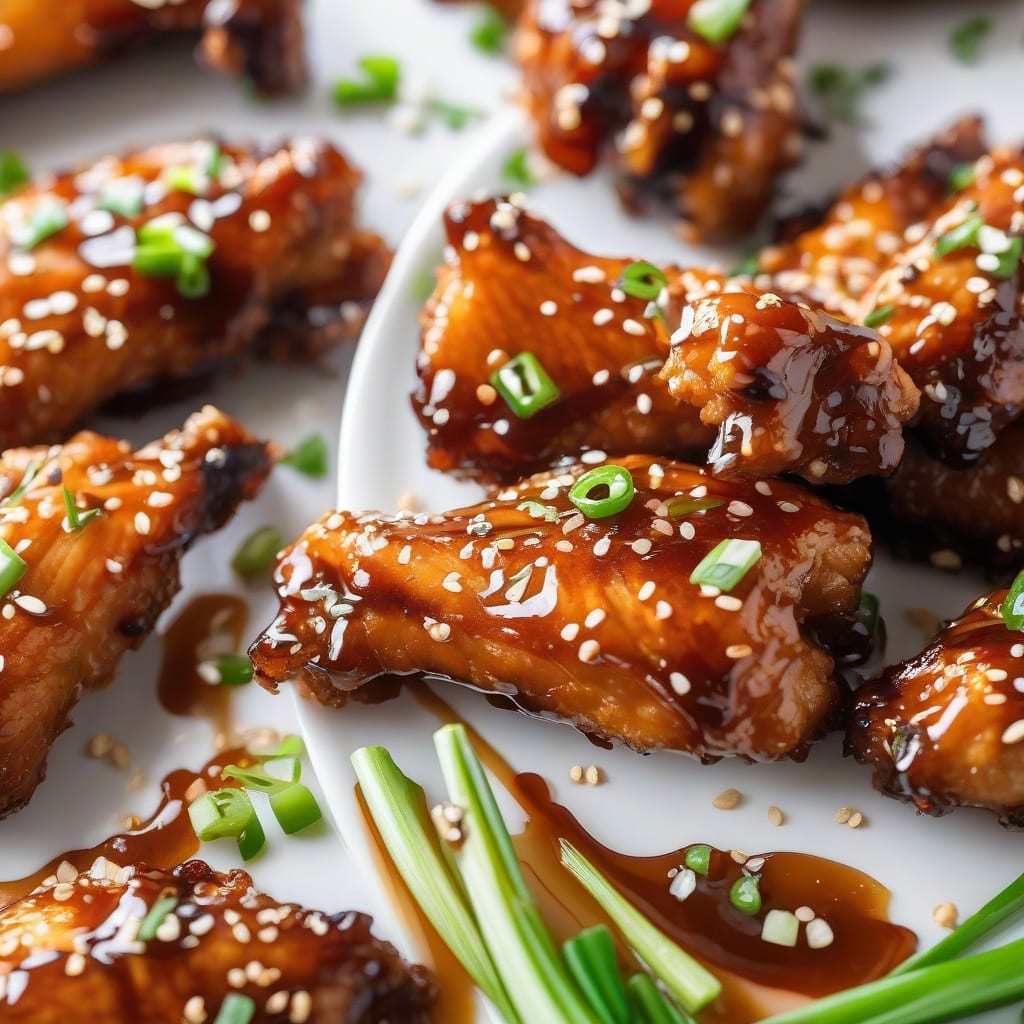
These wings deliver the perfect balance of crispy skin and sticky-sweet glaze that’ll have everyone reaching for seconds. I’ve tested this recipe dozens of times to nail that restaurant-quality crunch at home.
The secret is a two-step cooking process: baking first to render the fat, then broiling to achieve that golden, crispy exterior. The honey garlic sauce goes on at the very end, so it caramelizes without burning.
You’ll end up with wings that are shatteringly crisp outside, juicy inside, and coated in a glossy glaze that’s sweet, savory, and just slightly sticky. Let’s get started!
Ingredients for crispy honey garlic chicken wings
Here’s everything you need to create these crispy, sticky honey garlic chicken wings at home.
| Ingredient | Amount | Notes |
|---|---|---|
| Chicken Wings 🍗 | 3 lb | Split into flats and drumettes |
| Baking Powder 🥄 | 2 tbsp | Aluminum-free for crispy skin |
| Salt 🧂 | 1 tsp | Kosher or sea salt |
| Black Pepper 🌶️ | ½ tsp | Freshly ground preferred |
| Garlic Cloves 🧄 | 6 cloves | Minced for sauce |
| Honey 🍯 | ½ cup | Pure honey, not imitation |
| Soy Sauce 🥢 | 3 tbsp | Low-sodium works well |
| Rice Vinegar 💧 | 2 tbsp | Adds tangy balance |
| Butter 🧈 | 2 tbsp | Unsalted for sauce richness |
| Sesame Oil 🫒 | 1 tsp | Toasted for deeper flavor |
| Red Pepper Flakes 🌶️ | ½ tsp | Optional for heat |
| Cornstarch 🌾 | 1 tsp | For thickening sauce |
| Green Onions 🧅 | 2 whole | Sliced for garnish |
| Sesame Seeds 🌰 | 1 tbsp | White or black variety |
[recipe_ingredient_scaler]
You can find chicken wings at any grocery store, though Costco and Sam's Club offer the best prices when buying in bulk. I recommend Argo or Clabber Girl baking powder—make sure it's aluminum-free to avoid any metallic taste. For honey, local varieties from farmers markets have wonderful flavor, but any pure honey works beautifully. Look for wings that are similar in size for even cooking, and check that they're not previously frozen if possible. Kikkoman soy sauce is my go-to brand for consistent quality, and you'll find rice vinegar in the Asian foods aisle at most supermarkets.
Don't have rice vinegar? Apple cider vinegar or white wine vinegar work as substitutes with similar tang. If you can't find baking powder, you can skip it, though your wings won't be quite as crispy—just pat them very dry before baking. Maple syrup or agave can replace honey for a different sweetness profile. For a gluten-free version, use tamari instead of soy sauce. If you want extra crispy wings, let them sit uncovered in the fridge for a few hours before cooking to dry out the skin even more.
Store raw chicken wings in the coldest part of your fridge and use within 2 days of purchase. Cooked wings keep refrigerated for up to 3 days in an airtight container—reheat in a 400°F oven for 10 minutes to restore crispiness. You can freeze uncooked seasoned wings for up to 3 months.
Step-by-Step Instructions for Crispy Honey Garlic Chicken Wings
Let me walk you through my proven method for achieving perfectly crispy wings with an irresistible glaze.
Step 1: Prep and Dry the Chicken Wings
Start by patting the 3 lb chicken wings completely dry with paper towels. I can’t stress this enough—moisture is the enemy of crispy skin, so take your time with this step. Make sure the wings are split into flats and drumettes, and remove any excess skin or feather bits.
In a large bowl, toss the dried wings with the 2 tbsp baking powder, 1 tsp salt, and 0.5 tsp black pepper. The baking powder is your secret weapon here—it raises the pH of the skin, allowing it to brown and crisp beautifully in the oven. Make sure every wing is evenly coated. Arrange them in a single layer on a wire rack set over a baking sheet, leaving space between each wing for air circulation.
Step 2: Bake Until Golden and Crispy
Preheat your oven to 425°F. Once it reaches temperature, bake the wings for 45-50 minutes, flipping them halfway through at the 25-minute mark. You’ll know they’re ready when the skin is deep golden brown and visibly crispy, and the internal temperature reaches 165°F.
Don’t skip the flip—it ensures even browning on both sides. The wings should look almost lacquered and make a slight crackling sound when you move them. If they’re not quite crispy enough after 50 minutes, give them an extra 5 minutes under the broiler, watching carefully to prevent burning.
Step 3: Make the Honey Garlic Sauce
While the wings finish baking, prepare your sauce. In a small saucepan over medium heat, melt the 2 tbsp butter. Add the 6 cloves garlic cloves (minced) and cook for 1-2 minutes until fragrant but not browned. You want that beautiful garlic aroma without any bitterness.
Stir in the 0.5 cup honey, 3 tbsp soy sauce, 2 tbsp rice vinegar, 1 tsp sesame oil, and 0.5 tsp red pepper flakes. Bring the mixture to a gentle simmer. In a small bowl, mix the 1 tsp cornstarch with 1 tablespoon water to create a slurry, then whisk it into the sauce. Simmer for 2-3 minutes until the sauce thickens enough to coat the back of a spoon. The sauce should be glossy and sticky.
Step 4: Toss and Garnish
Transfer the hot, crispy wings to a large mixing bowl. Pour the warm honey garlic sauce over them and toss gently but thoroughly until every wing is completely coated in that sticky, glossy glaze. Work quickly while everything is hot—the sauce will cling better to warm wings.
Plate the wings immediately and garnish with the 2 whole green onions (sliced) and 1 tbsp sesame seeds. Serve right away while the exterior is still crispy and the sauce is warm and sticky. These wings are best enjoyed fresh, with plenty of napkins nearby!
Side Dishes That Balance the Sweetness: A crisp Asian cucumber salad with rice vinegar and sesame oil cuts through the sticky glaze beautifully—the cool crunch provides perfect contrast to the hot, sweet wings. I toss 2 sliced cucumbers with 2 tbsp rice vinegar, 1 tsp sesame oil, and a pinch of salt. Pickled vegetables like daikon radish or carrots also work wonderfully, adding tangy brightness that cleanses your palate between bites. For something heartier, serve white rice or fried rice to soak up the extra honey garlic sauce. 🥗
Beer Pairings: Light, crisp lagers like Asahi or Sapporo are my go-to choices—their clean finish refreshes your palate without competing with the honey garlic flavors. Wheat beers with citrus notes also pair nicely, as the slight sweetness complements the honey while the carbonation cuts through the richness. For craft beer lovers, a Belgian-style witbier or Kölsch provides similar refreshment. Avoid hoppy IPAs—the bitterness clashes with the sweet glaze and can taste metallic. 🍺
Wine Options: An off-dry Riesling from Germany or Washington State matches the sweetness of the honey while providing acidity to balance the richness. I also love Gewürztraminer with its lychee and spice notes that echo the garlic and sesame flavors. For red wine drinkers, choose a chilled Beaujolais or light Pinot Noir—fruity and low-tannin so they don’t overpower the delicate glaze. The key is avoiding heavy, oaky wines that would dominate these wings. 🍷
Complementary Flavors and Textures: Add extra red pepper flakes at the table for guests who want more heat—about 1 tsp sprinkled on top adds a nice kick. Fresh cilantro leaves provide an herbaceous note that brightens the rich sauce. Some people love dipping these wings in sriracha mayo or ranch dressing for added creaminess, though I think the honey garlic sauce is perfect on its own. A squeeze of fresh lime juice right before serving adds a citrus pop that elevates everything. ✨
Nutrition Facts
485kcal
[recipe_ingredient_scaler]

Trained in classic French technique but raised on slow-cooked ribs and spicy rubs, she blends culinary skill with smoke and soul.
- Recipe for Boneless Pork Chops in Cast Iron Skillet: Sear and Baste to Juicy Perfection - October 3, 2026
- Recipe for Boneless Cross Rib Roast: Slow-Roasted Beef with Herb Crust - October 3, 2026
- Hamburgers in Sauce Recipe Crock Pot: Slow-Cooked Savory Delight - October 3, 2026