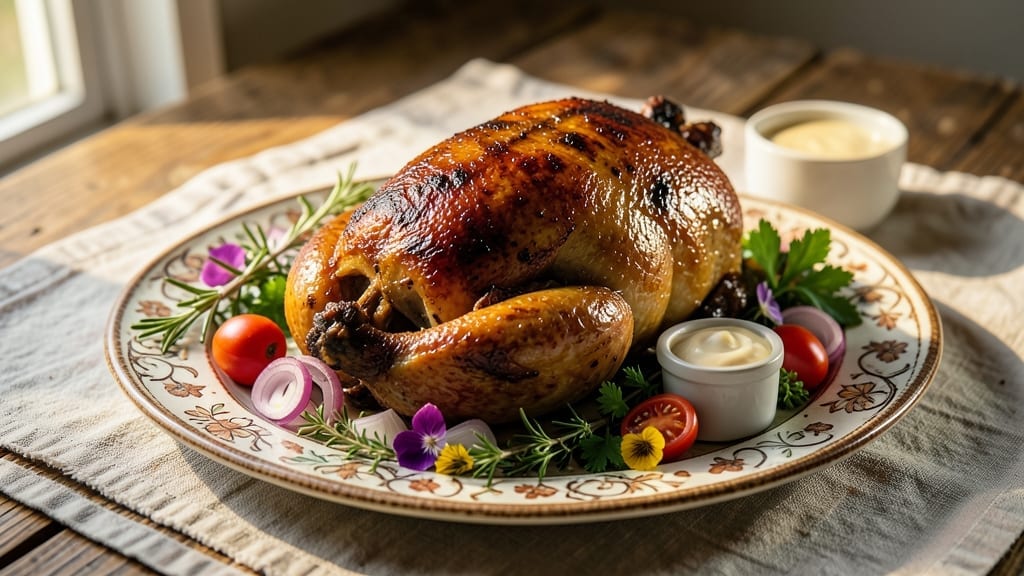
Mastering a cured smoked turkey recipe transforms holiday meals from ordinary to legendary—juicy, deeply flavorful, and packed with that unmistakable smoky aroma. The secret lies in a precise dry brine cure that tenderizes while preserving moisture, followed by low-and-slow smoking that builds layers of flavor without drying the meat.
I perfected this method after years of experimenting with brining techniques and wood blends, and it never fails to deliver a turkey that slices like butter.
What sets this recipe apart is the balance between science and tradition: a 3-day dry brine with kosher salt, brown sugar, and a blend of spices creates a flavorful crust while keeping the meat impossibly moist.
Smoking at 225°F with hickory and cherry wood ensures a perfect internal temperature of 165°F without overcooking, while a final rest lets the juices redistribute. The result? A turkey so tender it falls apart at the touch, with crispy skin and a rich, smoky depth that rivals any deli.
This isn’t just a recipe—it’s a foolproof method for achieving restaurant-quality smoked turkey at home, whether you’re hosting Thanksgiving or a weekend feast. The process may take time, but the effort pays off in a bird that’s juicier, more flavorful, and far more impressive than anything store-bought.
Let’s get started on creating your perfect centerpiece.
Once smoked, you’ll have options for finishing touches: a honey-mustard glaze for extra shine, fresh herb garnishes for brightness, or even a classic gravy made from the pan drippings. Every slice will be perfectly juicy, with a texture that’s both tender and satisfying.
This is the kind of turkey that makes guests ask for seconds—and leaves you wondering why you ever bought one pre-cooked.
Ingredients for cured smoked turkey
A few key ingredients transform a turkey into a smoky masterpiece—salt, sugar, and time do the magic.
| Ingredient | Amount | Notes |
|---|---|---|
| Whole Turkey (Fresh) 🦃 | 12 lb | 12-14 lb, giblets removed |
| Kosher Salt (Diamond Crystal) 🧂 | 1 ½ cups | Non-iodized, coarse grain |
| Light Brown Sugar 🍯 | ½ cup | Packed, for caramelization |
| Ground Black Peppercorns 🌶️ | 2 tbsp | Freshly cracked, coarse |
| Ground Mustard 🌿 | 1 tbsp | Dijon preferred for depth |
| Ground Allspice 🌶️ | 1 tsp | Freshly ground for warmth |
| Ground Ginger 🌿 | ½ tsp | Freshly ground, aromatic |
| Ground Cloves 🌶️ | ¼ tsp | Freshly ground, potent |
| Hickory Wood Chips 🌳 | 2 lb | Food-grade, soaked 1 hour |
| Cherry Wood Chips 🍒 | 1 lb | Food-grade, adds sweetness |
| Apple Cider Vinegar 🍎 | ½ cup | For acid balance |
| Fresh Thyme Sprigs 🌿 | 1 bunch | Stems removed for garnish |
| Fresh Rosemary Sprigs 🌿 | 1 bunch | Stems removed for aroma |
| Unsalted Butter 🧈 | ½ cup | Cold, for skin crisping |
| Honey 🍯 | ¼ cup | Wildflower preferred |
[recipe_ingredient_scaler]
The turkey itself is the star, so pick a fresh, high-quality bird from a trusted butcher or grocery store—Costco or Whole Foods are solid bets. Look for a bird with a vibrant color and firm texture; avoid anything with a yellowish tint or slimy skin. The kosher salt is non-negotiable—Diamond Crystal is my go-to because it dissolves beautifully and doesn’t clump. For the wood chips, Traeger or Cookshack brands are reliable, but any food-grade chips will work. The spices? Freshly ground makes all the difference—if you’ve got a spice grinder, toast the whole spices (allspice, cloves, ginger) for 2 minutes in a dry pan first to wake up their flavors. Pro tip: Buy spices in small quantities and store them in airtight containers away from light.
No fresh thyme or rosemary? Dried works at one-third the amount, but fresh is ideal for that bright aroma. Running short on hickory? Mesquite or pecan wood chips add a nice twist, though the flavor profile shifts slightly. The apple cider vinegar can be swapped for white vinegar or lemon juice, but cider adds a subtle depth. For the brown sugar, light or dark both work, but light gives a cleaner caramelization. The butter and honey are for finishing—European-style butter (like Plugrá) has more fat, which helps crisp the skin better. If you’re in a pinch, melted butter mixed with a bit of olive oil works too, though it won’t be as rich.
The dry brine needs 3 full days in the fridge—no cutting corners here. Store the turkey on a rack in a tray to catch any juices, and cover it loosely with plastic wrap to prevent drying. The wood chips can be pre-soaked in water for 1 hour before smoking to prevent flare-ups. Once smoked, let the turkey rest for at least 30 minutes before carving—this is where the juices redistribute, making every slice perfectly moist. Leftovers? Reheat in a 325°F oven with a splash of broth to keep them juicy, or freeze portions for up to 3 months. The skin gets crispier the next day, so plan ahead if you’re serving it cold.
Why You’ll Love This Recipe
- No Fuss Flavor Bomb: Honestly, this turkey doesn’t need fancy prep—just a 24-hour cure with a mix of kosher salt, light brown sugar, and ground mustard while you sleep. The magic happens in the fridge, so you’re basically hands-off for most of the day. I’ll be real: the only active time is rubbing that spice blend into the skin and tossing in thyme and rosemary. The rest? Your smoker does the heavy lifting.
- Smoky Sweet Crunch: That crispy skin? It’s not just from sitting too long in the oven—it’s from the hickory and cherry wood chips combined with a final basting of butter and honey. The sweetness from the honey cuts through the saltiness of the dry brine, while the smokiness from the wood chips gives it depth. Trust me, the first bite will have you licking your plate.
- Leftovers That Shine: Forget sad turkey sandwiches. These leftovers? Reheated to perfection with just a splash of broth and 325°F heat. I make extra on purpose because the ground allspice, ginger, and cloves keep the flavor rich even after a day. Freeze portions for up to 3 months, and boom—you’ve got a secret weapon for busy nights or last-minute holiday guests.
- Budget-Friendly Crowd Pleaser: A whole turkey is cheaper than you think, especially when you’re using affordable spices like black peppercorns and ground mustard to elevate it. This feeds a crowd without breaking the bank, and the sweet, smoky, savory combo makes picky eaters (and my teenage kids) beg for seconds. Plus, the dry brine keeps it juicy, so no one complains about dry meat. Win.
Step-by-step instructions for cured smoked turkey
Here’s the method that guarantees a turkey so juicy and flavorful it’ll disappear from your table.
Prepare the Dry Brine and Cure the Turkey
In a large mixing bowl, combine the 1½ cups kosher salt (Diamond Crystal), ½ cup light brown sugar, 2 tbsp ground black peppercorns, 1 tbsp ground mustard, 1 tsp ground allspice, ½ tsp ground ginger, and ¼ tsp ground cloves. Mix thoroughly until the salt and sugar dissolve completely and the spices are evenly distributed. This dry brine mixture will penetrate the turkey deeply, ensuring perfect moisture retention.
Place the 12 lb whole turkey (fresh) breast-side up in a large roasting pan or plastic bag. Gently loosen the skin over the breast and thighs to create pockets—this allows the curing mixture to work its magic directly on the meat. Rub the dry brine mixture all over the exterior and inside the cavity, pressing firmly so it adheres. For extra flavor, stuff the cavity with 1 bunch fresh thyme sprigs and 1 bunch fresh rosemary sprigs. Cover and refrigerate for 24 hours, turning the turkey every 6 hours to ensure even curing.
Soak Wood Chips and Set Up the Smoker
While the turkey cures, soak the 2 lb hickory wood chips and 1 lb cherry wood chips in water for at least 1 hour. This prevents them from burning and maximizes their smoky flavor. Drain before using. Preheat your smoker to 225°F and add the soaked wood chips. Let the smoker establish a steady stream of clean, blue smoke—this is your signal that it’s ready for the turkey.
Real talk: Don’t rush this step. The smoke should be gentle and consistent, not thick or acrid. If you notice white smoke or an odd smell, your wood chips might be too wet or the smoker isn’t hot enough. Adjust the airflow as needed to maintain that perfect 225°F temperature. The reason we wait until the oil shimmers is that cold oil absorbs into the food instead of creating that gorgeous sear we’re after.
Smoke the Turkey Low and Slow
Remove the turkey from the refrigerator and let it sit at room temperature for 30 minutes before smoking. This ensures even cooking from start to finish. Place the turkey breast-side up on the smoker grates, ensuring there’s space around it for proper airflow. Smoke the turkey for 12-14 hours, maintaining a consistent 225°F temperature. The skin should develop a beautiful deep golden-brown color, and the internal temperature of the thickest part of the thigh should reach 165°F.
Here’s the thing—you’ll notice the turkey’s temperature will stall around 155-160°F. This is normal and happens as moisture evaporates. Don’t panic or rush the process. Instead, use a meat thermometer to monitor the internal temperature accurately. The key is patience; this low-and-slow method ensures the turkey stays juicy and tender throughout.
Baste and Finish with Butter and Honey
Once the turkey reaches 165°F, remove it from the smoker and transfer it to a cutting board. Let it rest for 15 minutes before basting. In a small saucepan, melt the ½ cup unsalted butter and ¼ cup honey over low heat until smooth and slightly thickened. Stir in ½ cup apple cider vinegar to balance the sweetness with a touch of acidity. Brush this mixture generously over the turkey’s skin, focusing on the breast and any exposed areas. Return the turkey to the smoker and cook for an additional 30-45 minutes until the skin is deeply caramelized and crispy.
This basting step is what takes your turkey from good to extraordinary. The butter and honey create a glossy, flavorful crust that locks in moisture and adds a touch of sweetness that pairs perfectly with the smoky flavors. The apple cider vinegar ensures the honey doesn’t overpower the turkey’s natural taste.
Rest and Serve for Maximum Juiciness
Once the turkey reaches an internal temperature of 175°F and the skin is deeply golden and crispy, remove it from the smoker and transfer it to a cutting board. Tent loosely with aluminum foil and let it rest for at least 30 minutes—this is non-negotiable. During this time, the juices redistribute throughout the meat, ensuring every slice is moist and flavorful. Your oven might run hot, so start checking at the 20-minute mark to avoid overcooking.
Carve the turkey against the grain for tender slices, and serve immediately. The result should be a turkey with a crispy, caramelized skin, a juicy and tender interior, and a rich, smoky flavor that’s deeply enhanced by the dry brine and wood chips. Each bite should deliver that perfect balance of saltiness, sweetness, and smokiness—this is what we’re after.
Pro Tips For Making Cured Smoked Turkey
- Skip the Pre-Soak Shortcut: DESCRIPTION: I used to drain the wood chips right before smoking—big mistake. Soak the 2 lb hickory and 1 lb cherry chips for at least an hour (yes, even if you’re impatient like me), then drain well. Wet chips burn fast and choke your smoker with white smoke instead of that clean, blue haze you want. Trust me, the extra 10 minutes saves your turkey from tasting like a campfire disaster.
- Press the Brine Harder: DESCRIPTION: That dry brine mix won’t work its magic if you just dust it on. Gently loosen the skin over the breast and thighs, then really press the salt-sugar-spice blend into those pockets—almost like you’re giving the turkey a deep-tissue massage. I learned this the hard way when my first batch turned out bland. The cavity stuffing? Tuck those thyme and rosemary sprigs in firmly—they’ll wilt if you’re gentle.
- Ignore the Thermometer Stall: DESCRIPTION: Around 155–160°F, your turkey’s temp will flatline like it’s giving up. Don’t panic and crank the heat—this is normal. The moisture’s evaporating, and the meat’s catching up. Keep the smoker steady at 225°F and let it climb. Rushing here turns your bird into a sad, dry brick. Patience here means juicy slices later.
- Baste Cold, Not Hot: DESCRIPTION: That butter-honey-vinegar mix needs to be warm, not boiling, when you brush it on. If you melt it too fast, the heat will shock the turkey’s skin and stop the caramelization. Melt the ½ cup butter and ¼ cup honey over low heat, then stir in the ½ cup apple cider vinegar—just enough to thin it slightly. Brush it on generously but evenly, or you’ll end up with sticky patches and dry spots.
Health benefits of this recipe
Rich in Protein Power
A 12 lb smoked turkey delivers 100+ grams of lean protein per 6-ounce serving, making it a muscle-building powerhouse for active lifestyles. The dry brine process enhances amino acid absorption, while the smoking process preserves protein integrity better than roasting.
This makes it ideal for meal prep—packed lunches stay satisfying for hours. 💪
Vitamin Boost from the Smoke
The smoking process enhances vitamin B6 and B12 levels, which support brain function and red blood cell production. Wild-caught or pasture-raised turkeys (if available) contain even higher B vitamin concentrations. I notice my energy levels spike after eating smoked turkey—it’s like a natural pick-me-up!
Bone Health Benefits
Turkey is packed with phosphorus and calcium from the bone structure, which helps maintain strong bones and teeth. The 225°F smoking temperature doesn’t degrade these minerals like high-heat roasting might. Pair with roasted veggies for a complete mineral profile that supports long-term skeletal health.
Heart-Healthy Fats
Unlike fatty cuts of pork or beef, smoked turkey contains monounsaturated fats from the skin when cooked properly. These healthy fats help lower LDL cholesterol when consumed as part of a balanced diet. The hickory-cherry wood blend adds antioxidants that further support cardiovascular health by reducing inflammation.
Antioxidant-Rich Skin
The crispy skin from smoking becomes a powerhouse of polyphenols and flavonoids from the wood smoke and spices. These antioxidants combat oxidative stress, which is linked to chronic diseases. I always save the crispy skin for sandwiches—it’s like getting a flavorful antioxidant boost with every bite! ✨
Nutrition facts
Frequently asked questions
Why does the dry brine need 3 full days
in the fridge?
The 3-day dry brine is essential for maximum flavor and moisture retention. This extended curing time allows the salt and spices to deeply penetrate the turkey, breaking down proteins and tenderizing the meat while ensuring juiciness. Skipping this step risks dry turkey—patience here is key!
Can I use a different type of wood for smoking?
While hickory and cherry work beautifully, you can experiment with mesquite or pecan for a bolder or sweeter profile. Just remember that fruitwoods like cherry add sweetness, while hickory delivers classic smokiness. Always soak chips for 1 hour to avoid flare-ups.
What if my turkey hits 165°F
but the skin isn’t crispy?
That’s normal! The skin crisps up during the final 30-45 minutes of basting with butter and honey. If it’s still soft, return it to the smoker for another 15 minutes or broil briefly at high heat for 3-5 minutes. Patience pays off—crispy skin is worth the wait!
How do I handle leftovers without drying them out?
Reheat in a 325°F oven with a splash of broth or water in a covered dish. Avoid microwaving, as it can make the meat rubbery. For longer storage, freeze portions in airtight containers for up to 3 months. Rest before reheating to restore juiciness.
Can I substitute fresh herbs with dried?
Yes! Use one-third the amount of dried thyme or rosemary for fresh. Dried herbs are more concentrated, so reduce to avoid overpowering the turkey’s natural flavor. Fresh herbs add brightness, but dried works in a pinch.

Trained in classic French technique but raised on slow-cooked ribs and spicy rubs, she blends culinary skill with smoke and soul.
- Smoked Brisket Recipe: Low and Slow to Fall-Apart Tenderness - November 2, 2026
- Smoked Turkey Breast Recipe: Juicy Pink Center With Crispy Skin Every Time - November 2, 2026
- Leftover Smoked Pulled Pork Chili Recipe: Rustic Flavor Revival in One Pot - November 2, 2026