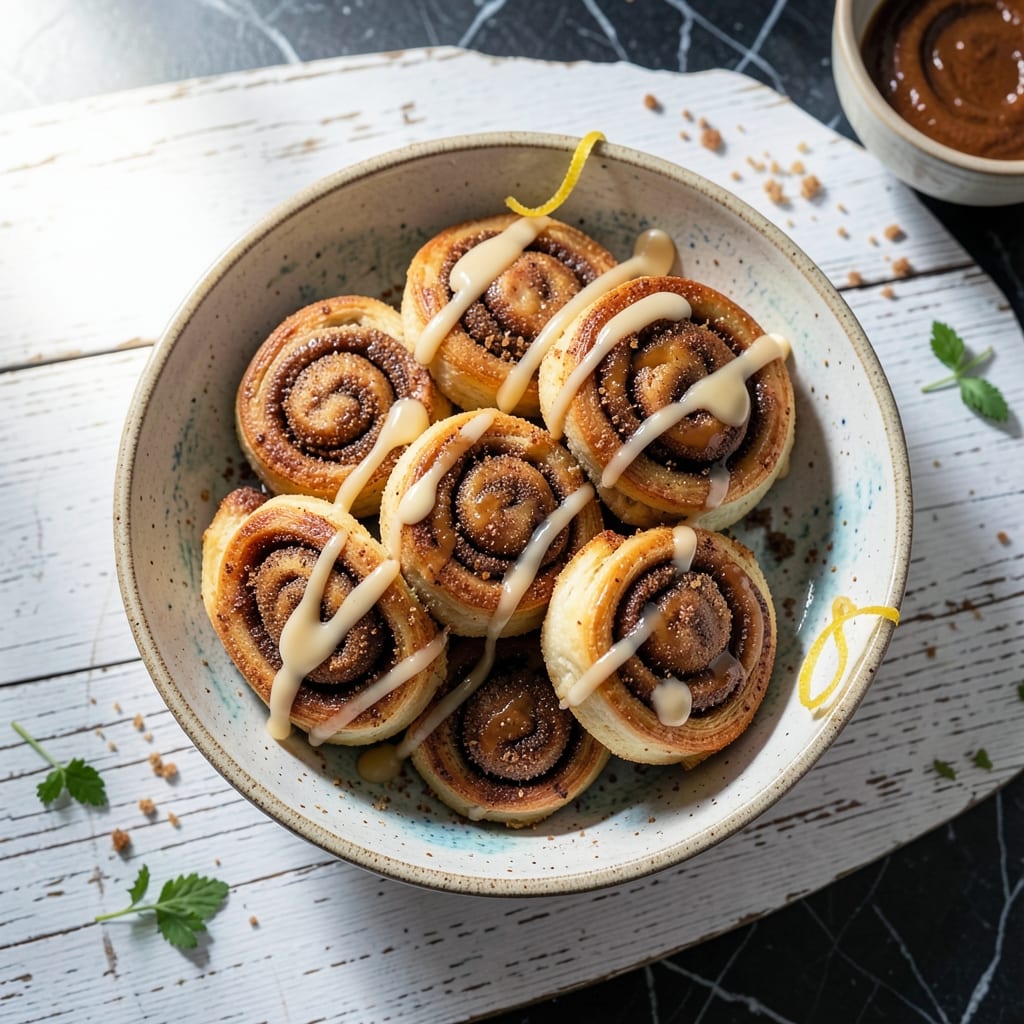
I tested this method in my tiny Boston kitchen, where counter space is a luxury and shortcuts are essential. This approach delivers all the gooey, cinnamon-sugar layers of traditional rolls without the fuss of shaping or proofing.
The secret lies in cutting store-bought dough into pieces before baking, creating more edges for caramelization. It transforms simple ingredients into a dish with restaurant-quality texture and flavor in under 30 minutes.
What emerges from the oven is a pan of golden, pull-apart rolls with perfectly crispy edges and soft, pillowy centers. The cinnamon sugar melts into every crevice, creating pockets of sweet, buttery goodness.
Serve warm for breakfast or brunch. Here’s how to make these irresistible rolls at home.
Ingredients for Cut Up Cinnamon Roll
Transform store-bought dough into restaurant-quality cinnamon rolls with these pantry staples and a few extras.
| Ingredient | Amount | Notes |
|---|---|---|
| Refrigerated Buttermilk Biscuit Dough 🍞 | 2 cans | 16.3 oz cans, uncooked |
| Granulated Sugar 🍚 | ¾ cup | Divided for filling and topping |
| Ground Cinnamon 🌿 | 2 tbsp | Freshly opened for potency |
| Unsalted Butter 🧈 | ½ cup | Melted, plus extra for greasing |
| Light Brown Sugar 🟤 | ½ cup | Packed, for caramelization |
| Vanilla Extract 💧 | 1 tsp | Pure extract preferred |
| Heavy Cream 🥛 | ¼ cup | Or whole milk for brushing |
| All-Purpose Flour 🌾 | 2 tbsp | For dusting work surface |
| Sea Salt 🧂 | ¼ tsp | Fine grain for balance |
| Powdered Sugar ❄️ | ½ cup | For optional glaze dusting |
| Milk 🥛 | 1 tbsp | For glaze consistency |
[recipe_ingredient_scaler]
The biscuit dough is non-negotiable—Pillsbury Grands or similar flaky layers work best. Avoid cheap generic brands (they skimp on butter). For the cinnamon, Penzeys or McCormick deliver consistent potency. Brown sugar should be soft and moist; if yours is hard, microwave with a damp paper towel for 10 seconds. Unsalted butter gives you control over the salt content, which matters for that perfect sweet-salty balance.
No buttermilk biscuits? Crescent roll dough works in a pinch (cut into squares). Out of brown sugar? White sugar plus 1 tbsp molasses per cup. Skip the vanilla? A pinch of ground nutmeg adds depth. For a richer glaze, swap powdered sugar for confectioners’ sugar—same thing, just finer. Heavy cream can be half-and-half or even evaporated milk if that’s what’s in the pantry.
Assembled rolls bake best immediately but can rest 30 minutes at room temperature. Store leftovers airtight for 2 days—reheat in microwave with a damp paper towel. Freeze unbaked cut pieces on a tray, then transfer to bags for up to 1 month.
Why You’ll Love This Recipe
- 5-Minute Setup: I just pop open the biscuit dough, roll it in melted butter and cinnamon sugar, and it’s ready for the oven—no mixing, no rising.
- Breakfast or Dessert: I’ve served these as a lazy Saturday morning treat and as a last-minute potluck contribution. Both times, zero leftovers.
Step-by-Step Instructions for Cut Up Cinnamon Rolls
This method delivers bakery-style layers with minimal effort and maximum flavor.
Step 1: Prepare the Dough and Work Surface
Preheat your oven to 375°F. Lightly dust your work surface with the 2 tbsp All-Purpose Flour to prevent sticking. I always use a silicone mat for this—it provides a non-slip surface and makes cleanup effortless.
Open the 2 cans Refrigerated Buttermilk Biscuit Dough and remove the biscuits, separating them into individual pieces. Press each biscuit gently to flatten slightly, but don’t overwork the dough. The goal is to create more surface area for the filling without toughening the texture.
Step 2: Create the Cinnamon Sugar Filling
In a small bowl, combine 0.75 cup Granulated Sugar and 2 tbsp Ground Cinnamon. Stir until evenly distributed—the mixture should look uniform and fragrant. I like to press this mixture into the dough to ensure every bite is packed with cinnamon flavor.
Melt the 0.5 cup Unsalted Butter in a microwave-safe bowl or small saucepan over low heat. Brush a generous amount of melted butter over each flattened biscuit, then sprinkle with the cinnamon sugar mixture. Reserve the remaining butter for later use.
Step 3: Stack and Layer the Dough
Stack 4 biscuits together, cinnamon side up, to form a tower. Repeat with the remaining biscuits to create a second stack. This layering is what creates the pull-apart, gooey texture that makes these rolls irresistible.
Using a sharp knife, carefully cut each stack into 4 equal pieces. As you slice, you’ll see the beautiful cinnamon swirls forming. Arrange the pieces cut-side up in a greased 9×13-inch baking dish, spacing them slightly apart to allow for expansion during baking.
Step 4: Add the Caramel Topping and Bake
In a small bowl, mix the 0.5 cup Light Brown Sugar with the 1 tsp Vanilla Extract and remaining melted butter. Pour this mixture evenly over the arranged dough pieces. Then, drizzle the 0.25 cup Heavy Cream over the top, ensuring it seeps into the crevices.
Bake for 25-30 minutes until the rolls are golden brown and the topping is bubbly. If the tops begin to brown too quickly, tent the dish with foil for the remaining baking time.
Step 5: Finish with Glaze and Serve
While the rolls bake, prepare the optional glaze by whisking together the 0.5 cup Powdered Sugar, 1 tbsp Milk, and a pinch of the 0.25 tsp Sea Salt until smooth. Drizzle this glaze over the warm rolls immediately after removing them from the oven.
Let the rolls cool for 5-10 minutes before serving. This allows the caramel topping to set slightly, making them easier to pull apart. Each roll should be tender, with layers of cinnamon sugar and a rich, gooey caramel base.
Pro Tips For Making Cut Up Cinnamon Roll
- Chill the Dough: After cutting the biscuit dough into pieces, pop them in the fridge for 10 minutes—it makes them easier to handle and prevents the butter from melting too soon.
- Melt Butter First: I learned this the hard way—melt the unsalted butter before mixing it with the brown sugar so it coats the dough evenly without clumping.
- Skip Overcrowding: Spread the dough pieces out in the pan with a little space between them, or they’ll steam instead of getting those crispy edges.
- Double the Cinnamon: Sounds like overkill, but using 2 teaspoons of ground cinnamon instead of 1 makes a real difference in flavor—trust me, I used to skimp.
Essential Equipment for Perfect Results
Baking Dish Essentials
I always reach for my 9×13-inch glass baking dish—it distributes heat evenly and lets me watch the caramelization. Pyrex is my go-to brand because it handles temperature changes without cracking. Lightly grease it with butter for easy release. 💡
Sharp Knife Matters
A serrated bread knife is non-negotiable for clean cuts through the dough layers. I use my 8-inch Wüsthof—it glides through without squishing the rolls. Keep a damp towel nearby to wipe the blade between cuts.
Mixing Bowls
Have 2 medium bowls ready: one for the cinnamon sugar and one for the caramel topping. I prefer stainless steel because they’re lightweight and won’t absorb odors. Plus, they nest for easy storage in my tiny kitchen.
Pastry Brush
A silicone pastry brush is perfect for spreading melted butter evenly. Unlike bristle brushes, it won’t shed and cleans up in seconds. I keep mine in a jar by the stove for easy access.
Measuring Tools
Accurate measurements matter here. I use OXO Good Grips measuring cups and spoons—they’re comfortable and the markings are easy to read. For the brown sugar, pack it firmly into the cup for best results.
Cooling Rack
After baking, transfer the dish to a wire cooling rack for 5-10 minutes. This prevents the bottom from getting soggy. I picked up a sturdy one at my local Boston hardware store for under $15.
Nutrition Facts
Frequently Asked Questions
Can I use crescent roll dough instead?
Yes! Crescent dough works in a pinch. Cut into squares before stacking and layering. The texture will be slightly different but still delicious.
Why do we cut the dough before baking?
Cutting creates more edges for caramelization and ensures every bite has crispy, cinnamon-sugar layers. It also makes them easier to pull apart after baking.
How do I prevent the rolls from sticking?
Grease your baking dish thoroughly with butter or nonstick spray. A 9×13-inch glass dish works best for even baking and easy release.
Can I make these ahead of time?
Assemble the rolls, cover, and refrigerate up to 12 hours before baking. Or freeze unbaked pieces for up to 1 month—bake straight from frozen, adding 5-10 minutes.

Trained in classic French technique but raised on slow-cooked ribs and spicy rubs, she blends culinary skill with smoke and soul.
- Recipe for Boneless Pork Chops in Cast Iron Skillet: Sear and Baste to Juicy Perfection - October 3, 2026
- Recipe for Boneless Cross Rib Roast: Slow-Roasted Beef with Herb Crust - October 3, 2026
- Hamburgers in Sauce Recipe Crock Pot: Slow-Cooked Savory Delight - October 3, 2026