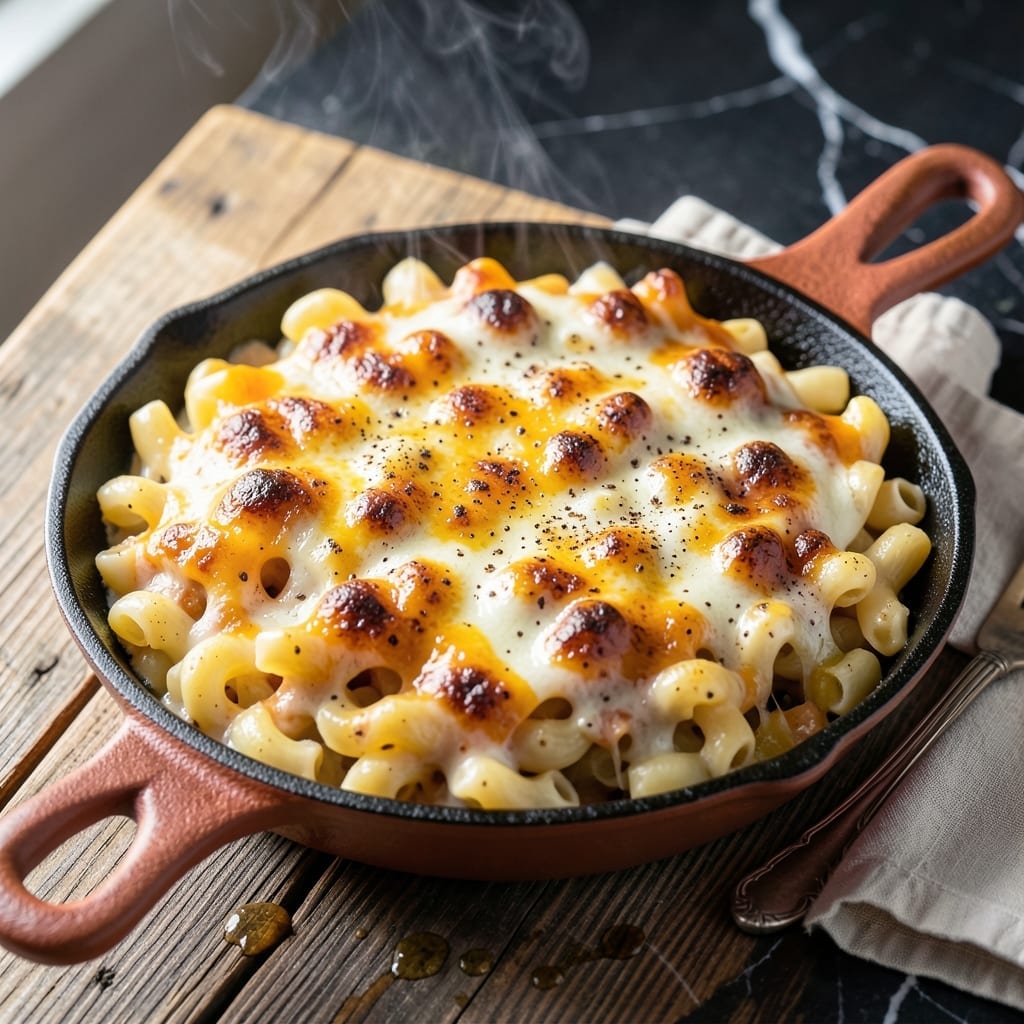
This smoky mac and cheese brings BBQ counter flavor to your kitchen table. The secret is a blend of cheeses that melts into a crispy top layer.
I developed this recipe after years of perfecting cheese sauces and smoke techniques. The result is a side dish that holds its own next to any smoked meat.
Ingredients for Dickies Bbq Mac and Cheese
Pantry staples plus a few cheeses bring that BBQ joint flavor home.
| Ingredient | Amount | Notes |
|---|---|---|
| Elbow Macaroni 🍝 | 12 oz | Or any short pasta shape |
| Sharp Cheddar Cheese 🧀 | 2 cups | Freshly shredded from block |
| Smoked Gouda Cheese 🧀 | 1 cup | Freshly shredded for best melt |
| Cream Cheese 🧀 | 4 oz | Softened to room temperature |
| Whole Milk 🥛 | 1 ½ cups | Full-fat for creaminess |
| Unsalted Butter 🧈 | ½ cup | 1 stick, for roux |
| All-Purpose Flour 🌾 | ¼ cup | For thickening sauce |
| Liquid Smoke 💨 | 1 tsp | Or hickory-smoked salt |
| Yellow Mustard 🟡 | 1 tbsp | For tang and color |
| Garlic Powder 🧄 | 1 tsp | For depth of flavor |
| Onion Powder 🧅 | 1 tsp | Complements the smoke |
| Panko Breadcrumbs 🍞 | ¾ cup | For crispy topping |
| Salt 🧂 | 1 tsp | Adjust to taste |
| Black Pepper 🌶️ | ½ tsp | Freshly ground preferred |
[recipe_ingredient_scaler]
The cheese blend is everything here. Sharp cheddar and smoked gouda give that authentic pit-smoke vibe—skip the pre-shredded stuff (it’s coated in anti-caking agents and won’t melt right). Whole Foods has great cheeses, but your regular grocery store deli counter works too. Cream cheese is the secret to extracreaminess. If you’re feeling fancy, Wisconsin cheddar takes this to another level.
No liquid smoke? Hickory-smoked salt works, or a pinch of smoked paprika. Short on gouda? Pepper Jack adds a nice kick. The mustard might seem odd, but it cuts through the richness and adds that classic BBQ tang. For the topping, regular breadcrumbs work if you don’t have panko—just toast them longer for crunch. Whole milk is ideal, but 2% in a pinch (don’t go lower).
Mac and cheese is best eaten fresh, but leftovers reheat nicely with a splash of milk. Keeps 3-4 days in the fridge, freezes for 2 months. The crispy top softens when stored—just broil for a minute to bring it back to life.
Why You’ll Love This Recipe
- I’ll be real: it tastes even better the next day, and it reheats like a dream with a splash of milk.
- One Pot Wonder: I love that this comes together in a single pot—no colander, no extra bowls, just melt, mix, and serve.
- Smoky Cheese Heaven: The sharp cheddar and smoked gouda hit that perfect balance of tangy and deep, with cream cheese making it ridiculously creamy.
- Crowd Pleaser: Honestly, it’s the only mac and cheese my picky nephew and my foodie brother both beg for at cookouts.
Step-by-Step Instructions for Smoky Mac and Cheese With a Crispy Top
Here’s how to get that perfect balance of creamy, smoky cheese with a crunchy breadcrumb topping.
Step 1: Cook the Pasta and Build the Base
Bring a large pot of salted water to a rolling boil. Add the 12 oz Elbow Macaroni and cook for 1 minute less than the package directions—it should be slightly underdone. Drain immediately and set aside. This prevents mushy pasta in the final dish.
While the pasta cooks, melt the 0.5 cup Unsalted Butter in a large pot over medium heat. Stir in the 0.25 cup All-Purpose Flour to create a smooth roux. Cook for 1-2 minutes until it turns a light golden color—this removes the raw flour taste.
Step 2: Create the Cheese Sauce
Gradually whisk in the 1.5 cups Whole Milk until the mixture is smooth. Stir in the 1 tbsp Yellow Mustard, 1 tsp Liquid Smoke, 1 tsp Garlic Powder, 1 tsp Onion Powder, 1 tsp Salt, and 0.5 tsp Black Pepper. Let it simmer for 2-3 minutes until it thickens slightly.
Reduce heat to low and add the 4 oz Cream Cheese, stirring until it melts completely. Then add the 2 cups Sharp Cheddar Cheese and 1 cup Smoked Gouda Cheese, a handful at a time, stirring until each addition is fully melted. The sauce should be velvety smooth with a noticeable smoky aroma.
Step 3: Combine and Top with Breadcrumb Crunch
Add the cooked pasta to the cheese sauce and stir until every piece is coated. Transfer the mixture to a greased 9×13-inch baking dish. In a small bowl, mix the 0.75 cup Panko Breadcrumbs with 1 tablespoon of melted butter (from your stick) and sprinkle evenly over the top.
Bake at 375°F for 15-20 minutes until the top is golden brown and the edges are bubbling. For extra crispiness, broil for 1-2 minutes at the end, watching closely to avoid burning. Let it rest for 5 minutes before serving—this allows the sauce to set slightly for perfect portions.
Pro Tips For Making Dickies Bbq Mac And Cheese
- Undercook the Pasta: Boil the elbow macaroni for 1-2 minutes less than package instructions—it’ll finish cooking in the oven and absorb the cheese sauce better.
- Shred Your Own Cheese: Skip pre-shredded bags; grate the sharp cheddar and smoked gouda fresh so they melt smoothly without that grainy texture.
- Temper the Cream Cheese: Let the cream cheese sit at room temperature for 20-30 minutes before mixing—cold lumps ruin the sauce.
- Warm the Milk: Heat the whole milk slightly before adding to the cheese mixture; it prevents the sauce from seizing up or turning oily.
Make-Ahead Tips for This dickies bbq mac and cheese
Prep Pasta Ahead
Cook the 12 oz Elbow Macaroni 1 minute less than package directions, rinse with cold water to stop cooking, and toss with 1 tsp olive oil. It’ll keep in the fridge for 24 hours without turning mushy. I learned this trick at my first BBQ competition. 💡
Sauce Prep Strategy
Make the cheese sauce up to 2 days ahead—just store it in an airtight container in the fridge. When ready to bake, reheat the sauce gently over low heat, then mix in the cooked pasta. The flavors meld even better overnight.
Assemble Before Baking
Combine the cooked pasta and sauce, transfer to your 9×13-inch baking dish, and cover tightly with foil. Refrigerate for up to 24 hours. Add the 0.75 cup Panko Breadcrumbs topping just before baking so they stay crisp. ⏰
Freeze for Later
Assemble the entire dish (without baking) and freeze in a freezer-safe 9×13-inch dish. Cover tightly with foil and plastic wrap. It’ll keep for 2 months. Thaw overnight in the fridge before baking as directed.
Reheating Leftovers
Store leftovers in the fridge for up to 3-4 days. To reheat, add a splash of milk, cover with foil, and warm at 350°F for 15-20 minutes. Broil for 1-2 minutes to crisp the top. 🔥
Nutrition Facts

Trained in classic French technique but raised on slow-cooked ribs and spicy rubs, she blends culinary skill with smoke and soul.
- Recipe for Boneless Pork Chops in Cast Iron Skillet: Sear and Baste to Juicy Perfection - October 3, 2026
- Recipe for Boneless Cross Rib Roast: Slow-Roasted Beef with Herb Crust - October 3, 2026
- Hamburgers in Sauce Recipe Crock Pot: Slow-Cooked Savory Delight - October 3, 2026