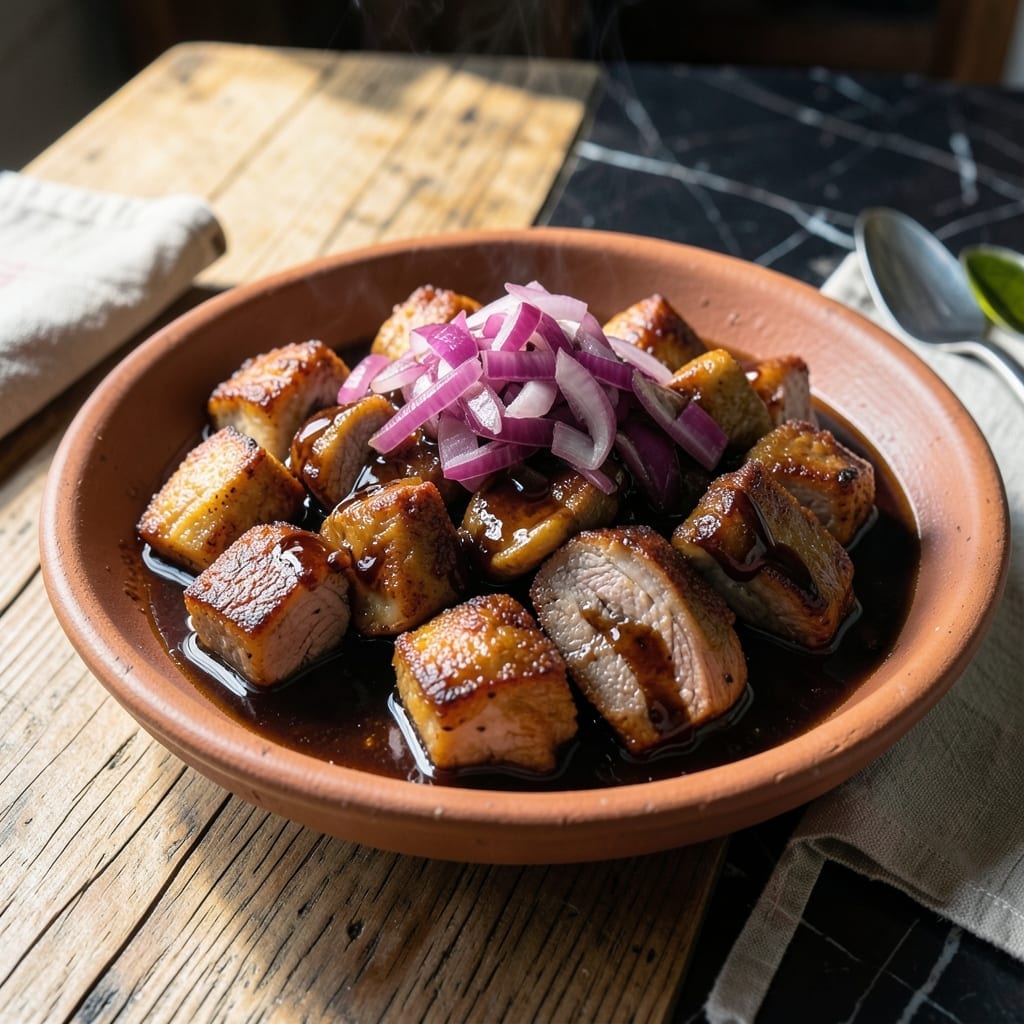
This stovetop method delivers the authentic taste of dinakdakan without outdoor grilling. The key is achieving that signature charred flavor through careful pan-searing and spice layering.
I developed this technique after years of perfecting smoke-based dishes. The process transforms pork parts into tender, flavorful pieces with the same depth as traditionally grilled versions.
By carefully controlling heat and timing, you’ll create that coveted crispy exterior while maintaining juicy interiors. The accompanying vinegar-based sauce ties everything together with its tangy, spicy kick.
This approach proves you can achieve restaurant-quality results with standard kitchen equipment. The flavors will transport you to a Filipino street food stall.
Ingredients for Dinakdakan Recipe Without Grilling
Standard kitchen ingredients with bold Filipino flavors. No grill, no problem.
| Ingredient | Amount | Notes |
|---|---|---|
| Pork Belly 🥓 | 2 lb | Cut into 1-inch cubes, skin-on |
| Pork Ear 🐖 | ½ lb | Thinly sliced (optional for texture) |
| White Vinegar 💧 | 1 cup | Cane vinegar preferred |
| Soy Sauce 🫒 | ½ cup | Regular or light variety |
| Calamansi Juice 🍋 | ¼ cup | Lime juice as substitute |
| Red Onion 🧅 | 1 whole | Finely chopped for sauce |
| Garlic Cloves 🧄 | 8 cloves | Minced for maximum flavor |
| Green Chili Peppers 🌶️ | 4 pieces | Sliced, adjust for heat |
| Ground Black Pepper 🌶️ | 2 tsp | Freshly cracked preferred |
| Bay Leaves 🍃 | 3 pieces | Dried, for simmering |
| Salt 🧂 | 1 ½ tsp | Adjust to taste |
| Sugar 🍚 | 1 tbsp | Balances vinegar acidity |
| Vegetable Oil 🫒 | ¼ cup | For pan-searing pork |
| Water 💧 | ½ cup | For sauce consistency |
[recipe_ingredient_scaler]
The pork belly is non-negotiable here—look for skin-on cuts at Asian markets or ask your butcher to save you some. The ear adds that authentic texture (skip if you’re squeamish). For the vinegar, Datu Puti or Mama Sita brand cane vinegar has the right sharpness. If you can’t find pork ear, pork cheek works as a backup. The key is getting a good sear on the meat for that charred flavor without a grill.
No calamansi? Lime juice works in a pinch—just add a tiny bit of orange zest for depth. For the chili peppers, siling labuyo is traditional, but jalapeños or serranos are fine (remove seeds for less heat). If you’re watching sodium, low-sodium soy sauce plus a pinch of salt works. The sugar might seem odd in a savory dish, but it balances the vinegar’s bite—don’t skip it.
The dish tastes even better the next day once flavors meld. Store in an airtight container in the fridge for up to 3 days. The sauce will thicken as it cools—just add a splash of water when reheating. Freezing isn’t recommended as the pork texture changes, but it’s perfect for meal prep.
Why You’ll Love This Recipe
- No Grill Needed: I just boil the pork belly and ear—no charcoal, no smoke, same bold taste.
- Tangy Crunch: The vinegar and calamansi hit that perfect sour-savory balance, and the crispy fried bits? Ridiculously good.
- Pulutan Perfection: I serve this at gatherings, and honestly, it’s the first dish to disappear.
- Budget Stretcher: Pork ear is cheap, and leftovers taste even better the next day.
Step-by-Step Instructions for Dinakdakan Without Grilling
This stovetop method delivers the same authentic flavor without needing a grill.
Step 1: Sear the Pork Belly and Ear
Heat the 0.25 cup vegetable oil in a large pot over medium-high heat. Add the 2 lb pork belly cubes and 0.5 lb pork ear slices. Cook without stirring for 5-7 minutes until the pork belly skin turns golden brown and crispy.
This searing step is crucial—it renders the fat and creates that signature crispy texture you’d normally get from grilling. Stir occasionally after the initial sear to ensure even browning. The pork ear should become slightly golden at the edges.
Use a slotted spoon to remove the pork to a plate, leaving the rendered fat in the pot. This fat will add incredible depth to your sauce later, so don’t discard it.
Step 2: Sauté the Aromatics
In the same pot with the rendered fat, add the finely chopped red onion. Sauté for 3-4 minutes until translucent and fragrant. Then add the 8 cloves minced garlic cloves and cook for 30 seconds until aromatic but not browned.
Next, stir in the 4 pieces sliced green chili peppers, 2 tsp ground black pepper, and 3 pieces bay leaves. Cook for 1 minute to release their flavors. The green chilies should soften slightly but retain some bite.
This aromatic base is the flavor foundation of your dinakdakan. The garlic should smell sweet and pungent, not burnt—if it starts to brown, lower the heat immediately.
Step 3: Build the Sauce
Pour in the 1 cup white vinegar, 0.5 cup soy sauce, and 0.25 cup calamansi juice. Add the 1.5 tsp salt and 1 tbsp sugar, then stir to combine. Let this mixture simmer for 3 minutes to meld the flavors.
Return the seared pork to the pot and add the 0.5 cup water. Stir well to coat everything in the sauce. The liquid should just cover the pork—if it looks too dry, add a splash more water.
Simmer uncovered for 25-30 minutes on medium-low heat, stirring occasionally. You want the sauce to reduce slightly but not completely evaporate. The pork should become tender and absorb the tangy, savory flavors.
Step 4: Reduce and Finish
Once the pork is tender and the sauce has thickened enough to coat the back of a spoon, taste and adjust the seasoning. If it needs more tang, add a bit more vinegar. If it’s too sharp, a pinch more sugar will balance it.
Let it sit off the heat for 5 minutes to allow the flavors to meld completely. The sauce should be glossy and cling to the pork, with the crispy bits of pork belly skin peeking through.
Serve warm with steamed rice. The pork belly should be fall-apart tender with crispy edges, while the pork ear adds a satisfying chew. The sauce should be a perfect balance of sour, salty, and slightly sweet.
Pro Tips For Making Dinakdakan Recipe Without Grilling
- Boil Pork Ear First: Start by boiling the pork ear for 45-60 minutes until tender—this softens the cartilage so it absorbs the vinegar and soy better. I learned this the hard way when my first batch was chewy and under-seasoned.
- Render the Belly: Cook the pork belly in its own fat over medium-low heat for 20-25 minutes until crispy. Sounds tedious, but it builds the rich base flavor you’d normally get from grilling.
- Balance the Acid: Use a 1:1 ratio of white vinegar to calamansi juice—any more vinegar and the dish turns harsh. My grandmother swore by this, and she was right.
- Chill Before Chopping: Let the cooked pork ear and belly cool completely before dicing. It’s messy to wait, but it keeps the pieces intact and prevents a mushy texture.
Storing and Reheating This Recipe
Fridge Storage
Let your dinakdakan cool completely before transferring to airtight containers. I use glass containers to preserve the flavors. It keeps in the fridge at 40°F or below for up to 3 days. The pork actually tastes better the next day as the flavors meld together. ❄️
Freezing Not Recommended
While you can freeze it for up to 1 month, I don’t recommend it. The pork texture changes significantly after thawing, losing that perfect crispy exterior. If you must freeze, use heavy-duty freezer bags and remove as much air as possible.
Stovetop Reheating
Gently reheat in a pot over medium-low heat for 8-10 minutes. Add 2-3 tbsp water to loosen the sauce. Stir occasionally to prevent sticking and maintain even heating. The sauce will thicken as it warms.
Microwave Method
For quick reheating, use 30-second intervals at 70% power. Cover with a damp paper towel to retain moisture. Stir between intervals and check temperature. This prevents the pork from drying out while warming through. 🔥
Serving After Reheating
Once reheated, let it sit for 2 minutes off heat. This allows the flavors to settle. The pork should be hot throughout with the sauce clinging beautifully. Taste and adjust seasoning if needed before serving.
Nutrition Facts
Frequently Asked Questions
Can I use pork shoulder instead of pork belly?
Yes, but the texture will differ. Pork belly’s fat renders beautifully for crispiness. Shoulder stays tender but lacks that signature crunch. Adjust cooking time to 35-40 minutes for shoulder pieces.
Why do I need to simmer the sauce uncovered?
Uncovered simmering allows the sauce to reduce and thicken properly. This concentrates the flavors and helps it cling to the pork. Covering would trap steam, making the sauce watery.
How do I make it less spicy?
Remove seeds from the green chilies before adding. You can also reduce the amount to 2 peppers or substitute mild bell peppers. The vinegar and soy balance will still shine.

Trained in classic French technique but raised on slow-cooked ribs and spicy rubs, she blends culinary skill with smoke and soul.
- Recipe for Boneless Pork Chops in Cast Iron Skillet: Sear and Baste to Juicy Perfection - October 3, 2026
- Recipe for Boneless Cross Rib Roast: Slow-Roasted Beef with Herb Crust - October 3, 2026
- Hamburgers in Sauce Recipe Crock Pot: Slow-Cooked Savory Delight - October 3, 2026