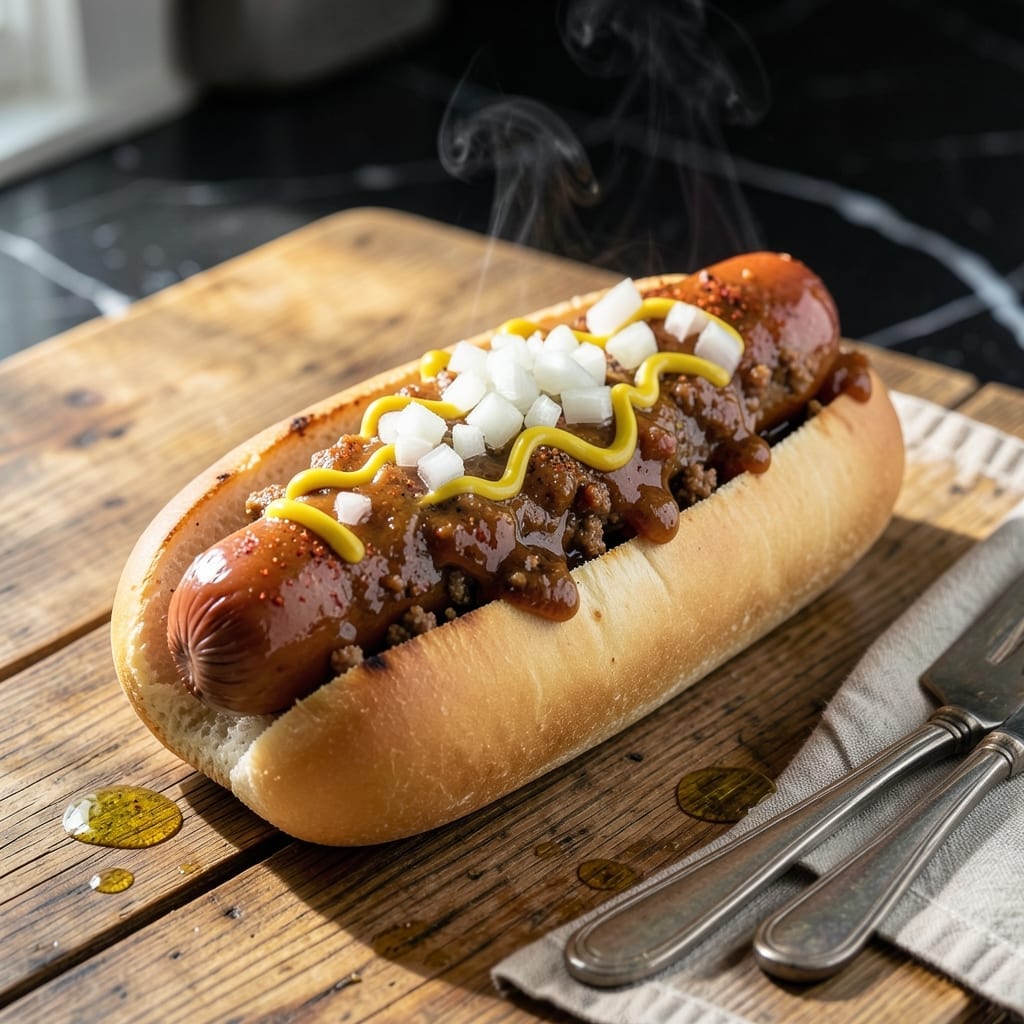
There’s something special about a classic coney sauce that brings back memories of summer nights at the drive-in. This recipe captures that nostalgic flavor with a simple blend of spices and textures.
I developed this version after testing multiple approaches to match the tangy, slightly sweet profile of the original. The key is balancing the spices just right and letting the mixture simmer to develop depth.
The result is a smooth, rich sauce that clings perfectly to hot dogs or burgers. It’s versatile enough for game day or a casual backyard cookout.
Make a big batch and keep it on hand—this disappears quickly once people taste it.
Ingredients for Dog N’ Suds Coney Sauce
Ten ingredients come together for that nostalgic drive-in flavor in every bite.
| Ingredient | Amount | Notes |
|---|---|---|
| Ground Beef 🥩 | 1 lb | 80/20 fat ratio preferred |
| Tomato Paste 🍅 | ½ cup | Double-concentrated for depth |
| White Vinegar 💧 | ¼ cup | For tangy brightness |
| Granulated Sugar 🥣 | ¼ cup | Balances acidity and spice |
| Chili Powder 🌶️ | 2 tbsp | Mild variety for classic flavor |
| Ground Cumin 🌿 | 1 tsp | Toasted for warmth |
| Paprika 🌶️ | 1 tsp | Sweet or smoked variety |
| Garlic Powder 🧄 | 1 tsp | Uniform flavor distribution |
| Onion Powder 🧅 | 1 tsp | Essential for base flavor |
| Salt 🧂 | 1 ½ tsp | Adjust to taste after simmering |
[recipe_ingredient_scaler]
The beef is non-negotiable for authenticity—80/20 ground chuck gives you the right fat content for that classic texture. Walmart or Kroger have it pre-packaged, or ask your butcher to grind it fresh. Tomato paste should be the double-concentrated kind (look for Amor or Contadina brands) for the deepest flavor. Don’t skip toasting the spices—it wakes them up.
No ground beef? Ground turkey works at a 1:1 ratio, though it’ll be leaner. Out of tomato paste? Crushed tomatoes reduced by half gets you close. Fresh garlic and onion can replace the powders (1 clove = 1/4 tsp powder), but simmer longer to mellow the bite. Vinegar is key—white for tang, apple cider for a fruitier note.
This sauce keeps 1 week in the fridge, 3 months frozen. Portion into airtight containers—it’s perfect for game day or spontaneous cookouts. The flavor actually improves after a day, so make it ahead if you can.
Why You’ll Love This Recipe
- One Pot Wonder: I brown the beef, stir in the rest, and let it simmer—no fancy steps, just straightforward cooking.
- Sweet & Tangy Kick: The sugar balances the vinegar’s bite, while chili powder gives it that classic coney island zing I can’t resist.
- Crowd Pleaser: Honestly, this sauce turns plain hot dogs into a party favorite, whether it’s game day or a backyard barbecue.
- Budget Stretcher: Ground beef and pantry staples mean I can feed a hungry group without breaking the bank.
Step-by-Step Instructions for Dog N’ Suds Coney Sauce
Here’s the method. Straightforward, tested, works every time.
Step 1: Brown the Ground Beef Thoroughly
Heat a large saucepan over medium-high heat and add the 1 lb Ground Beef. Break it up with a wooden spoon as it cooks, ensuring it browns evenly without large clumps.
Cook for 8-10 minutes until the beef is fully browned and no pink remains. I press down with the spoon to break up any larger pieces—this ensures a fine, consistent texture in the finished sauce. Drain excess fat if needed, but leave about 1 tablespoon for flavor.
Step 2: Add Spices and Toast for Depth
Stir in the 2 tbsp Chili Powder, 1 tsp Ground Cumin, 1 tsp Paprika, 1 tsp Garlic Powder, 1 tsp Onion Powder, and 1.5 tsp Salt. Cook for 1-2 minutes, stirring constantly, until the spices become fragrant.
This toasting step is crucial—it wakes up the flavors in the spices and eliminates any raw taste. You’ll notice the mixture darken slightly, and the aroma will fill your kitchen. This is the foundation of the sauce’s rich, complex character.
Step 3: Incorporate Liquid and Tomato Paste
Add the 0.5 cup Tomato Paste, 0.25 cup White Vinegar, and 0.25 cup Granulated Sugar to the pan. Stir well to combine all ingredients, breaking up any remaining bits of tomato paste.
The vinegar will create a slight sizzle as it hits the hot pan, and the sugar will begin to dissolve into the mixture. The tomato paste will deepen in color, and the sauce will start to come together. This is where the magic happens—the tangy brightness of the vinegar begins to balance the sweetness of the sugar.
Step 4: Simmer to Perfection
Reduce the heat to low and let the sauce simmer uncovered for 20-25 minutes. Stir occasionally to prevent sticking, and watch for the sauce to thicken to a consistency that coats the back of a spoon.
As it simmers, the flavors will meld together, and the sauce will darken to a rich, reddish-brown color. The vinegar’s sharpness will mellow, and the spices will infuse throughout. Taste and adjust the salt if needed, but remember the flavors will intensify slightly as it cools.
Remove from heat and let it cool slightly before using. The sauce should be thick but still pourable, with a smooth, uniform texture that clings perfectly to hot dogs or coney dogs.
Pro Tips For Making Dog N’ Suds Coney Sauce
- Brown the Beef Well: Cook the ground beef until it’s deeply browned, not just gray—this builds the rich, meaty base flavor that defines a good coney sauce. I learned this the hard way after making too many bland batches.
- Bloom the Chili Powder: Toast the chili powder in the pot for 30 seconds before adding liquid—it wakes up the spices and adds depth. Sounds weird, but it works.
- Balance the Vinegar: Add the white vinegar slowly and taste as you go; too much can overpower the sauce. My grandmother swore by this, and she was right.
- Simmer Low and Slow: Once everything’s combined, let it simmer on low for at least 20 minutes—this melds the flavors and thickens the sauce just right. I skip this when I’m lazy, but the dish is noticeably better when I don’t.
Essential Equipment for dog n suds coney sauce
Heavy Saucepan
A 3-4 quart heavy-bottomed saucepan is essential for even heat distribution. I prefer my All-Clad stainless steel pot—it prevents hot spots that could burn the sauce. Thin pans can scorch the beef or sugar, ruining the flavor.
Wooden Spoon
Use a flat-edge wooden spoon to break up the ground beef as it browns. The flat edge helps scrape the bottom of the pan, preventing sticking. I keep mine soaking in water to prevent warping.
Fine Mesh Strainer
If you want ultra-smooth coney sauce, press the finished mixture through a fine mesh strainer. This removes any stubborn beef bits for that classic drive-in texture. I skip this for rustic versions but always use it for competitions.
Glass Jars for Storage
Store cooled sauce in pint-sized mason jars for easy portioning. They’re airtight, easy to clean, and let you see the sauce’s rich color. I label mine with the date using masking tape. ❄️
Kitchen Scale
For precise measurements, especially for the 1 lb Ground Beef and spices, a digital kitchen scale ensures consistency. I use my OXO Good Grips scale—it’s accurate to 1 gram and has a tare function. 💡
Immersion Blender
An immersion blender quickly smooths out the sauce right in the pot. I pulse mine 3-4 times for a velvety texture without over-processing. It’s faster than transferring to a countertop blender and easier to clean.
Nutrition Facts
Frequently Asked Questions
Can I use ground turkey instead of beef?
Yes, ground turkey works at a 1:1 ratio, though it’ll be leaner. Brown it the same way, but add 1 tbsp oil to prevent sticking.
How long does the sauce keep?
Store in an airtight container in the fridge for up to 1 week. For longer storage, freeze for 3 months. The flavor deepens after a day.
Why toast the spices first?
Toasting for 1-2 minutes awakens the flavors and removes any raw taste. It builds the sauce’s rich, complex base.
Can I make it smoother?
Press the finished sauce through a fine mesh strainer or pulse with an immersion blender 3-4 times for a velvety texture.

Trained in classic French technique but raised on slow-cooked ribs and spicy rubs, she blends culinary skill with smoke and soul.
- Recipe for Dumplings in Crock Pot: Fluffy Pillows with Minimal Effort - October 3, 2026
- Recipe For Diced Pork In Slow Cooker: Melt-In-Your-Mouth Tenderness All Day - October 3, 2026
- Recipe for Crock Pot Lasagna Using Ravioli: No-Boil Cheese Layers - October 3, 2026