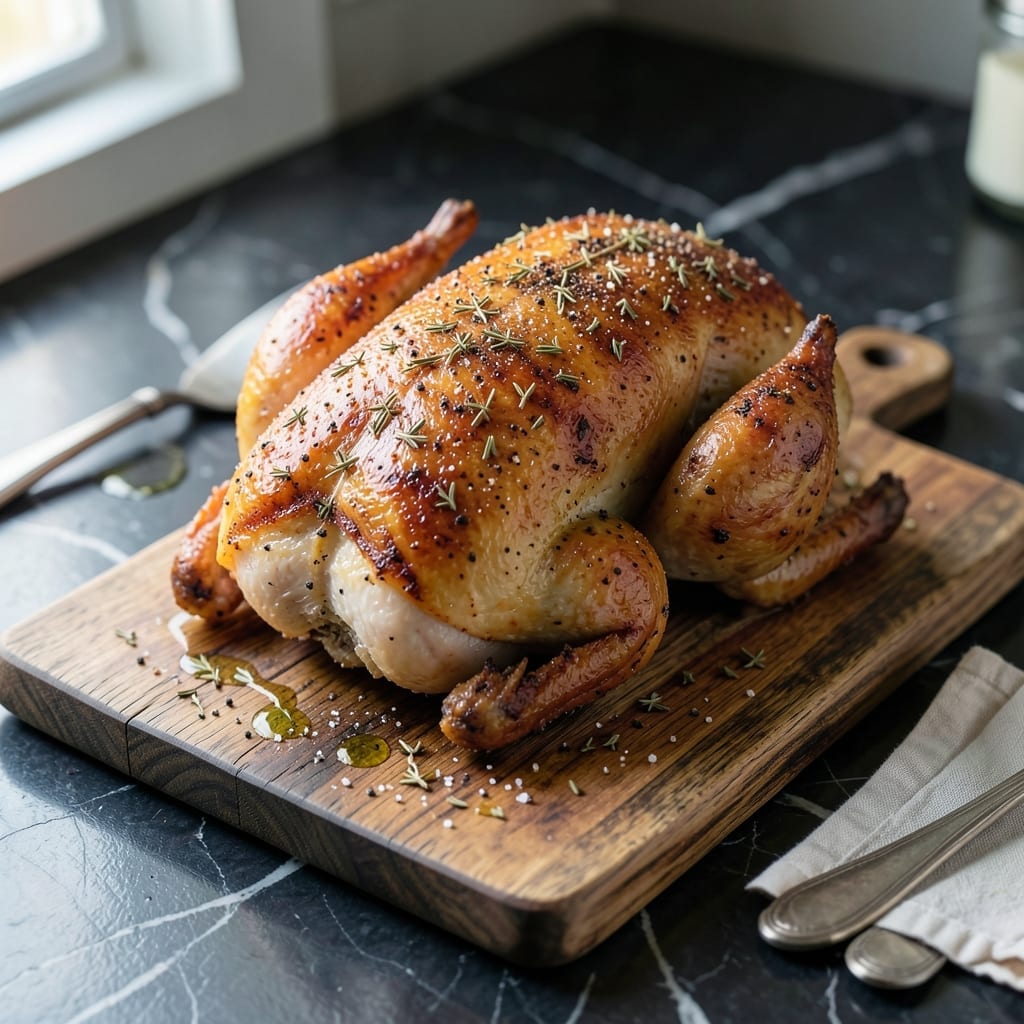
This method transforms your chicken with crispy, golden skin and juicy meat—no wet brine required. The process is simple: salt the chicken ahead of time and let it rest in the refrigerator. This draws out moisture, which is then reabsorbed with the salt, seasoning the meat deeply.
What makes this technique special is its ability to deliver restaurant-quality results with minimal effort. You’ll need just 12 to 24 hours of advance planning. The salt penetrates the meat, enhancing flavor and ensuring it stays moist during cooking.
The result is chicken with perfectly crispy skin and tender, well-seasoned meat. Whether roasted, grilled, or pan-seared, this dry brining method guarantees a better final product every time. The skin browns beautifully, adding texture and depth to each bite.
Ideal for whole chickens, thighs, or breasts. Here’s how to achieve the best results with this proven approach.
Ingredients for Dry Brine Recipe Chicken
Eleven ingredients create restaurant-quality chicken with crispy skin and juicy meat every time.
| Ingredient | Amount | Notes |
|---|---|---|
| Whole Chicken 🍗 | 3 ½ lb | Pat dry thoroughly before brining |
| Diamond Crystal Kosher Salt 🧂 | ¼ cup | Do not substitute table salt |
| Freshly Ground Black Pepper 🌶️ | 1 tsp | Coarsely ground preferred |
| Garlic Powder 🧄 | 1 tsp | Not garlic salt |
| Onion Powder 🧅 | 1 tsp | Balances the salt perfectly |
| Dried Thyme 🌿 | 1 tsp | Rubbed between fingers to release oils |
| Dried Rosemary 🌿 | 1 tsp | Crushed lightly before using |
| Paprika 🌶️ | 1 tsp | Sweet or smoked variety |
| Unsalted Butter 🧈 | 2 tbsp | Melted, for basting |
| Fresh Lemon 🍋 | 1 whole | Zest and juice for brightness |
| Fresh Parsley 🌿 | ¼ cup | Chopped, for garnish |
[recipe_ingredient_scaler]
The salt is non-negotiable here. Diamond Crystal kosher salt is the gold standard for dry brining—its coarse texture and pure flavor distribute evenly without over-salting. Most grocery stores carry it, but Costco offers the best value for bulk. The whole chicken should be 3.5-4 pounds for even cooking. Pat it meticulously dry before applying the brine—moisture is the enemy of crispy skin.
No kosher salt? Half the amount of table salt, but measure carefully—it’s easy to oversalt. Fresh herbs can replace dried at three times the quantity, but dried work perfectly fine. The butter isn’t mandatory, but it adds a luxurious sheen and flavor to the skin. European-style butter (higher fat content) gives superior results if you’re splurging.
The brined chicken keeps uncovered in the fridge for 12-24 hours. After cooking, leftovers stay fresh for 3-4 days sealed. For best results, bring the chicken to room temperature before cooking—never cook it straight from the fridge.
Why You’ll Love This Recipe
- Set It and Forget It: I just rub the chicken with salt and spices the night before, then roast it the next day—no last-minute stress.
- Crispy, Juicy Magic: The dry brine pulls out moisture first, then reabsorbs it with all that garlic and onion flavor locked in. Ridiculously good.
- Weeknight to Sunday Dinner: It’s just as good for a quick family meal as it is for impressing guests—honestly, I make it for both.
- Leftovers for Days: One bird means sandwiches, tacos, or soup for the next three meals. My wallet and my schedule thank me.
Step-by-Step Instructions for Dry Brined Chicken
Master this technique to achieve perfectly seasoned meat with irresistibly crispy skin every time.
Step 1: Prepare and Dry Brine the Whole Chicken
Pat the 3.5 lb whole chicken completely dry with paper towels, inside and out. This step is crucial—any moisture will dilute the 0.25 cup Diamond Crystal Kosher Salt and prevent proper seasoning.
Combine the salt with 1 tsp Freshly Ground Black Pepper, 1 tsp Garlic Powder, 1 tsp Onion Powder, 1 tsp Dried Thyme, 1 tsp Dried Rosemary, and 1 tsp Paprika in a small bowl. Rub this mixture evenly over every surface of the chicken, including inside the cavity. Place on a wire rack set over a baking sheet.
Refrigerate uncovered for 12 to 24 hours. This drying process allows the salt to penetrate deeply while the skin dries out, ensuring maximum crispiness during roasting.
Step 2: Rest and Temper the Bird
Remove the chicken from the refrigerator and let it sit at room temperature for 1 hour. This step ensures even cooking—cold meat seizes up in the oven, leading to uneven doneness.
During this rest, the salt continues to work its way into the meat, seasoning it thoroughly. You’ll notice the skin appears slightly tacky—this is normal and indicates the dry brine is working effectively. Do not cover the bird during this time; you want the skin to remain dry.
Step 3: Roast at High Heat for Crispy Skin
Preheat your oven to 425°F. Place the chicken breast-side up on a roasting rack in a shallow pan. Melt the 2 tbsp Unsalted Butter and brush half over the chicken. This adds richness and promotes browning.
Roast for approximately 1 hour to 1 hour 15 minutes, basting with the remaining butter and pan juices every 20 minutes. The chicken is done when the thickest part of the thigh reaches an internal temperature of 165°F and the juices run clear. The skin should be deep golden brown and crisp to the touch.
Step 4: Rest and Garnish for Serving
Transfer the chicken to a cutting board and tent loosely with foil. Let it rest for 15 minutes—this allows the juices to redistribute, ensuring moist, flavorful meat. Skipping this step will result in dry chicken as the juices escape onto the cutting board.
Zest the 1 whole Fresh Lemon over the chicken, then squeeze the juice for added brightness. Garnish with 0.25 cup Fresh Parsley for a pop of color and freshness. Carve and serve immediately while the skin remains at its crispiest.
Pro Tips For Making Dry Brine Recipe Chicken
- Salt Overnight: I learned this the hard way—give the chicken at least 12 hours in the fridge with just Diamond Crystal salt before adding pepper or spices. The salt penetrates deep, keeping the meat juicy without over-seasoning the surface.
- Pat It Dry: After dry brining, grab a paper towel and really press into the skin to remove every bit of moisture. Sounds tedious, but it’s the only way to get that crackling, golden crust.
- Skip the Wet Brine: Resist the urge to add water or oil to the salt mix—this isn’t a wet brine. The dry method concentrates flavor and avoids soggy skin, which is exactly what you want in a roast chicken.
- Rest Before Roasting: Pull the chicken out of the fridge 45 minutes before cooking and let it sit on the counter. My grandmother swore by this, and she was right: it cooks more evenly and the skin crisps up faster.
Troubleshooting Great dry brine recipe chicken
Skin Not Crispy
If your chicken skin isn’t crispy, it likely wasn’t dry enough before roasting. Pat it thoroughly with paper towels and leave it uncovered in the fridge for 24 hours. This ensures maximum moisture evaporation for that perfect crunch. 💡
Overly Salty Meat
Over-salting often happens with table salt substitutions. Stick to Diamond Crystal kosher salt—its coarse texture distributes evenly. If you must use table salt, reduce the amount by half and taste the seasoning mixture first.
Uneven Cooking
Cold chicken straight from the fridge can cook unevenly. Always let it sit at room temperature for 1 hour before roasting. This allows the meat to cook through uniformly, preventing dry spots near the bones.
Dry Meat
Dryness usually means overcooking. Pull the chicken from the oven when the thickest part of the thigh hits 165°F. Use a meat thermometer for accuracy—guessing can lead to tough, dry results.
Seasoning Not Penetrating
If the flavor seems surface-level, the brine may not have had enough time. Aim for at least 12 hours in the fridge. For deeper seasoning, extend to 24 hours—this gives the salt time to fully infuse the meat.
Sticky Skin
Sticky skin often results from insufficient drying. Ensure the chicken is uncovered during its fridge rest and pat it dry again just before roasting. This removes excess moisture that can cause sticking. 🔥
Nutrition Facts
Frequently Asked Questions
How long should I dry brine chicken?
For optimal flavor and texture, dry brine for 12 to 24 hours in the fridge. This gives the salt time to fully penetrate the meat.
Can I use table salt instead of kosher salt?
Use half the amount of table salt if kosher isn’t available. Table salt is finer and saltier by volume, so measure carefully.
Does dry brining work for chicken breasts?
Yes! Use 1 tsp kosher salt per pound and brine for 4-12 hours. This keeps lean breast meat juicy and flavorful.
Why leave chicken uncovered in the fridge?
This dries the skin surface, which is essential for achieving maximum crispiness during cooking. Covering traps moisture.

Trained in classic French technique but raised on slow-cooked ribs and spicy rubs, she blends culinary skill with smoke and soul.
- Recipe for Dumplings in Crock Pot: Fluffy Pillows with Minimal Effort - October 3, 2026
- Recipe For Diced Pork In Slow Cooker: Melt-In-Your-Mouth Tenderness All Day - October 3, 2026
- Recipe for Crock Pot Lasagna Using Ravioli: No-Boil Cheese Layers - October 3, 2026