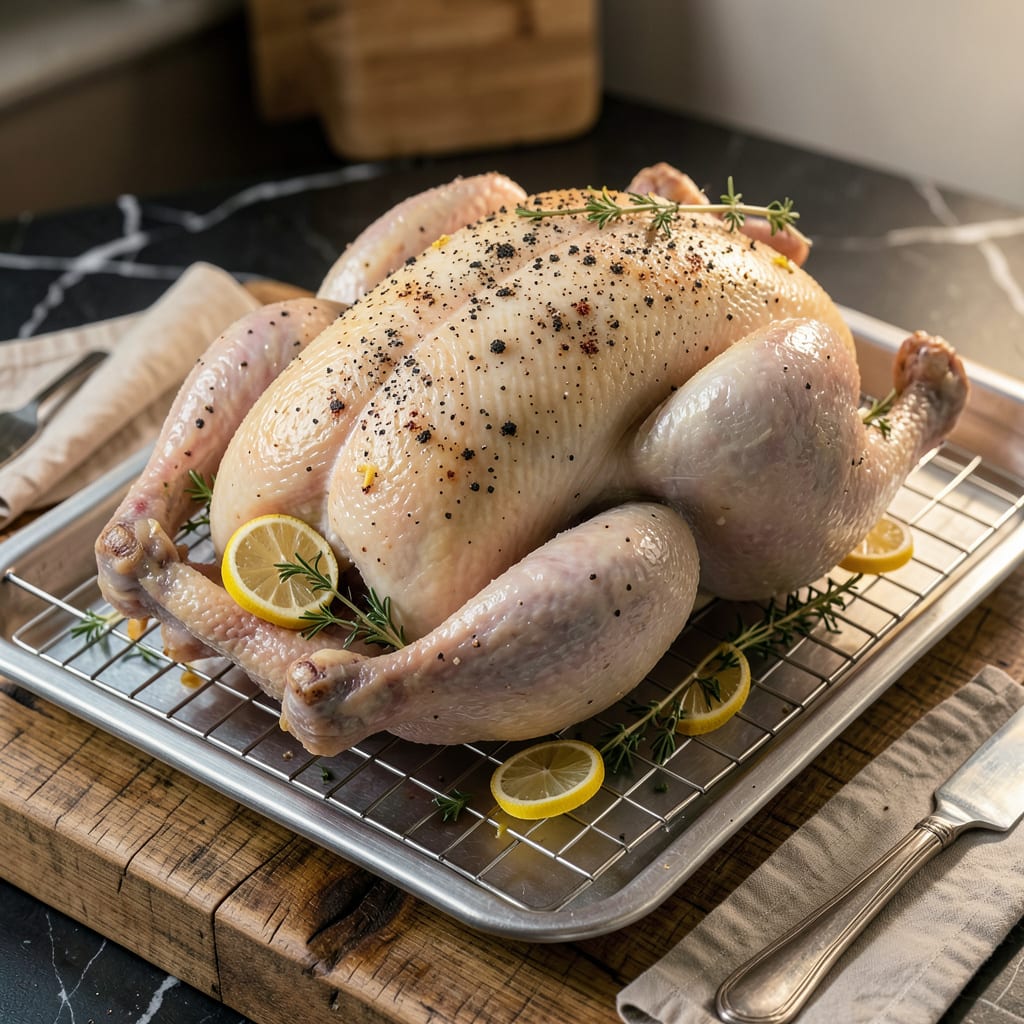
I’ll be real with you—deep-fried turkey is a game-changer, but dry brining it first? That’s where the magic happens. That first whiff of hickory smoke from my family’s backyard cookouts taught me that patience pays off, and this method proves it. A simple salt-and-spice rub applied 12-24 hours before frying transforms the meat from good to unforgettable.
Here’s the thing—dry brining pulls moisture to the surface, where it mixes with the salt and spices, then gets reabsorbed, seasoning the turkey from the inside out. The result? Juicy meat that stays tender even after the high-heat fry, and skin that crisps up like you wouldn’t believe. No soggy, bland turkey here.
Now, don’t skip the resting step (learned that the hard way). Letting the turkey sit uncovered in the fridge after brining ensures the skin dries out completely, which is crucial for that shatteringly crispy finish. When it hits that hot oil, you’ll hear the sizzle that promises perfection—golden, crackling skin giving way to succulent meat underneath.
Fair warning: This isn’t your average Thanksgiving turkey. It’s the kind of bird that’ll have everyone hovering around the fryer, waiting for that first bite. The French techniques I swear by meet good old Southern frying tradition here, and the result is worth every minute of prep. Just remember—safety first, flavor second, and leftovers? Forget about it.
📚 In This Guide
- What You’ll Need
- Instructions
- Tips and Common Mistakes
What Youll Need
- ● Whole turkey (12–16 lbs for optimal frying) – fully thawed if frozen 🦃
- ● Kosher salt (1–1.5 tbsp per 5 lbs of turkey) – avoid iodized salt
- ● Coarse black pepper (1 tbsp) – freshly ground preferred
- ○ Optional dry brine add-ins: Garlic powder (1 tsp)
- ● Onion powder (1 tsp)
- ● Smoked paprika (½ tsp)
- ● Large rimmed baking sheet or tray – for brining and air-drying
- ● Wire rack – fits inside the tray for airflow
- ● Paper towels – for patting the turkey dry
- ● Kitchen twine – to tie legs if needed
- ● Meat thermometer – instant-read, for safety checks
- ● Deep fryer kit (30+ qt pot, basket, burner) – or a heavy stockpot + candy thermometer
- ● Peanut or vegetable oil (3–5 gallons) – high smoke point required
- ● Fire extinguisher (Class B) – safety first! 🚒
- ● Heat-resistant gloves – for handling hot oil
- ○ Optional: Injector kit + melted butter/broth for extra juiciness
Step-by-Step Instructions for Dry Brining Turkey Before Deep Frying
This simple technique transforms your turkey, guaranteeing juicy meat and that perfect crispy skin you’re after.
Prepare the Turkey for Brining
Start by completely thawing your turkey if frozen. I recommend thawing in the refrigerator for 24 hours per 4-5 pounds of turkey. Once thawed, remove any giblets or neck from the cavity and pat the entire bird completely dry with paper towels.
The drying step is crucial—moisture prevents the salt from penetrating properly and will interfere with crispy skin later. Pay special attention to the cavity and under the wings where water tends to collect. I like to use clean kitchen towels for this job to really absorb all the moisture.
Apply the Dry Brine Evenly
Place the turkey on a wire rack set over a baking sheet or in a roasting pan. This setup allows air circulation on all sides. Generously season the entire turkey with kosher salt, making sure to coat every surface including the cavity.
I use about 1 tablespoon of salt per 5 pounds of turkey, but adjust based on your salt’s grain size—kosher salt is less salty than table salt by volume. Rub the salt into the skin and don’t forget the legs and wings. The salt will draw out moisture initially, then reabsorb with seasoning for maximum flavor.
Refrigerate Uncovered for Optimal Results
Leave the turkey uncovered in the refrigerator for 12-24 hours. This drying time is what creates that perfect crispy skin later. The salt will penetrate the meat, breaking down proteins to make it more tender while the uncovered drying in the fridge helps the skin become paper-thin and crispy when fried.
I’ve found that 18 hours gives the best balance of flavor penetration and skin drying. During this time, the turkey will develop a slightly tacky surface—that’s exactly what you want. It means the brine is working and the skin is drying properly for that perfect crunch.
Bring to Room Temperature Before Frying
Remove the turkey from the refrigerator 1 hour before you plan to fry it. This allows the meat to come to room temperature, which is crucial for even cooking. A cold turkey will cause the oil temperature to drop dramatically when submerged, leading to uneven cooking and potentially dangerous oil splatter.
While the turkey warms, check that it’s completely dry to the touch. If you notice any damp spots, pat them dry with paper towels. The drier the skin, the crispier your final result will be. This is also the perfect time to prepare your frying station and heat your oil to the proper temperature.
Final Prep Before Frying
Just before frying, give the turkey one final inspection. The skin should look dry and slightly translucent. If you used any additional seasonings beyond salt, now’s the time to apply them—they’ll adhere better to the tacky surface created by the brine.
I like to gently separate the skin from the breast in a few spots to help the hot oil crisp it evenly. Be careful not to tear the skin. Your turkey is now perfectly prepped for frying—it will cook more evenly, stay juicier, and develop that coveted golden, crispy skin that makes deep-fried turkey so special.
Tips and Common Mistakes for Perfect Dry-Brined Turkey
After years of deep-frying turkeys, I’ve learned these key details that make all the difference between good and spectacular results.
The Drying Secret: In Step 1, when you’re patting the turkey dry, don’t rush this process. I use a combination of paper towels and clean kitchen towels to absorb every last drop of moisture. Pay extra attention to the cavity and under the wings where water loves to hide. The drier the skin, the better the salt will penetrate and the crispier your final result will be. This step is what separates mediocre skin from that perfect crackling crust we’re after.
Salt Distribution Technique: When applying the kosher salt in Step 2, I’ve found that using my fingers to gently massage the salt into the skin helps it adhere better. Don’t forget to salt the cavity and under the wings—these areas often get overlooked. The 1 tablespoon per 5 pounds ratio is perfect for flavor without being overly salty. Remember that kosher salt is less concentrated than table salt, so if you’re using a different type, adjust accordingly.
Timing Matters: The 12-24 hour refrigeration time in Step 3 is crucial for both flavor and texture. I’ve experimented extensively and found that 18 hours gives the ideal balance—long enough for the salt to fully penetrate and tenderize the meat, while allowing the skin to dry perfectly. During this time, you’ll notice the skin develops a slightly tacky feel, which is exactly what you want for maximum crispiness when frying.
Temperature Transition: That 1 hour at room temperature in Step 4 isn’t just about even cooking—it’s also your final chance to ensure the skin is completely dry. I like to use this time to do a final inspection, checking for any damp spots that might have developed in the fridge. A completely dry surface is what will give you that golden, crackling skin that makes deep-fried turkey so special.
Pro Tips for Dry Brine Turkey Before Deep Frying
- After years of deep-frying turkeys, I’ve learned these key details that make all the difference between good and spec…
- The Drying Secret: In Step 1, when you’re patting the turkey dry, don’t rush this process. I use a combination of pap…
- Salt Distribution Technique: When applying the kosher salt in Step 2, I’ve found that using my fingers to gently mass…
Frequently Asked Questions
How long should I dry brine a turkey before deep frying?
For the best flavor and moisture, dry brine your turkey 12–24 hours before frying. A full 24 hours is ideal for larger birds (14+ lbs), while 12 hours works for smaller turkeys. Don’t exceed 48 hours—it can make the meat too salty!
Can I dry brine a turkey the night before frying?
Absolutely! Overnight (8–12 hours) is perfect for a well-seasoned turkey. Just pat it dry before frying to ensure extra-crispy skin. Pro tip: Unwrap it 1–2 hours before cooking to let the skin air-dry further.
What’s the difference between dry brining and wet brining before frying?
Dry brining (rubbing with salt/spices) concentrates flavor and crisps the skin, while wet brining (soaking in liquid) adds moisture but can dilute taste. For deep frying, dry brining wins—it avoids excess liquid (which can cause dangerous oil splatter) and delivers juicier meat with less mess.
Do I need to rinse the turkey after dry brining?
No! Rinsing washes away flavor and can spread bacteria. Just pat the turkey dry with paper towels before frying. The salt will have fully absorbed, leaving the surface ready for crispy perfection.
What if my turkey skin isn’t crispy after frying?
If the skin isn’t crispy, it’s likely due to excess moisture. Ensure the turkey is completely dry before frying, and fry at 350°F (not lower). For extra crunch, rest the turkey uncovered 10 minutes post-fry—this helps the skin set.
Dry brining your turkey before deep frying is the secret weapon for juicy, flavorful meat and that perfect crispy skin. 🎯 With just a little planning—salt, time, and patience—you’ll transform your fried turkey into a showstopper that’ll have everyone asking for seconds.
Ready to give it a try? Grab your turkey, salt, and spices, and start brining 12–24 hours ahead of fry day. Your taste buds (and dinner guests) will thank you! 🍽️

Trained in classic French technique but raised on slow-cooked ribs and spicy rubs, she blends culinary skill with smoke and soul.
- Recipe for Boneless Pork Chops in Cast Iron Skillet: Sear and Baste to Juicy Perfection - October 3, 2026
- Recipe for Boneless Cross Rib Roast: Slow-Roasted Beef with Herb Crust - October 3, 2026
- Hamburgers in Sauce Recipe Crock Pot: Slow-Cooked Savory Delight - October 3, 2026