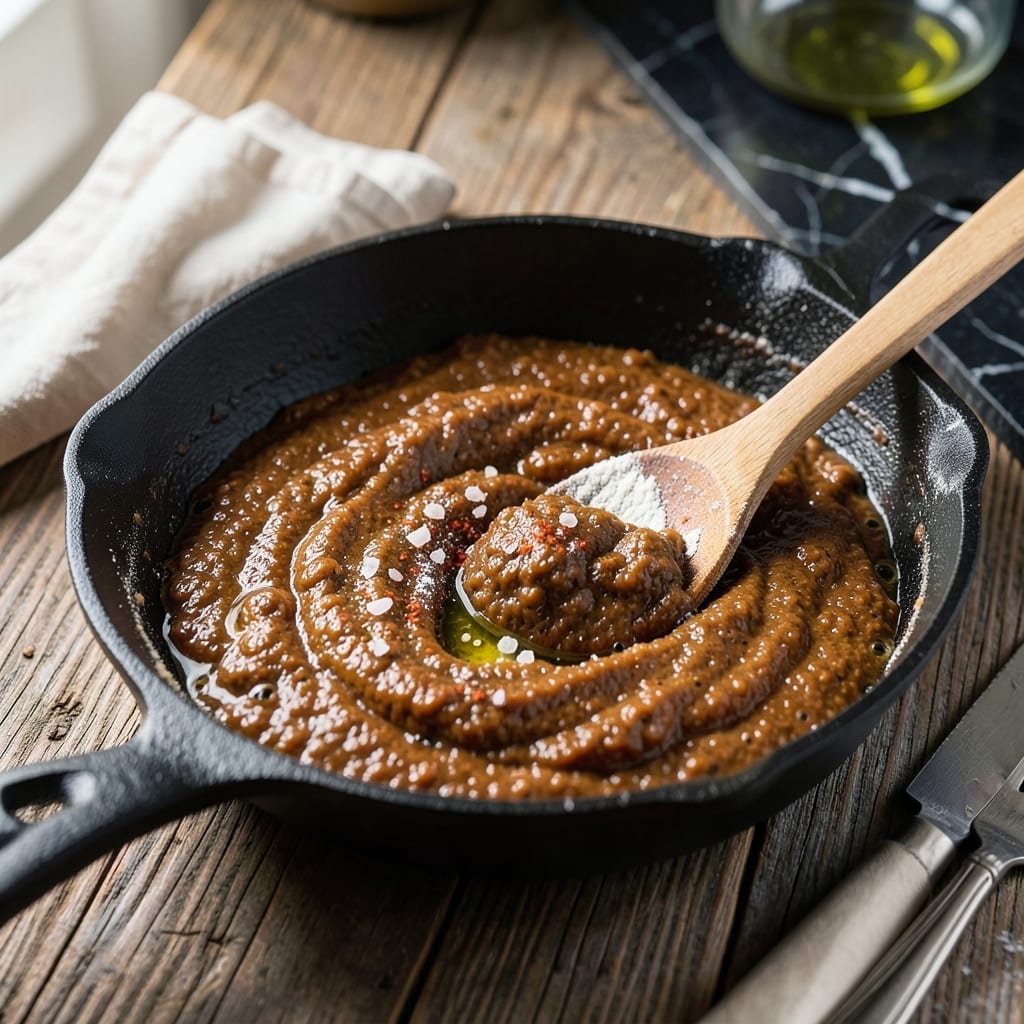
A proper dry roux is the foundation of countless classic sauces, from rich gumbo to velvety béchamel. I learned its importance during my French training, where precision in this technique separates good sauces from extraordinary ones.
This method combines equal parts fat and flour cooked together until reaching the desired color. The process transforms raw flour’s taste into a deep, nutty base that thickens and enriches any sauce it joins.
Mastering the dry roux means controlling heat and timing carefully. Too hot and it burns; too cool and it never develops that essential depth of flavor. The result is a versatile building block for authentic sauces.
Store it properly and you’ll have this flavor-packed base ready for your next culinary creation. Here’s how to make it perfectly every time.
Ingredients for Dry Roux
Two fats, one flour, and a pinch of seasoning create this flavor powerhouse.
| Ingredient | Amount | Notes |
|---|---|---|
| All-Purpose Flour 🌾 | ½ cup | Unbleached preferred for depth |
| Unsalted Butter 🧈 | ½ cup | European-style for richness |
| Vegetable Oil 🫒 | ½ cup | Neutral flavor, high smoke point |
| Kosher Salt 🧂 | ¼ tsp | Diamond Crystal preferred |
| White Pepper 🌶️ | 0.125 tsp | Freshly ground for subtle heat |
| Cayenne Pepper 🔥 | 0.125 tsp | Optional for heat (adjust to taste) |
[recipe_ingredient_scaler]
The fat choice defines your roux. Butter gives classic richness (use European-style for lower water content), while vegetable oil creates a darker roux without burning. Whole Foods or Trader Joe’s carry both in bulk if you’re making big batches. The flour should be all-purpose—unbleached adds a touch more depth. Skip the self-rising, the leavening agents mess with the texture.
Out of butter? Ghee or clarified butter works at a 1:1 ratio with a higher smoke point. Need it dairy-free? Coconut oil (refined, for neutral flavor) is solid. The cayenne is optional but adds a subtle kick—half the amount if you’re heat-sensitive. For gluten-free, swap the flour for rice flour (same ratio), though the flavor won’t be quite as nutty.
Store cooked roux in an airtight container at room temp for up to 1 week, or freeze for 3 months. Darker roux (peanut butter-colored or beyond) keeps slightly less time. Always let it cool completely before sealing—trapped steam means mold.
Why You’ll Love This Recipe
- One Bowl Wonder: I just dump flour, butter, and oil in a pan—no fancy prep, no mess.
- Rich and Toasty: The flour browns to a deep, nutty depth that makes gumbo taste like it simmered all day.
- Meal Prep Magic: I make a big batch, store it in a jar, and pull out spoonfuls for stews, sauces, or even gravy all week.
- Pantry Staples Only: Flour, butter, oil—things I always have. Honestly, it costs pennies and saves me from last-minute grocery runs.
Step-by-Step Instructions for Dry Roux
Master this fundamental technique and you’ll build rich, authentic sauces with deep, nutty flavor.
Step 1: Combine the Fat Base
In a heavy-bottomed skillet or Dutch oven, melt the 0.5 cup unsalted butter over medium heat. As it melts, add the 0.5 cup vegetable oil and stir to combine. The oil prevents the butter from burning while allowing the flour to cook evenly.
You want the fat mixture to reach a gentle shimmer but not smoke. If it starts to smoke, reduce the heat immediately—this means it’s too hot and the flour will burn. The ideal temperature is 350-375°F, but go by visual cues rather than a thermometer.
Step 2: Whisk in the Flour Gradually
Slowly sprinkle the 0.5 cup all-purpose flour into the hot fat, whisking constantly with a wooden spoon or silicone spatula. This gradual incorporation prevents clumping and ensures a smooth mixture. Don’t dump it all in at once—you’ll end up with a lumpy paste that won’t cook evenly.
As you whisk, the mixture will thicken and take on a paste-like consistency. Keep it moving constantly to prevent hot spots from forming. You’re aiming for a uniform, bubble-free surface that looks like wet sand. This step usually takes 2-3 minutes of steady whisking.
Step 3: Cook to the Perfect Color
Continue cooking the roux over medium heat, stirring frequently. After 10-12 minutes, it will begin to take on a light tan color. This is the peanut butter stage—keep going. The smell will change from raw flour to a warm, nutty aroma that fills your kitchen.
For a classic dry roux used in gumbo and other Creole dishes, you want to reach a deep chocolate brown color, like milk chocolate. This takes 25-35 minutes total. The darker it gets, the more complex the flavor, but be vigilant—it can go from perfect to burnt in 30 seconds. If you see black specks, you’ve gone too far and need to start over.
Step 4: Season and Store
Once the roux reaches your desired color, immediately remove it from the heat. Stir in the 0.25 tsp kosher salt, 0.125 tsp white pepper, and 0.125 tsp cayenne pepper. The spices will bloom in the hot roux, deepening their flavor impact.
Transfer the roux to a heatproof bowl to stop the cooking process. Let it cool completely before storing. It will keep in an airtight container in the refrigerator for up to 1 month, or you can freeze it for longer storage. When ready to use, simply scoop out what you need and add it directly to your sauce or stew.
Pro Tips For Making Dry Roux
- Stir Constantly: Keep that whisk moving nonstop—once you stop, the flour will burn in seconds, especially after it turns a deep peanut butter color.
- Use Equal Fat: Measure your butter and oil by volume, not weight, and keep them exactly equal to the flour for a smooth, lump-free roux every time.
- Skip the High Heat: I learned this the hard way—medium-low heat is all you need; high heat scorches the flour before it can develop that rich, nutty flavor.
- Toast to Chocolate: Pull the roux off when it hits the color of milk chocolate; it’ll darken another shade as it carries over, and that’s the sweet spot for gumbo.
Make-Ahead Tips for This dry roux
Prep Ahead Strategy
I always make a double batch of this flavor base when I’m already in the kitchen. It takes the same effort whether you’re making ½ cup or 1 cup of fat and flour. Just use a wider pot to give the mixture room to cook evenly. 💡
Cool Completely First
Never seal hot roux in a container—it traps steam that creates condensation, which leads to mold. Spread it on a baking sheet to cool quickly, then transfer to airtight glass jars. This method prevents any moisture buildup.
Refrigerator Storage
Your roux will keep in the fridge for up to 1 month in a sealed container. I use mason jars because they’re easy to sterilize and create a perfect seal. The flavor actually deepens slightly over time.
Freezing for Later
For long-term storage, portion the cooled roux into ice cube trays. Once frozen, transfer the cubes to a freezer bag. This lets you grab just 1-2 tablespoons as needed. It’ll keep for 3 months without quality loss. ❄️
Reheating Tips
No need to thaw frozen roux before using. Add it directly to hot liquid in your sauce or stew—it’ll melt and incorporate beautifully. If stored in the fridge, give it 10 minutes at room temp before using.
Color Preservation
Darker roux can separate slightly during storage. Just give it a good stir before using. If the color looks uneven, it’s still perfectly fine—the flavor remains intact. Trust your nose; it should smell deeply nutty.
Nutrition Facts
Frequently Asked Questions
What’s the best fat for making this?
Butter gives the richest flavor, but use a 50/50 butter-oil blend to prevent burning. For dairy-free, vegetable oil or ghee work perfectly. Each fat changes the smoke point and final taste.
How do I know when it’s done?
Watch for color and aroma. A light roux takes 5-10 minutes, while a dark chocolate color needs 25-35 minutes. It’s ready when it smells nutty, not raw. Burnt smells mean it’s overcooked.
Can I make it in advance?
Store cooled roux in an airtight container at room temp for 1 week, fridge for 1 month, or freeze for 3 months. Portion into ice cubes for easy use.
Why does it need constant stirring?
Stirring prevents hot spots and ensures even cooking. Without it, flour can burn in seconds, especially as it darkens. Use a wooden spoon for best control.

Trained in classic French technique but raised on slow-cooked ribs and spicy rubs, she blends culinary skill with smoke and soul.
- Recipe for Boneless Pork Chops in Cast Iron Skillet: Sear and Baste to Juicy Perfection - October 3, 2026
- Recipe for Boneless Cross Rib Roast: Slow-Roasted Beef with Herb Crust - October 3, 2026
- Hamburgers in Sauce Recipe Crock Pot: Slow-Cooked Savory Delight - October 3, 2026