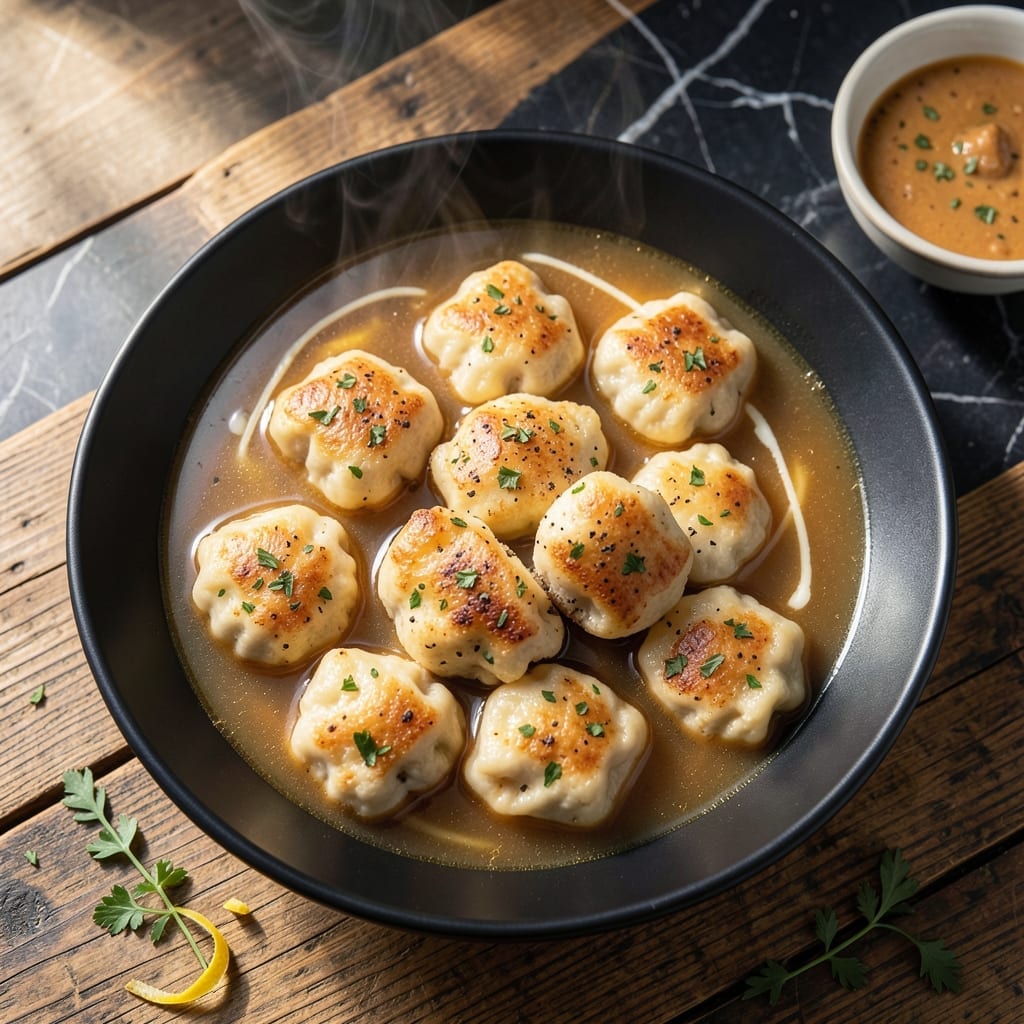
There’s nothing quite like the comfort of fluffy dumplings floating in a simmering pot of stew or soup. This method using Bisquick delivers light-as-air results with minimal effort.
The beauty lies in the simplicity: just mix, drop, and cook. In 15 minutes, you’ll have tender dumplings that soak up the surrounding liquid beautifully. No yeast, no resting time—just pantry staples and a hot broth.
Each bite offers that perfect balance of softness and substance, with edges that hold their shape while remaining melt-in-your-mouth tender. The Bisquick base ensures consistent texture every time.
Serve these over chicken and dumplings or in a hearty vegetable stew. The technique works for any broth-based dish needing that comforting touch.
Ingredients for Dumplings Recipe Bisquick
Pantry staples plus Bisquick create these tender, fluffy dumplings in minutes.
| Ingredient | Amount | Notes |
|---|---|---|
| Bisquick Baking Mix 🥣 | 2 cups | Original formula preferred |
| All-Purpose Flour 🌾 | ¼ cup | For lightening texture |
| Milk 🥛 | 0.67 cup | Whole for richness |
| Large Egg 🥚 | 1 whole | Beaten, room temperature |
| Unsalted Butter 🧈 | 2 tbsp | Melted for flavor |
| Baking Powder 🧂 | 1 tsp | Ensures extra lift |
| Salt 🧂 | ½ tsp | Fine sea salt preferred |
| Dried Parsley 🌿 | 1 tsp | For color and flavor |
| Black Pepper 🌶️ | ¼ tsp | Freshly ground |
| Chicken Broth 🍲 | 4 cups | Low-sodium preferred |
| Fresh Thyme 🌿 | 1 tsp | Chopped, optional garnish |
[recipe_ingredient_scaler]
The Bisquick is non-negotiable for that signature texture. Use the original formula—the heart-smart version doesn’t rise as high. Most supermarkets carry it in the baking aisle, but Target has the best bulk pricing. The milk should be whole for maximum richness (2% works in a pinch). If you’re out of baking powder, don’t skip it—this isn’t the time for improvisation.
No Bisquick? Self-rising flour plus 1 tsp baking powder per cup gets you close, but the texture won’t be identical. Short on milk? Buttermilk at the same quantity adds a nice tang. The parsley is optional, but fresh herbs add a bright finish (thyme works too). For a richer flavor, swap the milk for half-and-half—just don’t overmix the batter.
These cook directly in the broth, so no storage needed for the dumplings themselves. Leftover cooked dumplings keep in the fridge for 2-3 days, but they’re best fresh. The batter can be mixed 30 minutes ahead—just stir before dropping into the pot.
Why You’ll Love This Recipe
- One Bowl Wonder: I just dump the Bisquick, flour, egg, and milk into a single bowl—no fancy prep, no fuss.
- Buttery Richness: That melted unsalted butter in the dough makes them tender with a subtle richness that’s hard to resist.
- Weeknight Hero: I’ve served these with stew, soup, and even just gravy—my kids devour them every time.
Step-by-Step Instructions for Bisquick Dumplings
This streamlined method delivers light, tender dumplings with minimal effort and time.
Step 1: Prepare the Dumpling Dough
In a large bowl, whisk together the 2 cups Bisquick Baking Mix, 0.25 cup All-Purpose Flour, 1 tsp Baking Powder, 0.5 tsp Salt, 1 tsp Dried Parsley, and 0.25 tsp Black Pepper. This dry mix ensures even distribution of leavening agents for maximum lift.
Create a well in the center and add the 0.67 cup Milk, 1 whole Large Egg, and 2 tbsp Unsalted Butter (melted and slightly cooled). Stir just until the dry ingredients are moistened—overmixing develops gluten and creates tough dumplings. The batter will be thick and slightly lumpy.
Step 2: Simmer the Chicken Broth
Pour the 4 cups Chicken Broth into a large, deep skillet or Dutch oven. Bring to a gentle simmer over medium-high heat. I prefer using low-sodium broth here so I can control the seasoning precisely.
Once simmering, reduce heat to medium-low to maintain a steady, gentle simmer. You want small bubbles breaking the surface, not a rolling boil—vigorous boiling will break apart your dumplings as they cook. This is the moment that matters: stable heat ensures even cooking.
Step 3: Drop and Steam the Dumplings
Using a tablespoon or small cookie scoop, drop heaping portions of dough into the simmering broth. Space them about 1 inch apart to allow for expansion. I typically fit about 8 dumplings in a 12-inch skillet without overcrowding.
Immediately cover the skillet with a tight-fitting lid. Steam the dumplings for 12-15 minutes without lifting the lid. Resist the urge to peek—the trapped steam is what makes these pillows so fluffy. You’ll know they’re done when a toothpick inserted into the center comes out clean.
Step 4: Finish and Serve
Once cooked, remove the lid and let the dumplings rest in the broth for 2 minutes. This brief rest allows them to firm up slightly while absorbing a bit more flavor. Sprinkle with 1 tsp Fresh Thyme if using—it adds a bright, herbal note that complements the richness.
Serve immediately while hot, spooning the dumplings directly from the broth into shallow bowls. Each serving should include 2-3 dumplings and plenty of the flavorful cooking liquid. The broth will have thickened slightly from the dumpling starch, creating a light, velvety sauce.
Pro Tips For Making Dumplings Recipe Bisquick
- Use Cold Butter: Grate the unsalted butter straight from the fridge—about 2 tablespoons—into the Bisquick mix. I learned this the hard way after my dumplings turned out dense and flat.
- Don’t Overmix: Stir just until the dough comes together, even if it looks shaggy. After making tough dumplings too many times, I finally realized less mixing means lighter texture.
- Simmer, Don’t Boil: Keep the broth at a gentle simmer when cooking the dumplings. I used to crank the heat, but boiling makes them gummy and uneven.
- Add Extra Flour: Dust your spoon or hands with all-purpose flour before dropping the dough into the broth. Sounds small, but it keeps them from sticking and falling apart.
Wine and Beer Pairings for This Dish
Crisp White Wines
A dry Sauvignon Blanc from New Zealand cuts through the richness with its zesty acidity and citrus notes. The Cloudy Bay or Kim Crawford labels are my go-to choices for $15-20. 🍷
Light Red Options
For red wine lovers, a chilled Pinot Noir with bright acidity works beautifully. Look for Oregon producers like A to Z Wineworks or Eyrie Vineyards. Serve at 55-60°F to enhance its fruit-forward character.
Classic Beer Pairings
An American wheat beer like Shock Top or Blue Moon complements the fluffy texture with its light body and citrus notes. The effervescence cleanses your palate between bites of the rich broth. 🍺
Malty Alternatives
Try a smooth amber ale such as Fat Tire from New Belgium. Its caramel notes pair well with the buttery dumplings, while the moderate hop bitterness balances the dish. Serve at 45-50°F for optimal flavor.
Non-Alcoholic Choices
For a non-alcoholic option, sparkling apple cider from Martinelli’s offers the same palate-cleansing effect. The bubbles and sweetness contrast nicely with the savory broth. Chill thoroughly before serving.
Nutrition Facts
Frequently Asked Questions
Can I make these without an egg?
Yes! Replace the egg with 2 tablespoons of additional milk or plain yogurt. The texture may be slightly denser but still fluffy.
Why are my dumplings tough?
Overmixing the batter develops gluten. Stir just until dry ingredients are moistened—lumps are fine! Also, ensure the broth is simmering, not boiling.
Can I bake these instead?
For baked dumplings, drop batter onto a greased baking sheet and bake at 400°F for 12-15 minutes. They’ll be less fluffy but still delicious.
How do I store leftovers?
Store cooked dumplings in an airtight container with broth for 2-3 days. Reheat gently on the stove—microwaving can make them rubbery.

Trained in classic French technique but raised on slow-cooked ribs and spicy rubs, she blends culinary skill with smoke and soul.
- Recipe for Boneless Pork Chops in Cast Iron Skillet: Sear and Baste to Juicy Perfection - October 3, 2026
- Recipe for Boneless Cross Rib Roast: Slow-Roasted Beef with Herb Crust - October 3, 2026
- Hamburgers in Sauce Recipe Crock Pot: Slow-Cooked Savory Delight - October 3, 2026