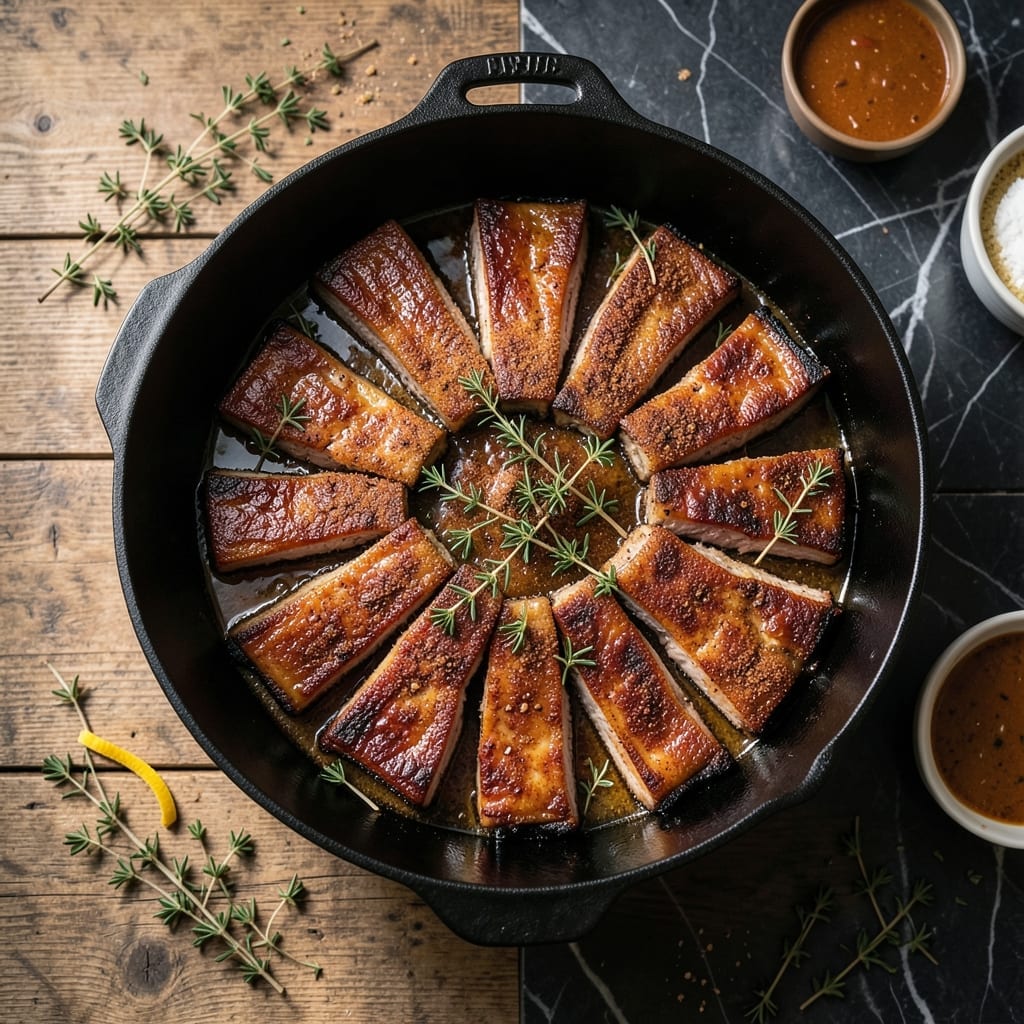
There’s nothing like the aroma of slow-braised pork ribs filling the kitchen, a scent that brings me back to my family’s backyard cookouts. This method transforms tough ribs into meat-falling-off-the-bone perfection with minimal effort.
The Dutch oven locks in moisture and flavor, allowing the ribs to tenderize slowly in their own juices. A simple dry rub and a few hours of gentle heat create results that rival any pitmaster’s work.
What emerges is tender, flavorful pork with a rich, caramelized exterior. The ribs absorb every bit of the braising liquid, making each bite deeply satisfying.
Serve with roasted potatoes or cornbread to soak up the juices. Here’s how to achieve this at home.
Ingredients for Dutch Oven Pork Ribs
A few pantry staples and a long, slow braise transform pork ribs into something magical.
| Ingredient | Amount | Notes |
|---|---|---|
| Pork Spareribs 🍖 | 3 lb | Bone-in, trimmed of excess fat |
| Kosher Salt 🧂 | 1 ½ tbsp | Diamond Crystal preferred for even seasoning |
| Black Pepper 🌶️ | 1 tbsp | Freshly ground for best flavor |
| Smoked Paprika 🌶️ | 1 tbsp | Sweet or hot variety |
| Garlic Powder 🧄 | 1 tbsp | Not garlic salt substitute |
| Onion Powder 🧅 | 1 tbsp | Fresh ground preferred |
| Brown Sugar 🍚 | ¼ cup | Light or dark works |
| Olive Oil 🫒 | 2 tbsp | Extra-virgin for depth |
| Low-Sodium Chicken Broth 🍲 | 2 cups | Or substitute beef broth |
| Apple Cider Vinegar 🍏 | ¼ cup | Balances the richness |
| Yellow Onion 🧅 | 1 whole | Medium size, diced |
| Garlic Cloves 🧄 | 4 cloves | Minced for braising liquid |
| Tomato Paste 🍅 | 2 tbsp | Canned for convenience |
[recipe_ingredient_scaler]
The ribs are everything here. Spareribs give you that perfect fat-to-meat ratio—avoid pre-trimmed if you can find them whole (butcher will do it for free). I grab mine from Costco for bulk savings, but any grocery store with a decent meat counter works. Look for ribs with good marbling and avoid anything that looks dry or gray. The dry rub should coat every surface—don’t skimp on the smoked paprika, it’s the flavor backbone.
No brown sugar? Substitute white sugar plus a pinch of molasses. Out of apple cider vinegar? Red wine vinegar at half the amount works in a pinch. The broth can be homemade or store-bought (I like Swanson’s low-sodium), but avoid anything with added MSG if you’re sensitive. For extra depth, swap one cup of broth for dark beer—a stout or porter adds richness. Tomato paste in a tube from Trader Joe’s means no waste.
Braising liquid freezes beautifully for 3 months. Leftovers keep in the fridge for 4-5 days—reheat gently to keep the meat tender. The ribs taste even better the next day (the flavors meld overnight). Just don’t microwave them or they’ll dry out—oven or stovetop only.
Why You’ll Love This Recipe
- One Pot Magic: I just brown the ribs, toss in the spices, and let the Dutch oven do the rest—no babysitting required.
- Smoky Depth: Honestly, the smoked paprika and garlic powder create this rich, fall-off-the-bone flavor that’s ridiculous for how little effort it takes.
- Feeds a Crowd: Between us, this is my go-to for Sunday dinners—plenty for seconds, and the leftovers make killer sandwiches.
- Budget Friendly: Pork spareribs stretch far, and a little salt and spice turn them into something that tastes way fancier than the cost.
Step-by-Step Instructions for Dutch Oven Pork Ribs
Here’s the method. Simple, tested, and foolproof for perfect ribs every time.
Step 1: Season the Ribs Generously
Pat the 3 lb Pork Spareribs completely dry with paper towels—this ensures the dry rub adheres properly. In a small bowl, combine the 1.5 tbsp Kosher Salt, 1 tbsp Black Pepper, 1 tbsp Smoked Paprika, 1 tbsp Garlic Powder, 1 tbsp Onion Powder, and 0.25 cup Brown Sugar.
Rub this mixture evenly all over the ribs, pressing it into the meat so it forms a crust. I like to let the seasoned ribs sit at room temperature for 20-30 minutes while I prep the rest of the ingredients—this allows the salt to begin penetrating the meat for better flavor.
Step 2: Sear the Ribs to Build Flavor
Heat the 2 tbsp Olive Oil in a large Dutch oven over medium-high heat until it shimmers. Add the ribs in a single layer (work in batches if necessary) and sear for 3-4 minutes per side until deep golden brown.
Don’t rush this step—the sear creates a flavorful fond on the bottom of the pot that will enrich your braising liquid. You’ll know it’s ready to flip when the meat releases easily from the pot. Transfer the seared ribs to a plate and set aside.
Step 3: Sauté Aromatics and Deglaze
In the same Dutch oven, add the diced 1 whole Yellow Onion and cook for 3-4 minutes until softened and just beginning to brown. Stir in the minced 4 cloves Garlic Cloves and cook for 30 seconds until fragrant.
Add the 2 tbsp Tomato Paste and cook for 1 minute, stirring constantly, until it darkens slightly. This deepens its flavor. Pour in the 0.25 cup Apple Cider Vinegar and scrape up all the browned bits from the bottom of the pot with a wooden spoon.
Step 4: Braise Low and Slow
Return the ribs to the Dutch oven, bone-side down. Pour in the 2 cups Low-Sodium Chicken Broth—it should come about halfway up the ribs. Bring the liquid to a gentle simmer, then reduce the heat to low, cover, and let it braise undisturbed for 2 to 2.5 hours.
Check occasionally to ensure the liquid hasn’t reduced too much—add a splash of broth if needed. The ribs are done when the meat pulls away easily from the bone and is fork-tender. This slow cooking process is what transforms tough ribs into melt-in-your-mouth perfection.
Step 5: Reduce the Sauce and Serve
Once the ribs are tender, carefully transfer them to a serving platter. Skim any excess fat from the surface of the braising liquid, then increase the heat to medium-high and let it simmer for 5-7 minutes until it reduces slightly and thickens into a light sauce.
Spoon this sauce over the ribs before serving. The sauce should be rich, slightly tangy from the apple cider vinegar, and packed with the deep, smoky flavors from the spices. Serve immediately with your favorite sides—mashed potatoes or crusty bread are perfect for soaking up that incredible sauce.
Pro Tips For Making Dutch Oven Pork Ribs
- Preheat the Dutch Oven: Get that pot screaming hot before adding the ribs—about 5 minutes over medium-high heat. I learned this the hard way after my first batch steamed instead of seared.
- Pat Ribs Dry: Blot the spareribs with paper towels until they’re bone-dry. Sounds tedious, but it’s the only way to get that deep brown crust with smoked paprika.
- Don’t Crowd the Pot: Brown the ribs in batches if needed—shoving them all in at once drops the temperature and you’ll end up boiling them in their own juices.
- Use a Meat Thermometer: Pull the ribs when they hit 195-203°F internally, not just when the timer dings. After overcooking my first rack, I finally figured out tenderness isn’t about time, it’s about temp.
Dietary Considerations for These Flavors
Gluten-Free Friendly
This dish is naturally gluten-free as written, making it perfect for anyone with celiac disease or gluten sensitivity. All ingredients—from the pork spareribs to the spices—are inherently gluten-free. Just double-check your chicken broth brand, as some store-bought versions contain wheat. 💪
Low-Carb Option
To reduce carbs, simply omit the 0.25 cup brown sugar from the dry rub. The ribs will still be flavorful thanks to the smoked paprika and other spices. The apple cider vinegar adds tang without significant carbs, keeping this dish keto-friendly.
Dairy-Free by Default
There’s no dairy in this recipe, so it’s safe for those with lactose intolerance or dairy allergies. The richness comes from the pork itself and the caramelized braising liquid. No substitutions needed—just enjoy as is.
Lower-Sodium Adjustments
Cut the 1.5 tbsp kosher salt in half and use low-sodium chicken broth to reduce sodium content significantly. The smoked paprika and garlic powder still pack a flavor punch without the extra salt. I often do this when cooking for friends watching their sodium intake.
Paleo Adaptation
For a paleo-friendly version, replace the brown sugar with coconut sugar or maple syrup (about 2 tbsp). Ensure your tomato paste has no additives. The rest of the ingredients already fit paleo guidelines. 🌱
Allergen Note
This recipe contains no common allergens like nuts, eggs, or soy. However, always verify the labels on your spices and broth, as some brands process their products in facilities that handle allergens. Safety first!
Nutrition Facts
Frequently Asked Questions
Should I use baby back or spareribs?
Spareribs work best for slow braising—they have more connective tissue that breaks down into tender, flavorful meat. Baby backs are leaner and may dry out during the long cook. Either will work in a pinch, though!
Can I make this in a slow cooker instead?
Yes! Brown the ribs first, then transfer to your slow cooker with all braising liquid. Cook on low for 6-8 hours or high for 4-5 hours. The texture will be slightly different but still delicious.
Why did my ribs turn out tough?
This usually means they didn’t braise long enough or the heat was too high. Keep the liquid at a gentle simmer and cook until the meat pulls away from the bone easily—usually 2-2.5 hours.
Can I add vegetables to the pot?
Carrots, celery, and potatoes hold up well. Add them during the last 1 hour of cooking so they don’t turn to mush. They’ll soak up all that delicious flavor.

Trained in classic French technique but raised on slow-cooked ribs and spicy rubs, she blends culinary skill with smoke and soul.
- Recipe for Boneless Pork Chops in Cast Iron Skillet: Sear and Baste to Juicy Perfection - October 3, 2026
- Recipe for Boneless Cross Rib Roast: Slow-Roasted Beef with Herb Crust - October 3, 2026
- Hamburgers in Sauce Recipe Crock Pot: Slow-Cooked Savory Delight - October 3, 2026