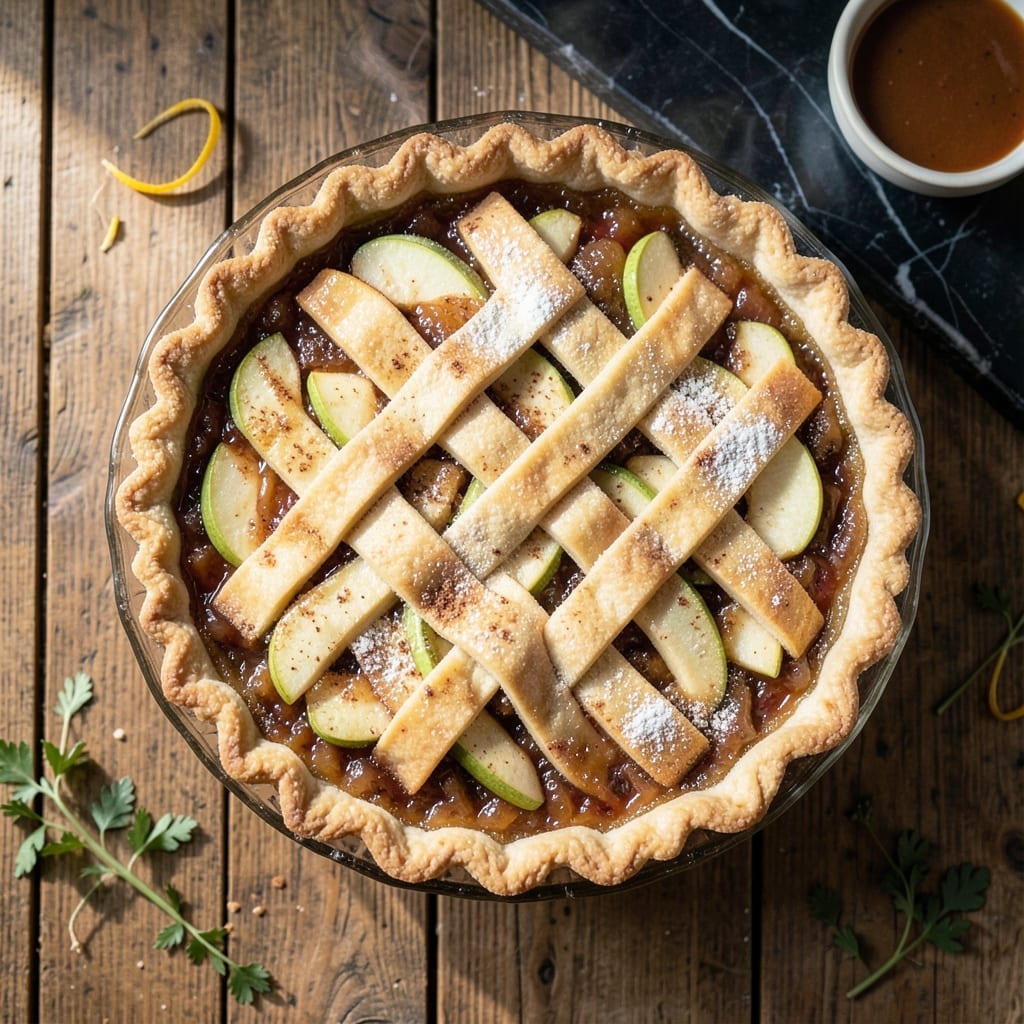
This recipe proves that classic apple pie doesn’t require homemade crust to be exceptional. The shortcut delivers all the warmth and comfort of tradition.
With a flaky store-bought base and perfectly spiced filling, it captures that nostalgic taste in far less time. The result is a foolproof dessert that still feels special.
Ingredients for Easy Apple Pie Recipe with Store-bought Crust
Store-bought crust meets spiced apples for a nostalgic dessert with minimal effort.
| Ingredient | Amount | Notes |
|---|---|---|
| Store-Bought Pie Crust 🥧 | 2 sheets | Refrigerated, ready-to-use |
| Granny Smith Apples 🍏 | 6 whole | Peeled, cored, sliced thin |
| Granulated Sugar 🍚 | ¾ cup | Plus 2 tbsp for topping |
| Brown Sugar 🟤 | ½ cup | Light or dark, packed |
| All-Purpose Flour 🌾 | 2 tbsp | For thickening filling |
| Ground Cinnamon 🌿 | 1 ½ tsp | Freshly opened for best flavor |
| Ground Nutmeg 🌰 | ¼ tsp | Freshly grated preferred |
| Lemon Juice 🍋 | 1 tbsp | Freshly squeezed from lemon |
| Unsalted Butter 🧈 | 2 tbsp | Cold, cubed for topping |
| Vanilla Extract 🌿 | 1 tsp | Pure extract for best flavor |
| Salt 🧂 | ¼ tsp | Fine grain for even distribution |
| Large Egg 🥚 | 1 whole | For egg wash finish |
[recipe_ingredient_scaler]
The crust is the shortcut hero here. Pillsbury refrigerated pie crusts are the gold standard—flaky, reliable, and found in every grocery store. For apples, Granny Smith holds its shape best, but a mix with Honeycrisp adds sweetness. Look for firm fruit without bruises. The butter should be real, unsalted for the topping—no margarine substitutions here.
No Granny Smith? Braeburn or Jonathan work well too (avoid Red Delicious—they turn mushy). Swap brown sugar for maple syrup at three-quarters the amount, though the texture changes slightly. Out of cinnamon? Apple pie spice blend is a direct 1:1 replacement. For the egg wash, a brush of milk or cream gives a similar sheen (just less golden).
Assemble the pie just before baking—prevents soggy crust. Leftovers keep 2-3 days at room temperature (covered), or freeze for 2 months. The filling thickens as it cools, so resist slicing for at least 2 hours.
Why You’ll Love This Recipe
- No-Fuss Assembly: I just roll out the store-bought crust, dump in the Granny Smiths tossed with sugar and flour, and fold it over—no lattice, no stress.
- Tart-Sweet Magic: The Granny Smiths stay crisp under that buttery crust, while the brown sugar caramelizes into pockets of gooey goodness.
- Weeknight Hero: I’ve served this for Sunday dessert and Tuesday breakfast. Honestly, it feels fancy either way.
- Pantry Friendly: I always have these staples on hand, so a warm apple pie is never more than an hour away.
Step-by-Step Instructions for Apple Pie With Store-Bought Crust
This method delivers classic flavor with minimal effort and maximum reliability.
Step 1: Prepare the Apple Filling
Peel, core, and thinly slice all 6 whole Granny Smith Apples. As you work, transfer them to a large bowl and immediately toss with 1 tbsp Lemon Juice—this prevents browning and adds a bright note to the filling.
Add 0.75 cup Granulated Sugar, 0.5 cup Brown Sugar, 2 tbsp All-Purpose Flour, 1.5 tsp Ground Cinnamon, 0.25 tsp Ground Nutmeg, 0.25 tsp Salt, and 1 tsp Vanilla Extract. Toss until the apples are evenly coated and the mixture looks glossy. The flour will thicken the juices as the pie bakes.
Step 2: Assemble the Pie
Unroll 1 sheet Store-Bought Pie Crust and transfer it to a 9-inch pie dish. Press it gently into the bottom and up the sides without stretching. Trim any excess dough hanging over the edge, leaving a slight overhang.
Pour the apple filling into the crust, mounding it slightly in the center. Dot the top with 2 tbsp Unsalted Butter cut into small cubes. This adds richness and helps create steam for tender apples.
Step 3: Add the Top Crust and Seal
Unroll the second sheet Store-Bought Pie Crust over the filling. Trim the edges, leaving a ½-inch overhang, then fold the bottom crust edges up and over the top crust. Crimp the edges with your fingers or a fork to seal tightly—this prevents the filling from bubbling out.
Cut 4-5 slits in the center of the top crust to allow steam to escape. This prevents a soggy crust by letting moisture release during baking.
Step 4: Bake to Golden Perfection
Preheat your oven to 375°F. Whisk the 1 whole Large Egg with 1 tablespoon water and brush it evenly over the top crust. Sprinkle with 2 tbsp Granulated Sugar for extra crunch and shine.
Bake on the middle rack for 50-60 minutes until the crust is deep golden brown and the filling bubbles visibly through the slits. If the edges brown too quickly, cover them loosely with foil.
Step 5: Cool Before Slicing
Remove the pie from the oven and let it cool on a wire rack for at least 2 hours. This resting time allows the filling to set completely—cutting too soon will result in a runny slice.
Serve warm or at room temperature. Each portion should have a flaky crust, tender apples, and a glossy, lightly spiced filling that holds its shape when sliced.
Pro Tips For Making Easy Apple Pie Recipe With Store-Bought Crust
- Pre-Bake the Crust: Blind-bake the bottom crust for 8-10 minutes at 375°F before adding filling. I learned this the hard way—without it, the crust stays soggy under all that juicy apple.
- Slice Apples Thin: Cut Granny Smith apples into 1/4-inch slices, not chunks. They soften faster and pack tighter, so you get more flavor in every bite.
- Thicken the Filling: Toss the apples with 2 tablespoons of flour before adding sugars. After burning three batches, I finally figured out this prevents a runny mess.
- Vent the Top: Cut 4-5 slits in the top crust, not just one. Sounds weird, but it works—steam escapes evenly and the pie bakes through without bursting.
Health Benefits of These Flavors
Fiber Richness
Apples provide a significant dose of dietary fiber, with one serving of this pie offering about 4 grams. Fiber supports digestion and helps maintain steady blood sugar levels, making this a more balanced dessert option. I love that it satisfies my sweet tooth while contributing to daily fiber needs. 💪
Vitamin C Boost
Each serving contains 10-15% of your daily vitamin C from the apples, an antioxidant that supports immune function. The lemon juice adds a small extra boost. This is particularly valuable during colder months when we might not be eating as many fresh fruits.
Natural Energy Source
The combination of natural sugars from apples and the complex carbohydrates in the crust provides sustained energy. Unlike processed sweets, this pie offers energy that releases more gradually, helping avoid that post-dessert crash.
Minimal Added Ingredients
With just 1.25 cups total sugar for the entire pie, this recipe keeps added sweeteners in check. The spices like cinnamon and nutmeg add flavor without extra sugar. I often reduce the sugar by 25% when using particularly sweet apple varieties. ✨
Heart Healthy Fats
The 2 tbsp unsalted butter provides healthy fats that are essential for nutrient absorption. When paired with the fiber from apples, this creates a more satisfying dessert. I always opt for real butter over margarine for both flavor and nutritional benefits.
Portion Control
Cutting the pie into 8 equal slices makes it easy to enjoy a reasonable portion size. Each slice contains about 300-350 calories, making it a treat that can fit into a balanced diet when enjoyed in moderation.
Nutrition Facts
Frequently Asked Questions
Can I use a different type of apple?
Honeycrisp or Braeburn work well. Avoid Red Delicious as they turn mushy. A mix of sweet and tart varieties adds depth.
How do I prevent a soggy bottom crust?
Bake on the lower oven rack and ensure steam vents are cut into the top crust. Letting it cool fully before slicing also helps.
Can I make this pie ahead of time?
Yes! Assemble and refrigerate for up to 24 hours before baking. Or bake, cool, and store at room temperature for 2-3 days.
Why did my filling turn out runny?
Likely not enough cooling time. The filling sets as it cools—wait at least 2 hours before slicing.

Trained in classic French technique but raised on slow-cooked ribs and spicy rubs, she blends culinary skill with smoke and soul.
- Recipe for Boneless Pork Chops in Cast Iron Skillet: Sear and Baste to Juicy Perfection - October 3, 2026
- Recipe for Boneless Cross Rib Roast: Slow-Roasted Beef with Herb Crust - October 3, 2026
- Hamburgers in Sauce Recipe Crock Pot: Slow-Cooked Savory Delight - October 3, 2026