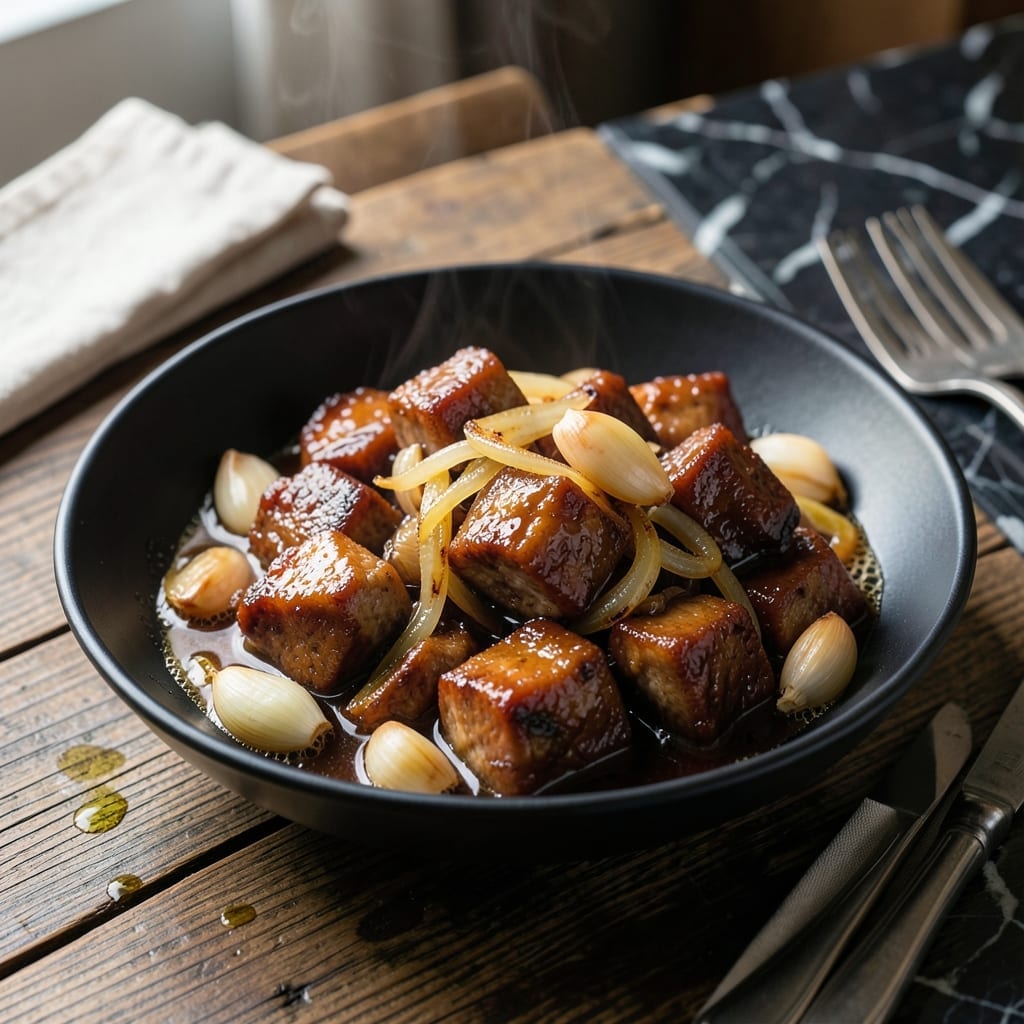
This Filipino braised pork belly brings rich, tangy flavors with minimal effort. I developed this version after tasting authentic humba in Charleston, adapting it for home kitchens with simple ingredients.
The dish relies on soy sauce for its deep umami base, balanced with vinegar and brown sugar for that signature sweet-savory profile. Slow cooking transforms the pork into tender, fall-apart pieces.
What emerges is a dish with layers of flavor—caramelized edges, a silky sauce, and meat that melts in your mouth. It’s the kind of recipe that tastes like it took hours but comes together with easy steps.
Serve with steamed rice to soak up every drop of sauce. This is comfort food at its finest.
Ingredients for Easy Pork Humba Recipe in Soy Sauce
Simple pantry staples and a few fresh items create this rich, tangy braise with minimal effort.
| Ingredient | Amount | Notes |
|---|---|---|
| Pork Belly 🥓 | 2 lb | Cut into 2-inch cubes |
| Soy Sauce 🫒 | ¾ cup | Regular or low-sodium |
| White Vinegar 🍶 | ½ cup | Or cane vinegar |
| Brown Sugar 🍚 | ½ cup | Packed, light or dark |
| Garlic Cloves 🧄 | 8 cloves | Peeled and minced |
| Yellow Onion 🧅 | 1 whole | Medium, thinly sliced |
| Bay Leaves 🍃 | 3 pieces | Dried, for aromatics |
| Black Peppercorns 🌶️ | 1 tsp | Whole or ground |
| Water 💧 | 1 cup | For braising liquid |
| Cooking Oil 🫒 | 2 tbsp | Neutral oil for searing |
| Green Onions 🧅 | 3 whole | Thinly sliced for garnish |
| Pineapple Juice 🍍 | ½ cup | Optional for tanginess |
[recipe_ingredient_scaler]
The pork belly is key—look for well-marbled cuts at your butcher or the meat section of Whole Foods. Ask them to cube it for you if you’re short on time. Soy sauce quality matters here; Kikkoman or Silver Swan are reliable brands. I always grab extra garlic since it’s the backbone of the dish (fresh heads from the produce section, not the jarred stuff).
No pork belly? Pork shoulder at half the cook time works in a pinch. Brown sugar can be swapped for coconut sugar if you prefer. For vinegar, apple cider works too, though white vinegar keeps the color cleaner. The pineapple juice is optional but adds a nice brightness—canned or bottled is fine (just no added sugar).
This keeps 4-5 days in the fridge and the flavors deepen overnight. Freeze for up to 3 months in airtight containers. Reheat gently to keep the pork tender (microwave works, but stovetop is better).
Why You’ll Love This Recipe
- One Pot Wonder: I toss everything in a single pot and let it simmer—no fancy techniques, just pork belly soaking up that soy-vinegar-sugar magic.
- Sweet-Savory Balance: The brown sugar caramelizes with the soy sauce, while the vinegar cuts through the richness. Honestly, it’s the kind of flavor that lingers.
- Feeds a Crowd: I make a big batch for Sunday lunch, and it reheats beautifully for busy weeknights.
- Budget Stretcher: Pork belly is affordable, and a little goes a long way with the bold garlic and soy base. I’ll be real: it’s my go-to for impressing without overspending.
Step-by-Step Instructions for Filipino-Style Braised Pork Belly
Here is the straightforward method for achieving perfectly tender and flavorful pork belly every time.
Step 1: Sear the Pork Belly Cubes
Start by heating the 2 tbsp cooking oil in a large pot or Dutch oven over medium-high heat. Add the 2 lb pork belly cubes in a single layer, working in batches if necessary to avoid overcrowding.
Sear the pork for 5-7 minutes until golden brown on all sides. This step builds a deep flavor foundation and renders some of the fat. Remove the pork and set it aside, but leave the rendered fat in the pot for the next step.
Step 2: Sauté Aromatics and Bloom Spices
In the same pot, reduce the heat to medium and add the 1 whole yellow onion and 8 cloves garlic cloves. Sauté for 2-3 minutes until the onion softens and becomes translucent.
Add the 3 pieces bay leaves and 1 tsp black peppercorns to the pot, stirring for 30 seconds until fragrant. This releases the aromatic oils from the spices, which will infuse the dish with rich, complex flavors.
Step 3: Build the Braising Liquid
Pour in the 0.75 cup soy sauce, 0.5 cup white vinegar, and 0.5 cup brown sugar. Stir well to dissolve the sugar completely. Add the 1 cup water and the 0.5 cup pineapple juice to the pot, then return the seared pork belly cubes.
The liquid should cover about three-quarters of the pork. Bring the mixture to a gentle boil, then reduce the heat to low to maintain a simmer. This ensures the pork cooks evenly without drying out.
Step 4: Braise Until Tender
Cover the pot and let the pork braise for 1.5 to 2 hours, stirring occasionally. The pork is done when it is fork-tender and the sauce has thickened slightly. If the liquid reduces too quickly, add a small amount of water to keep the pork submerged.
During the last 30 minutes of cooking, uncover the pot to allow the sauce to reduce and concentrate. The sauce should coat the back of a spoon and have a glossy appearance.
Step 5: Garnish and Serve
Once the pork is tender and the sauce has thickened, remove the pot from the heat. Discard the bay leaves and adjust the seasoning if needed. Transfer the pork to a serving dish and spoon the sauce over the top.
Garnish with the 3 whole green onions, thinly sliced, for a fresh, vibrant finish. Serve the pork humba hot with steamed rice to soak up the rich, savory sauce.
Pro Tips For Making Easy Pork Humba Recipe In Soy Sauce
- Sear the Belly First: I learned this the hard way—browning the pork belly cubes in batches before braising adds depth and keeps them from turning mushy. Use medium-high heat and don’t crowd the pan, or they’ll steam instead of crisp.
- Balance the Vinegar: After one too-tangy batch, I now add the white vinegar after the sugar caramelizes, not before. This way, it brightens the dish without overpowering the soy and brown sugar.
- Skip the Over-Stirring: Resist the urge to stir constantly once the sauce starts thickening. Let it reduce undisturbed for 5-10 minutes so the flavors meld and the pork absorbs the glaze properly.
- Use Fresh Garlic: Sounds obvious, but pre-minced garlic from a jar just doesn’t hold up in this long braise. Crush 6-8 fresh cloves instead—they’ll sweeten as they cook and infuse the oil beautifully.
Health Benefits of This Dish
Rich Protein Source
This dish delivers high-quality protein with about 40g per serving—perfect for muscle maintenance and repair. As someone who works with pork daily, I appreciate how this recipe turns affordable cuts into a protein-packed meal. 💪
Heart-Healthy Fats
Pork belly contains monounsaturated fats that support heart health when enjoyed in moderation. The slow cooking process renders excess fat, leaving tender meat with balanced nutritional value. I always recommend pairing it with veggies.
Essential Minerals
You’ll get a boost of iron and zinc from this creation—critical for immune function and energy levels. The soy sauce adds sodium, so I suggest using low-sodium soy sauce if watching your intake.
Vitamin B Complex
Pork is naturally rich in B vitamins, particularly B12 and thiamine, which help convert food into energy. This dish provides a significant portion of your daily needs in one satisfying serving.
These nutrients are especially important for active folks—I notice the difference on long days at the restaurant. ✨
Antioxidant Benefits
The garlic in this recipe offers antioxidant properties that combat inflammation. Combined with the vinegar’s acetic acid, it creates a dish that’s as nourishing as it is delicious. I always use fresh garlic for maximum benefit.
Nutrition Facts
Frequently Asked Questions
Can I use pork shoulder instead of pork belly?
Yes, pork shoulder works well as a substitute. Use the same quantity and cook for 1 to 1.5 hours since it cooks faster than pork belly. The texture will be slightly less fatty but still tender and flavorful.
Why does the sauce need to reduce at the end?
Reducing the sauce concentrates the flavors and creates a thicker, glossier consistency. This step ensures the sauce clings to the pork and rice, enhancing every bite with rich, balanced taste.
How do I prevent the pork from drying out?
Keep the heat at a gentle simmer and ensure the pork stays mostly submerged in liquid. Avoid boiling vigorously, and check occasionally to add water if needed. This guarantees fork-tender results.
Can I make this in a slow cooker?
Brown the pork first, then transfer everything to a slow cooker. Cook on low for 6-8 hours or high for 4-5 hours for melt-in-your-mouth pork.

Trained in classic French technique but raised on slow-cooked ribs and spicy rubs, she blends culinary skill with smoke and soul.
- Recipe for Boneless Pork Chops in Cast Iron Skillet: Sear and Baste to Juicy Perfection - October 3, 2026
- Recipe for Boneless Cross Rib Roast: Slow-Roasted Beef with Herb Crust - October 3, 2026
- Hamburgers in Sauce Recipe Crock Pot: Slow-Cooked Savory Delight - October 3, 2026