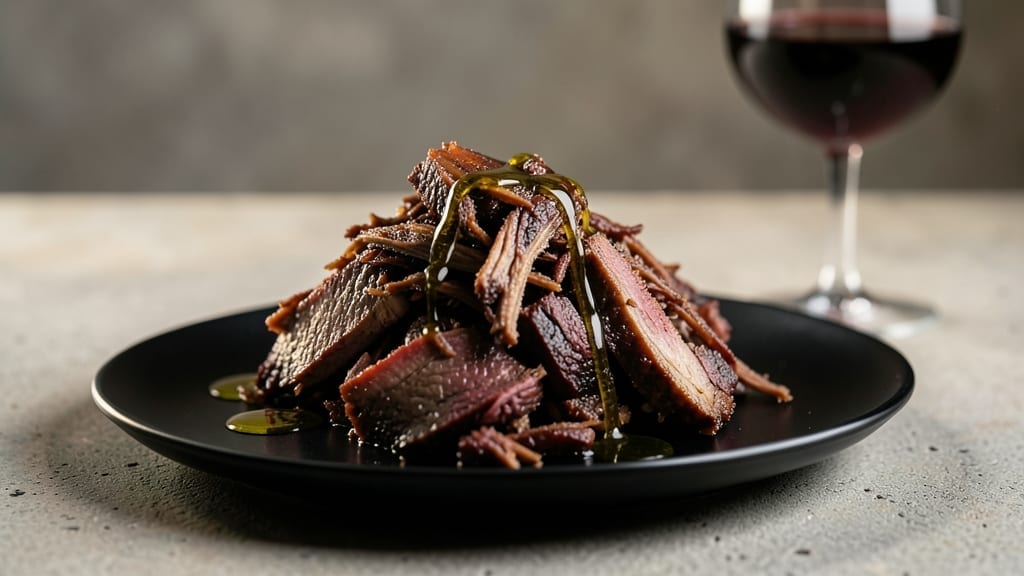
Mastering electric smoker pulled pork transforms tough cuts into melt-in-your-mouth perfection—something I perfected during my apprenticeship under Master Chef Chen in Charleston. The key lies in precise temperature control and patience, two elements that make this method foolproof even for home cooks.
Growing up in small-town Georgia, I learned pork’s transformative power, and this recipe captures that same magic in your backyard.
This recipe delivers restaurant-quality results using just your electric smoker, quality pork shoulder, and a simple dry rub. The process begins with proper preparation—trimming excess fat and applying a flavorful rub—before smoking at a consistent 225°F for 8-10 hours.
That low-and-slow approach breaks down collagen while building deep, smoky flavor without drying out the meat. The secret weapon? Wrapping the pork in butcher paper during the final hour to lock in moisture.
By the time you’re ready to serve, the pork will pull apart effortlessly, yielding tender, juicy shreds that cling to buns or soak up sauces. The bark will be rich and caramelized, with layers of wood-fired flavor that make every bite unforgettable.
This is the kind of pulled pork that turns casual cookouts into memorable gatherings—exactly what I strive for in every recipe I share.
Serve with classic coleslaw, toasted brioche buns, and a drizzle of tangy BBQ sauce for the full experience. Whether you’re feeding a crowd or meal prepping for the week, this method delivers consistent, professional results every time. Let’s get smoking!
Ingredients for electric smoker pulled pork
A few quality ingredients transform your smoker into a restaurant-worthy pork machine.
| Ingredient | Amount | Notes |
|---|---|---|
| Pork Shoulder (Boston Butt) 🥩 | 8 lb | Bone-in, well-marbled cut preferred |
| Yellow Onion 🧅 | 1 whole | Yellow or red, rough chopped |
| Garlic Cloves 🧄 | 8 cloves | Fresh, peeled, minced |
| Brown Sugar 🍚 | ½ cup | Light or dark, packed |
| Smoked Paprika 🌶️ | 2 tbsp | For authentic smoky depth |
| Ground Black Pepper 🌶️ | 1 ½ tbsp | Freshly cracked for intensity |
| Kosher Salt 🧂 | 1 ½ tbsp | Diamond Crystal preferred |
| Ground Cumin 🌿 | 1 tbsp | Toasted for warmth |
| Dried Mustard 🍯 | 1 tbsp | Yellow or Dijon powder |
| Apple Cider Vinegar 🍎 | 2 tbsp | For tangy brightness |
| Wood Chips (Hickory or Apple) 🌳 | 2 cups | Soaked for 30 minutes |
| Butcher Paper 📄 | 1 sheet | For moisture retention wrap |
| Yellow Mustard 🍯 | ¼ cup | For final glaze (optional) |
| Apple Juice 🍎 | ½ cup | For moisture during smoking |
[recipe_ingredient_scaler]
The pork shoulder is non-negotiable—look for bone-in cuts with good marbling from your butcher or Costco’s vacuum-sealed packs. I always ask for 8-10 pounds to account for shrinkage, especially when feeding a crowd. For the rub, smoked paprika is the secret weapon—it mimics wood-fired flavor without needing extra wood chips. Penzeys Spices or Trader Joe’s bulk bins have the best quality. If you can’t find smoked paprika, regular paprika plus a pinch of liquid smoke works in a pinch (though it’s not quite the same).
No apple cider vinegar? White vinegar or lemon juice at the same amount adds tang, but apple cider gives that perfect balance. For wood chips, hickory delivers classic BBQ flavor while apple adds subtle sweetness—mix them for depth. The butcher paper is your moisture lock; no plastic wrap—it traps too much steam. If you’re short on time, spray the pork with apple juice every 2 hours instead of wrapping. And trust me on the yellow mustard glaze—it’s the perfect finishing touch for that sticky, caramelized bark.
This pork keeps perfectly for 5 days in the fridge, wrapped tightly in butcher paper. For longer storage, freeze in portions—it reheats beautifully. I always make double batches because the leftovers make incredible tacos, sandwiches, and loaded baked potatoes. The bark gets even better after a day of resting, so plan ahead. Store any unused rub in an airtight container for up to 6 months—it’s worth making extra.
Why You’ll Love This Recipe
- No-Fuss Setup: Honestly, this is the only pulled pork recipe where you don’t have to babysit the smoker. Just toss that 8 lb pork shoulder with the brown sugar, smoked paprika, and cumin mix—no fancy prep—and let the electric smoker do the heavy lifting. The butcher paper wrap? Game-changer. No foil needed, no stress about sticking, just pure, unfussy cooking.
- Caramelized Magic: That rough-chopped yellow onion tossed in an hour before the end? Absolute genius. It caramelizes right in the smoker, infusing the pork with sweet, smoky depth that makes every bite taste like a Sunday supper. And the garlic—minced fresh, not powdered—adds that just-right punch without overpowering. Trust me, your taste buds will thank you.
- Leftover Powerhouse: I make this once a week, and honestly, I never run out. The pork keeps like a dream for 5 days, wrapped tight in butcher paper, so you can meal prep tacos, sandwiches, or even soups without a second thought. Plus, that dry rub? Double it, store it, and use it for ribs or chicken next time. Zero waste, maximum flavor.
- Budget-Friendly Feast: For under $15, you’re feeding a crowd with enough leftovers to last a week. The pork shoulder is affordable, and the spices? A little goes a long way. I’ve fed 12 people with this recipe, and everyone asks for seconds. It’s the kind of dish that makes you feel like a five-star chef without breaking the bank.
Step-by-step instructions for electric smoker pulled pork
Here’s the foolproof method for tender, smoky pulled pork that falls apart at every bite.
Prepare the Rub and Season the Pork Shoulder
In a small bowl, combine the ½ cup brown sugar, 2 tbsp smoked paprika, 1½ tbsp ground black pepper, 1½ tbsp kosher salt, 1 tbsp ground cumin, 1 tbsp dried mustard, and 2 tbsp apple cider vinegar. Mix thoroughly until you have a coarse, evenly distributed dry rub. This blend creates the perfect balance of sweet, smoky, and tangy flavors that penetrate the meat.
Pat the 8 lb pork shoulder completely dry with paper towels—this is crucial for developing that beautiful bark. Spread the rub generously over every inch of the meat, pressing it into the surface so it adheres well. Pay special attention to the thickest parts of the shoulder where the rub tends to accumulate. Let the seasoned pork sit at room temperature for 30 minutes before smoking to ensure even cooking.
While the pork seasons, prepare the 8 garlic cloves by peeling and mincing them finely. You’ll use these later to enhance the final flavor profile. The garlic adds a subtle depth that complements the smoky sweetness of the pork perfectly.
Set Up the Electric Smoker and Add Moisture
Soak the 2 cups wood chips (hickory or apple) in water for 30 minutes to prevent them from burning and creating bitter smoke. Once soaked, add them to the smoker tray and set your electric smoker to 225°F. This low-and-slow temperature is key to achieving tender, juicy pulled pork without drying it out.
Place a small bowl of ½ cup apple juice in the smoker along with the wood chips. The apple juice adds moisture to the smoking environment, which helps keep the pork tender and prevents it from becoming too dry. Allow the smoker to preheat for 15-20 minutes until you see steady, thin blue smoke—this indicates the wood chips are burning properly.
Once the smoker reaches temperature, position the pork shoulder fat-side up on the smoker grate. The fat will render slowly and baste the meat as it cooks, creating a flavorful crust. Avoid the temptation to open the smoker lid frequently, as each time you do, you lose heat and extend the cooking time.
Smoke the Pork Until Probe-Tender
Smoke the pork shoulder for 8-10 hours, maintaining a consistent temperature of 225°F. This long, slow cook allows the connective tissues to break down, resulting in meat that practically melts in your mouth. You’ll know it’s ready when the internal temperature reaches 195-203°F and a meat probe slides in like butter with no resistance.
Here’s where the yellow onion comes into play. Roughly chop the 1 yellow onion into large chunks and place them in a small bowl. About 1 hour before the pork is expected to finish cooking, add the onions to the smoker. Their sweet, caramelized flavor will infuse into the pork and the smoker, enhancing the overall depth of the dish.
Real talk: Your smoker might run hot or cold, so start checking the internal temperature at the 6-hour mark using an instant-read thermometer. If the temperature fluctuates, adjust the heat output or add more wood chips as needed to maintain a steady 225°F.
Wrap and Finish the Pork
Once the pork reaches 195°F, it will hit “the stall”—a point where the internal temperature stops rising as moisture evaporates. This is the moment that matters: Remove the pork from the smoker and wrap it tightly in the 1 sheet butcher paper. The butcher paper allows the pork to breathe while retaining moisture, creating a perfect balance between bark and tenderness.
Return the wrapped pork to the smoker and continue cooking until the internal temperature reaches 203°F. This final push ensures the pork is fork-tender and ready to pull apart easily. The butcher paper wrap also helps the pork absorb the smoky flavors more evenly, resulting in a richer, more cohesive taste.
While the pork finishes, prepare the ¼ cup yellow mustard for a final glaze. Mix the mustard with 1 tablespoon of apple juice (reserved from the ½ cup apple juice used earlier) to create a thin, glossy coating. This step is optional but adds a tangy brightness that cuts through the richness of the pork.
Rest and Pull the Pork
Remove the pork from the smoker and let it rest for 1-2 hours, still wrapped in the butcher paper. This resting period allows the juices to redistribute throughout the meat, ensuring every bite is moist and flavorful. Don’t skip this step—I learned the hard way that cutting into pork too soon results in dry, disappointing slices.
Once rested, carefully unwrap the pork and transfer it to a cutting board. Using two forks or meat claws, pull the pork apart into shreds. You’ll see it effortlessly separate into tender strands, a testament to the slow-smoking process. Discard any large fat chunks or connective tissues, but leave the flavorful juices behind—they’re packed with smoky goodness.
Toss the pulled pork with any accumulated juices from the butcher paper and the minced 8 garlic cloves you prepared earlier. The garlic adds a final layer of flavor that ties everything together. Serve immediately with your favorite barbecue sauce or a simple drizzle of the reserved apple juice glaze for a bright, tangy finish.
Pro Tips For Making Electric Smoker Pulled Pork
- Skip the Vinegar Shortcut: I used to dump the 2 tbsp apple cider vinegar into the rub all at once—big mistake. The acid burns off too fast, leaving flat flavor. Instead, mix it with the ½ cup brown sugar first, let it sit for 10 minutes, then add the rest of the dry rub. The sugar mellows the vinegar’s bite, and the rub sticks better to the pork.
- Check Temp at 6 Hours: Your smoker’s thermometer lies. At the 6-hour mark, shove an instant-read probe into the thickest part of the pork—ignore what the smoker display says. If it’s not at 195°F yet, don’t panic, but don’t assume it’s on track either. Adjust wood chips or heat output now to lock in that steady 225°F.
- Wrap When It Stalls: The stall isn’t just a pause—it’s your cue. When the internal temp hits 195°F and flatlines, that’s when you wrap it in butcher paper. I’ve seen people wrap too early (meat turns soggy) or too late (dries out). The paper’s breathable magic only works if you time it right.
- Toast the Cumin First: Dry-toast the 1 tbsp ground cumin in a dry skillet over medium heat for 2 minutes—just until it smells toasty. Let it cool, then mix it into the rub. It adds warmth without bitterness, and the pork absorbs it deeper. Skipping this? You’ll taste the difference.
Perfect pairings for these flavors
Classic Southern Buns
Nothing pairs better with pulled pork than a stack of buttery brioche buns—I swear by Pillsbury Golden Layer for their rich texture. Toast them lightly on the smoker grate for 2-3 minutes while the pork finishes to create a crispy exterior that holds up to the juicy meat.
Brush with ½ cup melted butter mixed with 1 tsp garlic powder before serving for extra flavor. These buns turn ordinary sandwiches into a Southern BBQ experience. 🥖
Tangy Apple Slaw
For a refreshing contrast to the smoky pork, I make a sharp apple slaw with 3 cups shredded cabbage, 1 large carrot grated, and 1 Granny Smith apple diced.
Toss with ¼ cup apple cider vinegar, 2 tbsp olive oil, 1 tsp Dijon mustard, ½ tsp celery seed, and a pinch of salt. The acidity cuts through the richness while the apple adds natural sweetness. Serve chilled for the best texture. 🍏
Spicy Carolina Mustard Sauce
If you love heat, I recommend a Carolina-style mustard sauce that’s a staple at my farm. Mix ½ cup yellow mustard, ¼ cup apple cider vinegar, 2 tbsp brown sugar, 1 tsp smoked paprika, and ½ tsp cayenne pepper.
Thin with ¼ cup water until it reaches a drizzling consistency. The smoky mustard complements the pork perfectly while adding a kick. I keep this sauce in the fridge for weeks. 🌶️
Pickled Red Onions
Quick-pickled red onions add a bright, tangy bite that balances the pork’s richness. Thinly slice 1 large red onion and soak in ½ cup apple cider vinegar, <top>¼ cup water, 1 tsp kosher salt, and 1 tsp sugar for at least 30 minutes.
Drain before serving and sprinkle generously over pulled pork sandwiches or slaw. The vinegar’s acidity cuts through the fat beautifully. 🍅
Sweet Potato Fries
For a Southern twist, bake 2 large sweet potatoes cut into thick fries at 400°F for 25-30 minutes until crispy. Toss with 1 tbsp olive oil, ½ tsp smoked paprika, and ¼ tsp cayenne before baking.
The natural sweetness pairs perfectly with the smoky pork, and they’re a crowd-pleaser at any gathering. These fries also reheat wonderfully for leftovers. 🍠
Nutrition facts
Frequently asked questions
Why does my electric smoker need wood chips for pulled pork?
The wood chips create the signature smoky flavor that transforms ordinary pork into something extraordinary. When soaked and burned properly, they infuse the meat with aromatic compounds that mimic traditional fire-smoking. For this recipe, hickory or apple wood chips deliver classic BBQ depth while keeping the meat tender through added moisture.
What’s the deal with wrapping the pork in butcher paper instead of foil?
Butcher paper is the secret weapon for perfect pulled pork! Unlike foil, it allows steam to escape while still trapping moisture—creating that perfect balance of bark and tenderness. The paper lets the pork breathe just enough to develop that beautiful crust while preventing it from drying out during the final hour of cooking.
How do I handle temperature fluctuations in my electric smoker?
Start checking the internal temperature at the 6-hour mark using an instant-read thermometer. If your smoker runs hot, open the lid briefly to cool it down, or move it to a cooler area. If it’s too cold, add more wood chips or increase the heat slightly. Consistency at 225°F is key for tender, juicy results.
Can I make this recipe without an electric smoker?
While electric smokers are ideal, you can adapt this method using a pellet grill, offset smoker, or even a regular oven with a meat thermometer. The key is maintaining 225°F for 8-10 hours and using the same wrapping technique. Just adjust your smoke source accordingly—pellet grills work particularly well with this approach.
What’s the best way to reheat leftover pulled pork?
Reheat gently in a slow cooker on low or in a pot with ½ cup apple juice over low heat until warmed through. Avoid high heat which can dry out the meat. For extra moisture, add a splash of broth or sauce while reheating. This pork actually tastes better the next day as the flavors meld together!

Trained in classic French technique but raised on slow-cooked ribs and spicy rubs, she blends culinary skill with smoke and soul.
- Chinese Stew Beef Brisket Recipe: Slow-Simmered Richness With Tender Meat - October 23, 2026
- Leftover Brisket Soup Recipe: Smoky Depth With Zero Waste - October 23, 2026
- Black-Eyed Peas Recipe With Smoked Turkey: Smoky-Sweet Comfort in One Pot - October 23, 2026