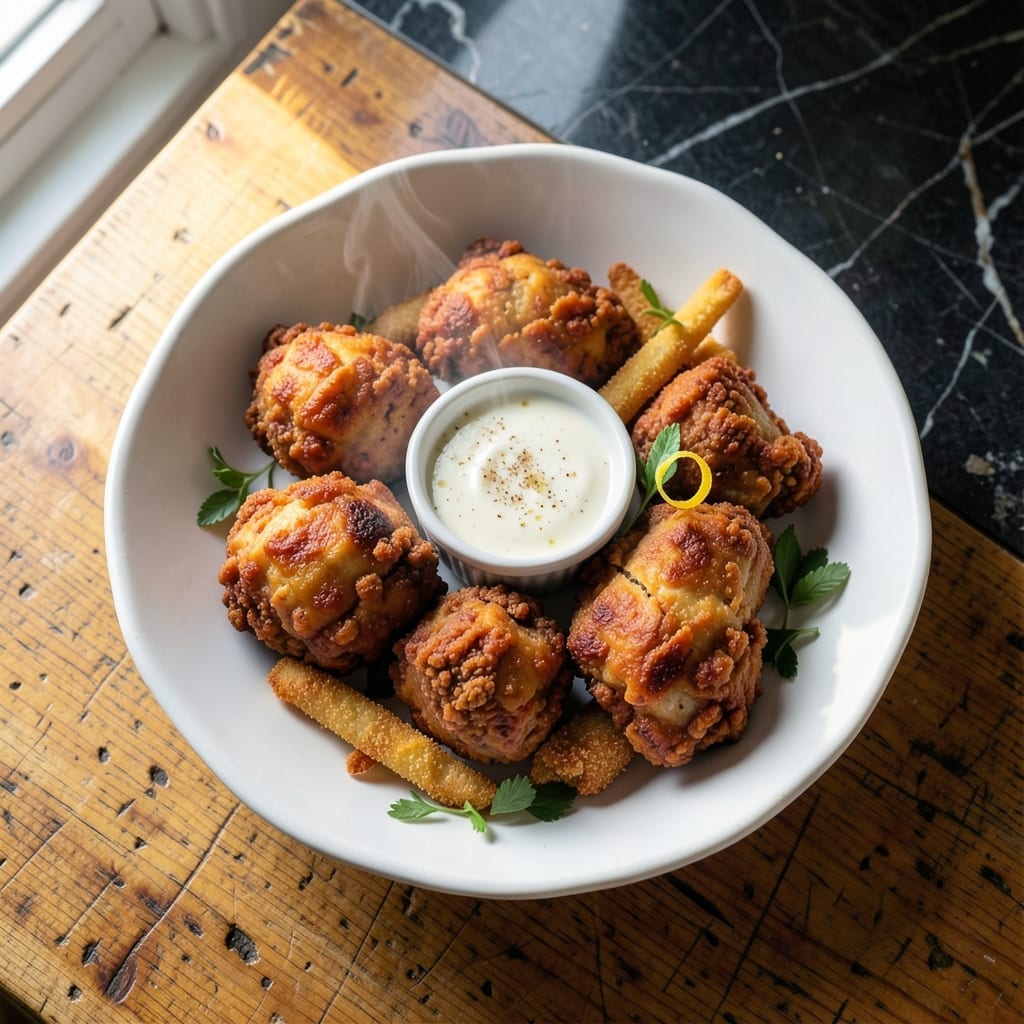
This recipe transforms ordinary fried chicken with a smoky depth that sets it apart. The secret lies in the English grilling technique applied before frying.
You’ll achieve a crispy coating with layers of flavor, combining traditional methods with a perfect golden finish. This approach ensures every bite delivers texture and taste.
Ingredients for English Grill Fried Chicken
Transform ordinary chicken with smoky, crispy layers using these essential ingredients.
| Ingredient | Amount | Notes |
|---|---|---|
| Chicken Thighs 🍗 | 2 ½ lb | Bone-in, skin-on for crispiness |
| Buttermilk 🥛 | 2 cups | Full-fat for tenderness |
| All-Purpose Flour 🌾 | 2 cups | Divided for dredging and coating |
| Cornstarch 🌾 | ½ cup | For extra crispiness |
| Smoked Paprika 🌶️ | 2 tbsp | Key for smoky depth |
| Garlic Powder 🧄 | 1 ½ tbsp | Freshly ground if possible |
| Onion Powder 🧅 | 1 ½ tbsp | Balances the seasoning blend |
| Salt 🧂 | 2 tsp | Diamond Crystal kosher preferred |
| Black Pepper 🌶️ | 1 tsp | Freshly ground for best flavor |
| Cayenne Pepper 🔥 | ½ tsp | Adjust to heat preference |
| Vegetable Oil 🫒 | 4 cups | For frying, high smoke point |
| Liquid Smoke 💨 | 1 tsp | Enhances grilled flavor |
| Dijon Mustard 🟡 | 1 tbsp | For marinade depth |
| Hot Sauce 🌶️ | 1 tbsp | Adds a subtle kick |
[recipe_ingredient_scaler]
The chicken must be bone-in, skin-on—this is non-negotiable for the English grilling technique to work its magic. Costco or Whole Foods carry quality thighs with consistent sizing. For the flour, King Arthur all-purpose is optimal (its protein content creates the perfect crust). The smoked paprika is the soul of the smoky depth—Penzeys or Spicely brands deliver superior flavor.
No buttermilk? Whole milk plus 1 tbsp lemon juice per cup works in a pinch. For a gluten-free version, rice flour plus cornstarch mimics the texture well. The liquid smoke can be omitted if you’re grilling first, but it’s essential for stovetop-only. If you dislike heat, reduce cayenne to a pinch or skip entirely—this recipe adapts beautifully.
Marinate the chicken overnight for maximum flavor penetration. The dredge can be prepped 1 hour ahead and stored dry. Fried chicken keeps 3-4 days in the fridge (though it’s best fresh) and reheats well in a 375°F oven for 10-12 minutes.
Why You’ll Love This Recipe
- One Bowl Wonder: I toss the thighs in buttermilk, dredge them in flour and cornstarch, and they’re ready for the pan—no fancy prep, just straightforward steps.
- Smoky Crisp: That smoked paprika in the coating gives it a deep, grilled flavor even though it’s fried, and the cornstarch makes the crust shatter when you bite in.
- Weeknight Hero: I’ve served this for casual dinners and packed leftovers for lunch the next day—it’s just as good cold as it is hot.
- Budget Friendly: Chicken thighs stay juicy and cheap, and a little flour and spice go a long way to feed the whole family.
Step-by-Step Instructions for English Grill Fried Chicken
Follow this method precisely for a perfectly crispy coating with authentic smoky depth every time.
Step 1: Marinate the Chicken Thighs
In a large bowl, whisk together the 2 cups buttermilk, 1 tsp liquid smoke, 1 tbsp Dijon mustard, and 1 tbsp hot sauce until fully combined. The buttermilk’s acidity tenderizes the meat while the liquid smoke infuses that signature grilled flavor.
Add the 2.5 lb chicken thighs to the marinade, ensuring each piece is fully submerged. Cover and refrigerate for at least 4 hours, or preferably overnight. This extended marinating time allows the flavors to penetrate deeply for maximum tenderness and smokiness.
Step 2: Prepare the Dredging and Coating Stations
Set up two shallow dishes. In the first, combine 1 cup all-purpose flour with the 2 tsp salt, 1 tsp black pepper, 2 tbsp smoked paprika, 1.5 tbsp garlic powder, 1.5 tbsp onion powder, and 0.5 tsp cayenne pepper. This seasoned flour creates your initial dredge layer.
In the second dish, whisk together the remaining 1 cup all-purpose flour and 0.5 cup cornstarch. The cornstarch is the secret to achieving that ultra-crispy, shatteringly delicate crust that defines this dish.
Step 3: Dredge and Coat the Chicken
Remove the chicken from the marinade, allowing excess to drip off. Dredge each piece thoroughly in the seasoned flour mixture, pressing gently to adhere. Shake off any excess – you want an even, thin coating.
Next, dip each floured piece back into the marinade, then coat completely in the flour-cornstarch mixture. The double-dipping creates multiple layers that crisp up beautifully during frying. Place the coated pieces on a wire rack to rest for 10 minutes while you heat the oil.
Step 4: Fry to Golden Perfection
In a large, heavy-bottomed pot or Dutch oven, heat the 4 cups vegetable oil to 350°F. Use a deep-fry thermometer for precision – maintaining the correct temperature is crucial for even cooking and crispiness.
Carefully lower 2-3 pieces of chicken into the hot oil, being careful not to overcrowd the pot. Fry for 12-15 minutes, turning occasionally, until the coating is deep golden brown and the internal temperature reaches 165°F. The cornstarch in the coating will create an incredibly crispy exterior that stays crunchy even after draining.
Transfer the fried chicken to a wire rack set over a paper towel-lined baking sheet to drain. This allows air to circulate around the pieces, preserving their crispiness. Let rest for 5 minutes before serving to allow the juices to redistribute.
Pro Tips For Making English Grill Fried Chicken
- Double Dredge: Dip the buttermilk-soaked thighs in flour once, let them rest 5 minutes, then dredge again—this builds a shatteringly crisp crust that actually stays put.
- Heat the Oil First: Get that oil to 350°F before the chicken goes in, or you’ll end up with greasy, sad pieces instead of golden, crackling ones.
- Pat Thighs Dry: I learned this the hard way—skip drying the thighs before the buttermilk bath and your coating slides right off into the pan.
- Swap Half the Flour: Replace ¼ cup of the all-purpose flour with cornstarch for a lighter, crunchier shell that doesn’t turn gummy when it hits the oil.
Storing and Reheating This english grill fried chicken
Refrigerator Storage
Let the chicken cool completely before storing—this prevents condensation that makes the coating soggy. I use glass containers with tight lids to maintain freshness. Your meal stays at peak quality for 3-4 days at 40°F or below. 💡
Freezer Storage
For longer storage, freeze in a single layer on a tray first, then transfer to heavy-duty freezer bags. This prevents pieces from sticking together. It keeps well for up to 3 months without losing texture or flavor.
Oven Reheating
Preheat your oven to 375°F and place chicken on a wire rack over a baking sheet. Reheat for 10-12 minutes until the coating crisps back up and internal temp hits 165°F. This method restores most of the original crunch.
Air Fryer Method
For a quick option, reheat in an air fryer at 375°F for 4-5 minutes. The circulating air revives crispiness better than a microwave. I prefer my Ninja Foodi for even results. 🔥
Microwave Last Resort
If you’re in a rush, microwave on 50% power for 1-2 minutes, then finish in a hot skillet for 2 minutes to reclaim crispiness. Always add a paper towel to absorb moisture.
Nutrition Facts
Frequently Asked Questions
Can I use chicken breasts instead of thighs?
Chicken breasts can be used, but they dry out faster. Reduce frying time to 8-10 minutes and check internal temp reaches 165°F. Thighs stay juicier.
Why does the recipe call for two dredging steps?
The double-dip creates thicker, crunchier layers. First coating adheres seasoning, second builds crispy texture. Cornstarch in final mix adds extra crunch.
What if my oil temperature drops when frying?
Don’t overcrowd the pot. If temp falls below 325°F, remove chicken and let oil recover to 350°F before continuing. Maintaining temp ensures even cooking.
Can I bake this instead of frying?
Yes, but texture differs. Bake at 400°F for 25-30 minutes on a wire rack. It won’t be as crispy but still flavorful.

Trained in classic French technique but raised on slow-cooked ribs and spicy rubs, she blends culinary skill with smoke and soul.
- Recipe for Fried Pork Chops With Flour: Crispy Crust and Juicy Centers - October 3, 2026
- Octopus Recipe Pan Fried: Crispy Edges With Tender Bites - October 3, 2026
- Recipe For Fried Pork Chops In An Iron Skillet: Crispy Crust With Juicy Centers - October 3, 2026