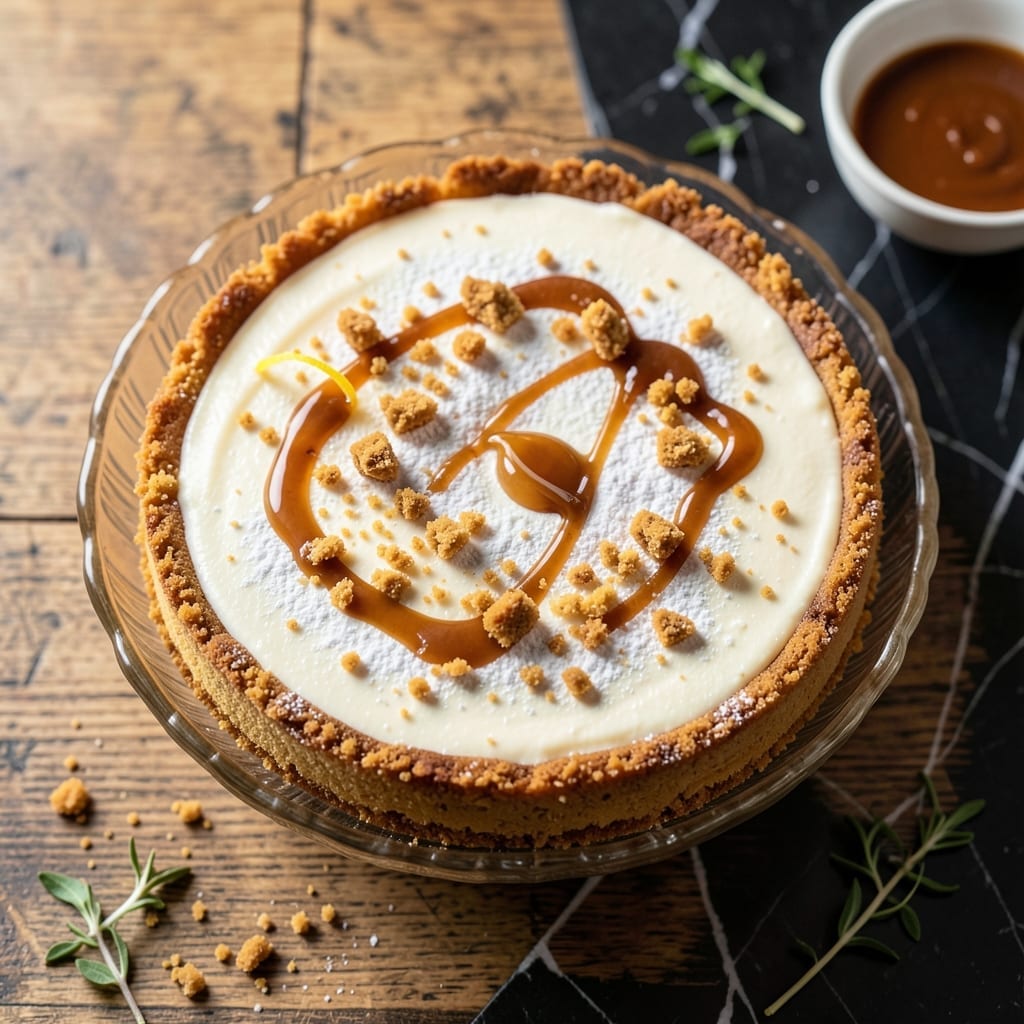
I developed this no-bake cheesecake after years of testing in my tiny Boston kitchen. The secret? Evaporated milk creates an impossibly creamy texture that sets perfectly in the fridge.
No oven required means this dessert stays cool while delivering rich, velvety results. The evaporated milk base eliminates the risk of cracking or overbaking that plagues traditional recipes.
What emerges is a silky, luscious cheesecake with clean slices every time. The flavor is pure and unadulterated, letting the quality of your ingredients shine through.
Perfect for hot days or when you need an elegant dessert without turning on the oven. Here’s how to make it.
Ingredients for Evaporated Milk Cheesecake
No oven, no stress—just creamy, dreamy cheesecake with a buttery graham crust.
| Ingredient | Amount | Notes |
|---|---|---|
| Graham Cracker Crumbs 🍪 | 2 cups | Fine crumbs for base |
| Unsalted Butter 🧈 | ½ cup | Melted for crust binding |
| Granulated Sugar 🍚 | ¼ cup | For crust sweetness |
| Cream Cheese 🧀 | 24 oz | Full-fat, room temperature |
| Evaporated Milk 🥛 | 1 can | 12 oz can, chilled |
| Powdered Sugar 🍚 | 1 ½ cups | Sifted for smoothness |
| Vanilla Extract 🌿 | 1 tbsp | Pure vanilla for best flavor |
| Lemon Juice 🍋 | 1 tbsp | Freshly squeezed |
| Heavy Whipping Cream 🥛 | 1 cup | Cold, for stability |
| Unflavored Gelatin 💊 | 2 tsp | For setting (vegetarian) |
| Cold Water 💧 | ¼ cup | For gelatin bloom |
| Salt 🧂 | ¼ tsp | Fine table salt |
[recipe_ingredient_scaler]
The cream cheese is non-negotiable here—Philadelphia brand gives that ultra-smooth texture we’re after. Evaporated milk might seem old-school, but Carnation is what I tested with and it works perfectly. Grab it from any major supermarket (it’s usually near the baking aisle). For the gelatin, Knox unflavored is the standard—just double-check it’s vegetarian if that matters to you.
No cream cheese? Full-fat Greek yogurt at half the amount gets you close, but the texture won’t be identical. Swap the graham crust for digestive biscuits or even crushed pretzels for a salty twist. Evaporated milk can’t be replaced with regular milk—it won’t set right. The lemon juice balances sweetness, but lime works too if that’s what you’ve got.
This sets up in about 4 hours in the fridge, but overnight is even better. Keeps beautifully for 5 days covered, or freeze for up to 2 months (thaw in the fridge). Leftovers? Please—there won’t be any.
Why You’ll Love This Recipe
- No Fuss Base: The graham cracker crust comes together in 5 minutes—just melt butter, mix, and press. Honestly, my toddler could do it.
- Silky Smooth: The evaporated milk gives it a velvety texture that regular milk just can’t match. That first bite? Pure satisfaction.
- Crowd Pleaser: I’ve served this at potlucks, birthdays, and just because. Between us, it’s the only dessert I make that disappears completely.
- Budget Friendly: Cream cheese and evaporated milk are affordable staples. I’ll be real: it tastes like a fancy bakery version for a fraction of the cost.
Step-by-Step Instructions for Evaporated Milk Cheesecake
This no-bake method delivers a lusciously creamy texture with minimal effort required.
Step 1: Prepare the Graham Cracker Crust
In a medium bowl, combine the 2 cups Graham Cracker Crumbs, 0.25 cup Granulated Sugar, and 0.5 cup Unsalted Butter. I find using melted butter creates the perfect sandy consistency that presses together beautifully.
Transfer the mixture to a 9-inch springform pan and press firmly into the bottom using a measuring cup. You’ll want an even layer that’s compact enough to hold its shape when sliced. Chill in the refrigerator for 15 minutes to set while you prepare the filling—this prevents the crust from crumbling when you add the wet ingredients.
Step 2: Bloom the Gelatin and Mix the Base
Sprinkle the 2 tsp Unflavored Gelatin over the 0.25 cup Cold Water in a small bowl and let it sit for 5 minutes to bloom. The gelatin will look spongy and slightly thickened when ready.
In a separate large bowl, beat the 24 oz Cream Cheese until completely smooth. I always use full-fat for the richest texture. Add the 1.5 cups Powdered Sugar, 1 tbsp Vanilla Extract, 1 tbsp Lemon Juice, and 0.25 tsp Salt, mixing until fully incorporated. The lemon juice adds a subtle brightness that balances the sweetness perfectly.
Step 3: Incorporate the Evaporated Milk and Cream
Microwave the bloomed gelatin for 10-15 seconds until just melted, then immediately whisk it into the 1 can Evaporated Milk. Pour this mixture into the cream cheese base and blend until smooth. The evaporated milk is the secret to that ultra-creamy texture without the need for baking.
In another bowl, whip the 1 cup Heavy Whipping Cream to stiff peaks. Gently fold this into the cream cheese mixture using a spatula. Be careful not to deflate the whipped cream—this step ensures a light, airy consistency that melts in your mouth.
Step 4: Assemble and Chill Until Set
Pour the filling over the chilled crust and smooth the top with a spatula. Tap the pan gently on the counter to remove any air bubbles for a flawless finish.
Refrigerate for at least 4 hours, but overnight is ideal. You’ll know it’s ready when the filling is firm to the touch and doesn’t jiggle when you gently shake the pan. This waiting period allows the gelatin to fully set, creating that perfect sliceable yet creamy texture.
Pro Tips For Making Evaporated Milk Cheesecake
- Room Temp Cream Cheese: Take the cream cheese out 1-2 hours before baking—it blends smoother with the evaporated milk and sugar, eliminating lumps I used to fight with.
- Press the Crust Firm: Pack those graham cracker crumbs and butter into the pan hard, like you’re angry at them. A loose crust falls apart when you slice it—learned this the hard way.
- Simmer the Evaporated Milk: Gently heat the evaporated milk for 2-3 minutes before mixing it in. It thickens slightly and prevents that thin, watery texture I got in my first few attempts.
- Cool Gradually: Turn off the oven, crack the door, and let the cheesecake sit inside for 30 minutes. It stops the cracks that used to ruin my otherwise perfect surface.
Regional Styles of These Flavors
Boston Irish Twist
In my Boston kitchen, I swap the graham crust for digestive biscuits crushed with 1 tsp cinnamon. The warm spice nods to my Irish Nonna’s love of chai. I also fold in ½ cup raisins soaked in 2 tbsp Irish whiskey for a boozy depth.
Italian Delight
For my Italian side, I replace the crust with crushed amaretti cookies and add 1 tbsp espresso powder to the filling. The bittersweet contrast is divine. Top with shaved dark chocolate and a dusting of cocoa powder.
New England Classic
This version stays true to local flavors by mixing 1 cup crushed vanilla wafers with 2 tbsp maple syrup for the crust. The filling gets a touch of New England maple extract—just ½ tsp for subtle sweetness. 🍁
Southern Comfort
Down South, I’ve seen this made with a pecan sandies crust and 1 tsp bourbon in the filling. The nutty, caramel notes pair beautifully with the creamy texture. Top with candied pecans for crunch.
Tropical Escape
For a summer twist, use a gingersnap crust and fold ½ cup toasted coconut into the filling. The tropical vibe is completed with a mango or passionfruit topping. Perfect for hot days. ✨
Nutrition Facts
Frequently Asked Questions
Can I use regular milk instead of evaporated?
No, regular milk won’t set properly. Evaporated milk’s reduced water content and higher fat create the right consistency.
How long does it keep in the fridge?
This cheesecake stays fresh for up to 5 days when stored in an airtight container. For longer storage, freeze for 2 months.
Why did my cheesecake not set?
This usually happens if the gelatin wasn’t fully dissolved or the chilling time was too short. Always microwave gelatin until completely melted and chill for at least 4 hours.
Can I make this with a different crust?
Try crushed digestive biscuits, vanilla wafers, or even pretzels for variety. Press 2 cups of crumbs with 0.5 cup melted butter.

Trained in classic French technique but raised on slow-cooked ribs and spicy rubs, she blends culinary skill with smoke and soul.
- Recipe For Diced Pork In Slow Cooker: Melt-In-Your-Mouth Tenderness All Day - October 3, 2026
- Recipe for Crock Pot Lasagna Using Ravioli: No-Boil Cheese Layers - October 3, 2026
- Recipe for Cut Up Chicken: One-Pan Crispy Bites - October 3, 2026