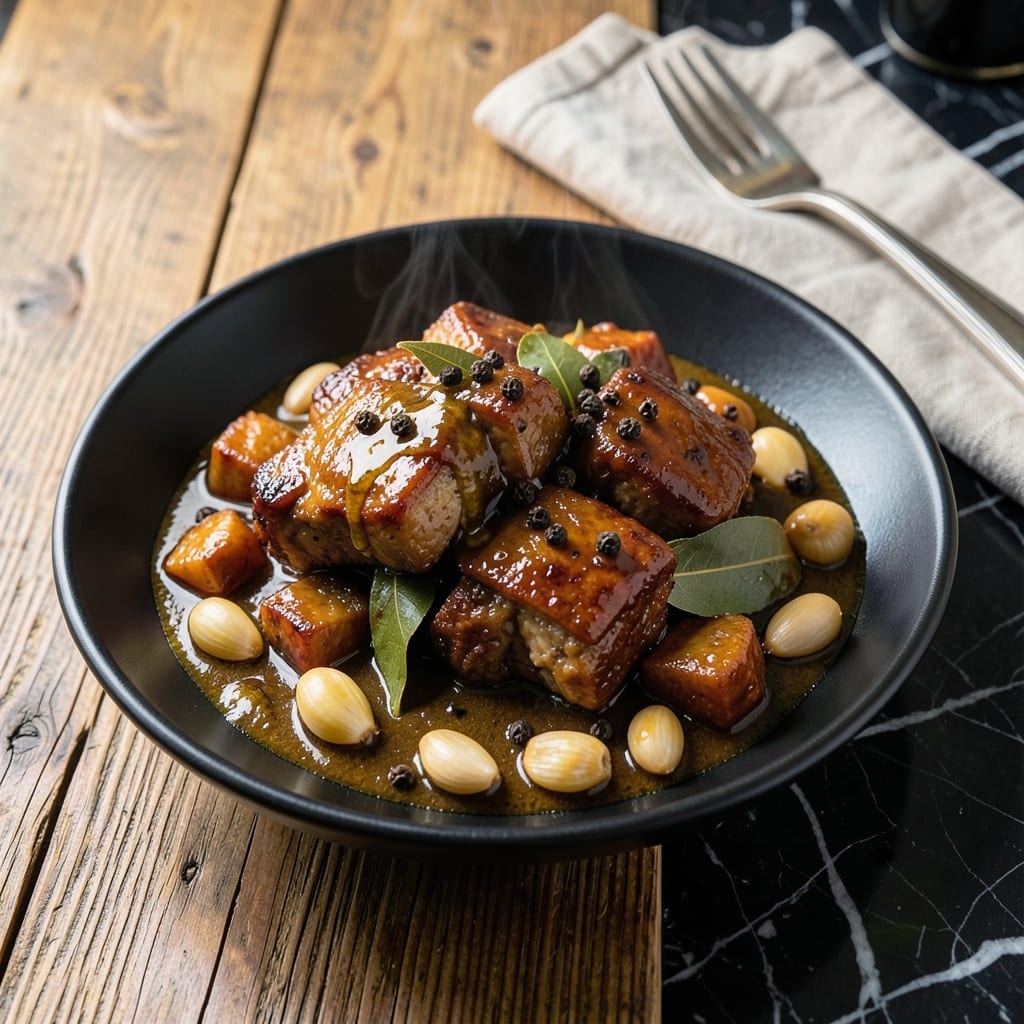
I remember watching my grandmother cook this dish without a single measurement, relying only on instinct. This version keeps her spirit alive while making it accessible to modern cooks.
Using an Instant Pot cuts the traditional cooking time in half while maintaining the deep, tangy garlic flavor that defines Filipino adobo. The pressure cooker infuses the pork with the vinegar-soy marinade, creating tender, flavorful meat.
The result is fall-off-the-bone pork in a rich, savory sauce that’s both tangy and slightly sweet. It’s the perfect balance of traditional flavor and modern convenience.
Serve over steamed rice to soak up every drop of the delicious sauce. This method delivers authentic taste without the long wait.
Ingredients for Filipino Pork Adobo Recipe Instant Pot
Tender pork, bold vinegar-soy marinade, and garlic make this dish unforgettable.
| Ingredient | Amount | Notes |
|---|---|---|
| Pork Shoulder 🍖 | 2 lb | Cut into 2-inch chunks |
| Soy Sauce 🫒 | ¾ cup | Use low-sodium if preferred |
| White Vinegar 💧 | ½ cup | Cane vinegar traditional |
| Garlic Cloves 🧄 | 12 cloves | Minced for maximum flavor |
| Bay Leaves 🌿 | 3 whole | Dried, for aroma |
| Black Peppercorns 🌶️ | 1 tbsp | Lightly crushed |
| Brown Sugar 🍚 | 2 tbsp | Balances the acidity |
| Onion 🧅 | 1 whole | Sliced into rings |
| Water 💧 | ½ cup | For pressure cooking |
| Vegetable Oil 🫒 | 1 tbsp | For searing pork |
| Green Onions 🌱 | 4 pieces | Sliced, for garnish |
[recipe_ingredient_scaler]
The pork shoulder is non-negotiable here—it’s fatty enough to stay juicy under pressure. Costco or Sam’s Club sell it in big chunks (perfect for cubing yourself). If you only find pre-cut stew meat, grab that—just avoid lean cuts like tenderloin. The bay leaves? Dried is fine, but fresh adds a brighter note if you’ve got an Asian market nearby.
No white vinegar? Apple cider vinegar works (same tang, slightly fruitier). Out of soy sauce? Coconut aminos are a decent sub, though less salty. For the sugar, brown adds depth, but white is fine. The garlic can be adjusted—10-15 cloves is my sweet spot—but don’t skimp. And yes, you can use chicken thighs instead, but the pork really soaks up that adobo magic.
Leftovers taste even better the next day. Keeps 4-5 days in the fridge, freezes for 3 months. Reheat gently so the pork doesn’t dry out—I always make extra for lunches. The sauce thickens as it cools, so thin with a splash of water if needed.
Why You’ll Love This Recipe
- Set and Forget: I toss everything in the Instant Pot, press a button, and walk away—no babysitting required.
- Garlic Soy Magic: The pork soaks up that tangy vinegar and soy sauce with garlic so deep it’ll make your kitchen smell like home.
- Feeds the Crowd: Honestly, this makes enough for dinner tonight and leftovers that taste even better tomorrow.
- Budget Friendly: Pork shoulder is cheap, the pantry staples do the rest, and it tastes like a million bucks.
Step-by-Step Instructions for Filipino Pork Adobo
This method delivers that classic tangy-savory balance with minimal effort and maximum flavor.
Step 1: Sear the Pork Shoulder for Depth of Flavor
Set your Instant Pot to the Sauté function and add the 1 tablespoon vegetable oil. Once hot, add the 2 lb pork shoulder (cut into 2-inch chunks) in a single layer, working in batches if necessary. Sear undisturbed for 3-4 minutes per side until deeply browned.
You’ll know it’s ready to flip when the pork releases easily from the pot. This searing step creates a fond that will deepen the adobo sauce’s flavor. Don’t rush—patience here builds the base for the entire dish.
Step 2: Build the Adobo Braising Liquid
After removing the pork, add the sliced onion to the pot and cook for 2 minutes until softened. Then add the 12 cloves minced garlic cloves and cook for 30 seconds until fragrant—watch carefully to prevent burning.
Pour in the 0.75 cup soy sauce, 0.5 cup white vinegar, 0.5 cup water, 2 tablespoons brown sugar, 3 whole bay leaves, and 1 tablespoon lightly crushed black peppercorns. Stir to combine, scraping up any browned bits from the bottom.
Step 3: Pressure Cook to Tender Perfection
Return the seared pork to the pot along with any accumulated juices. Secure the lid and set the Instant Pot to High Pressure for 20 minutes. It will take about 10-15 minutes to come to pressure before the cooking time begins.
Once the cooking cycle completes, allow for a natural pressure release for 10 minutes, then quick-release any remaining pressure. The pork should be fork-tender at this point, easily shredding with a gentle tug.
Step 4: Reduce the Sauce to Ideal Consistency
Switch the Instant Pot back to Sauté mode and simmer the pork and sauce uncovered for 8-10 minutes. This reduces the liquid to a glossy, syrupy consistency that clings beautifully to the meat.
Stir occasionally to prevent sticking, and taste the sauce—it should be a perfect balance of salty, tangy, and slightly sweet. If it’s too sharp, add a pinch more brown sugar; if too salty, a splash of water will mellow it.
Step 5: Garnish and Serve
Discard the bay leaves and transfer the adobo to a serving dish. Top with the 4 pieces sliced green onions for a fresh, vibrant finish. The sauce should be thick enough to coat the back of a spoon but still pourable.
Serve this over steamed rice to soak up every last bit of that incredible sauce. The pork should be fall-apart tender, with each bite delivering that signature adobo tang that makes this dish unforgettable.
Pro Tips For Making Filipino Pork Adobo Recipe Instant Pot
- Sear the Pork First: I learned this the hard way—skipping the sear leaves the pork bland. Toss the cubed shoulder in the Instant Pot on sauté mode until browned, about 3-4 minutes per side.
- Balance the Vinegar: Sounds weird, but it works: never let the vinegar overpower the soy sauce. Stick to a 1:1 ratio with soy sauce—about 1/2 cup each for 2 lbs of pork.
- Skip the Overfilling: After burning three batches, I finally figured out the Instant Pot needs room. Fill it no more than two-thirds full to avoid that dreaded “burn” error.
- Use Natural Release: My grandmother swore by this, and she was right: let the pressure release naturally for 10 minutes before quick-releasing. It keeps the pork tender, not tough.
Wine and Beer Pairings for This Recipe
Crisp White Wines
I love pairing this with a chilled Sauvignon Blanc from New Zealand—its citrusy acidity cuts through the richness beautifully. The grapefruit notes complement the vinegar tang in the adobo sauce perfectly. 🍷
Light Beers
A crisp Filipino lager like San Miguel is my top choice for authenticity. The light carbonation refreshes your palate between bites of the savory pork. For something local, try Lagunitas Pils for similar brightness.
Medium-Bodied Reds
If you prefer red wine, go for a lightly chilled Pinot Noir from Oregon. Its red fruit flavors won’t overpower the dish. I’ve found Belle Pente Vineyard makes an excellent accessible version.
Non-Alcoholic Options
A chilled calamansi juice (Filipino citrus) is traditional and refreshing. I also enjoy sparkling water with a squeeze of lime—simple but effective. The bubbles help cleanse your palate between bites.
Rice Wine Alternative
For a cultural pairing, try sake served slightly chilled. A dry junmai style like Tyku Junmai has the acidity to match the vinegar in the sauce. It’s a pairing my grandmother would have approved of.
Nutrition Facts
Frequently Asked Questions
Can I use chicken instead of pork?
Use 2 lb bone-in chicken thighs and reduce pressure cooking time to 8 minutes. The flavor profile works beautifully with poultry too.
Why does the sauce need reducing after pressure cooking?
Pressure cooking prevents liquid evaporation, so the sauce stays thin. Simmering for 8-10 minutes concentrates flavors and creates that perfect glossy consistency.
What if my Instant Pot says “burn”?
This usually means food stuck to the bottom. Quick-release pressure, check for burnt bits, add 1/4 cup water, and restart. Always deglaze well after searing.
How do I make it less salty?
Use low-sodium soy sauce or reduce to 1/2 cup. Balance with extra brown sugar or vinegar. Taste before serving and adjust.

Trained in classic French technique but raised on slow-cooked ribs and spicy rubs, she blends culinary skill with smoke and soul.
- Recipe for Boneless Pork Chops in Cast Iron Skillet: Sear and Baste to Juicy Perfection - October 3, 2026
- Recipe for Boneless Cross Rib Roast: Slow-Roasted Beef with Herb Crust - October 3, 2026
- Hamburgers in Sauce Recipe Crock Pot: Slow-Cooked Savory Delight - October 3, 2026