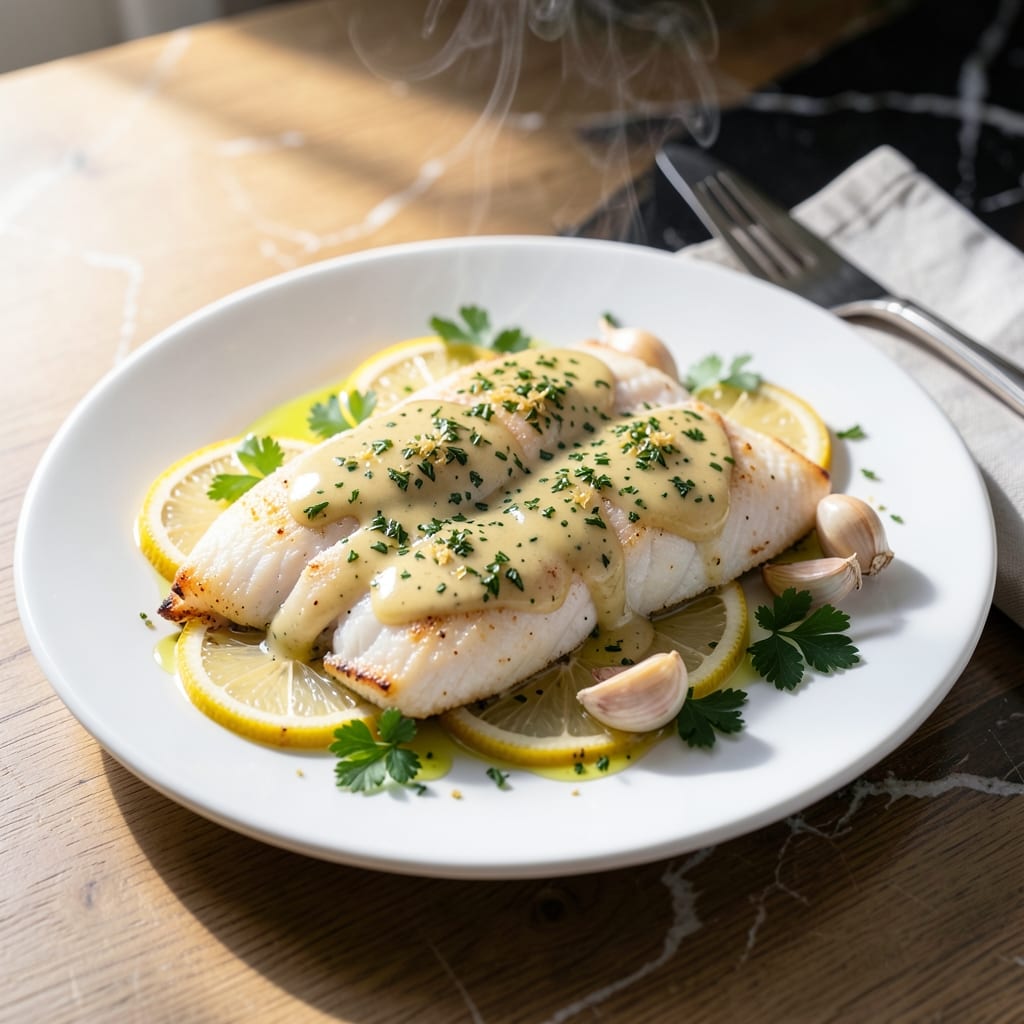
Baking flounder in the oven delivers perfectly flaky results with minimal effort. This method locks in moisture while creating a delicate texture that falls apart at the touch of a fork.
I developed this technique after years of testing to ensure consistent success. The key is precise timing and temperature control, which guarantees the fish cooks evenly without drying out.
The lemon butter sauce adds a bright, rich finish that complements the mild sweetness of the flounder. It’s a simple yet elegant preparation that works for both weeknight dinners and special occasions.
Serve with roasted vegetables or a light salad to complete the meal. Here’s how to achieve flaky perfection every time.
Ingredients for Flounder Recipe Oven
Fresh flounder, bright lemon, and rich butter create this elegant oven-baked dish with minimal effort.
| Ingredient | Amount | Notes |
|---|---|---|
| Flounder Fillets 🐟 | 1 ½ lb | Fresh or thawed, skinless |
| Unsalted Butter 🧈 | ½ cup | Melted for sauce |
| Fresh Lemon Juice 🍋 | ¼ cup | About 2-3 lemons |
| Lemon Zest 🍋 | 1 tbsp | From 1-2 lemons |
| Garlic Cloves 🧄 | 3 cloves | Minced finely |
| Fresh Parsley 🌿 | ¼ cup | Chopped, for garnish |
| Olive Oil 🫒 | 2 tbsp | For greasing baking dish |
| Salt 🧂 | 1 tsp | Kosher or sea salt |
| Black Pepper 🌶️ | ½ tsp | Freshly ground preferred |
| Dry White Wine 🍷 | ¼ cup | Optional, deglaze pan |
| Capers 🌿 | 2 tbsp | Drained, optional garnish |
| All-Purpose Flour 🌾 | ¼ cup | For light dredging |
[recipe_ingredient_scaler]
The flounder must be ultra-fresh—look for translucent flesh and a mild ocean scent, never fishy. Whole Foods or a trusted seafood counter will have the best selection. If frozen, thaw overnight in the fridge (never at room temperature). For the butter, Plugra or European-style has higher fat content, which emulsifies better with the lemon. The parsley should be vibrant green with no wilt—farmers markets often have the freshest bunches.
No flounder? Sole or tilapia work well (adjust cooking time for thickness). Short on white wine? Substitute chicken broth with a splash of vinegar. If capers aren’t your thing, chopped kalamata olives add a similar briny punch. The flour dredge can be skipped for gluten-free, but it helps create a light crust that locks in moisture. Always pat the fillets dry before baking—this ensures even browning.
Bake immediately after prepping—flounder dries out fast once exposed to air. Leftovers keep for 1-2 days in the fridge, but the texture is best fresh. To reheat, warm gently in a 200°F oven with a splash of water to prevent drying. Never microwave fish—it turns rubbery.
Why You’ll Love This Recipe
- One Pan Magic: I just toss the flounder fillets with melted butter, lemon, and garlic on a sheet pan—no fancy techniques, no mess.
- Bright & Zesty: The lemon zest and juice make the flounder taste fresh and lively, not fishy at all.
- Weeknight Hero: Honestly, it’s my go-to for busy evenings when I need dinner ready in 20 minutes.
- Budget Friendly: Flounder is affordable, and a little butter and lemon go a long way for a meal that feels special.
Step-by-Step Instructions for Baked Flounder
Here’s the method that guarantees perfectly flaky, restaurant-quality results every time.
Step 1: Prepare and Season the Flounder Fillets
Begin by preheating your oven to 400°F. Lightly grease a baking dish with the 2 tablespoons olive oil, ensuring the entire surface is coated. Pat the 1.5 lb flounder fillets completely dry with paper towels—this is essential for even cooking and proper browning.
Season both sides of the fillets evenly with the 1 teaspoon salt and ½ teaspoon black pepper. Then, lightly dredge each fillet in the ¼ cup all-purpose flour, shaking off any excess. This thin coating helps create a delicate crust while keeping the fish moist.
Step 2: Create the Lemon Butter Sauce
In a small saucepan over low heat, melt the ½ cup unsalted butter. Once melted, add the 3 cloves minced garlic cloves and sauté for 30 seconds until fragrant but not browned. Stir in the ¼ cup fresh lemon juice and 1 tablespoon lemon zest, then remove from heat.
This sauce will infuse the fish with bright, citrusy flavor while the butter keeps it rich and tender. The garlic should soften but not color—burnt garlic will make the sauce bitter.
Step 3: Bake the Flounder to Flaky Perfection
Arrange the seasoned flounder fillets in the prepared baking dish in a single layer, ensuring they don’t overlap. Pour the lemon butter sauce evenly over the fillets, letting it pool slightly around the edges. This ensures every bite is infused with flavor.
Bake on the middle rack for 12-15 minutes, or until the fish is opaque and flakes easily with a fork. Avoid overbaking—flounder continues cooking slightly after removal from the oven, so pull it out as soon as it reaches doneness.
Step 4: Deglaze and Garnish for Serving
While the fish bakes, warm the ¼ cup dry white wine in a small pan over medium heat for 1-2 minutes to reduce slightly. Once the flounder is done, carefully transfer the fillets to a serving platter, leaving the baking juices behind.
Pour the reduced wine into the baking dish and scrape up any browned bits with a wooden spoon. Drizzle this mixture over the fillets, then garnish with the ¼ cup chopped fresh parsley and 2 tablespoons drained capers for a pop of briny contrast. Serve immediately while hot.
Pro Tips For Making Flounder Recipe Oven
- Preheat the Pan: I learned this the hard way—cold pan to hot oven means uneven cooking. Heat your oven-safe skillet in the oven for 5 minutes first, then add the flounder and butter.
- Pat Dry the Fillets: Sounds obvious, but wet flounder steams instead of sears. Press between paper towels until bone-dry for that golden crust.
- Skip Overcrowding: After ruining a batch with soggy edges, I now leave at least an inch between fillets so the heat circulates properly.
- Zest First, Juice Later: My grandmother swore by this: zest the lemon before slicing for juice—once you cut it, the peel clings stubbornly to the knife.
Essential Equipment for This Recipe
Baking Dish Options
I always reach for my 9×13-inch Pyrex baking dish—it conducts heat evenly and the glass lets me monitor doneness. A ceramic dish works too if you prefer a more elegant presentation. Avoid metal pans, which can cause hot spots.
Thermometer for Precision
An instant-read thermometer is my secret weapon. Flounder is done at 145°F internal temperature. I use ThermoWorks ThermaPen—it’s accurate to within 0.7°F and gives readings in 3 seconds. 🌡️
Saucepan for Lemon Butter
For the sauce, I prefer a small, heavy-bottomed saucepan like All-Clad. It prevents scorching and gives you better control over the low heat. A light-colored pan lets you see the butter’s color change as it melts.
Essential Utensils
A wooden spoon won’t scratch your saucepan while deglazing. I also keep tongs nearby for gently flipping the fillets if needed. And don’t forget paper towels—patting the fish dry is critical for even cooking.
Serving Tools
Use a thin, flexible spatula to serve the delicate fillets without breaking them. I love my OXO fish spatula—it slides right under the flounder. A small ladle helps drizzle the sauce evenly over each serving. 💛
Optional but Helpful
A microplane makes quick work of zesting lemons. And if you’re using wine, a wine opener with a foil cutter saves time. These small tools make the process smoother and more enjoyable.
Nutrition Facts
Frequently Asked Questions
What temperature should I bake the fish at?
Preheat your oven to 400°F for even cooking. This temperature ensures the flounder cooks through without drying out while creating a light golden crust.
How do I know when it’s done?
The fish is ready when it reaches 145°F internally and flakes easily with a fork. It should appear opaque throughout with no translucent spots remaining.
Can I use frozen fillets instead?
Yes, but thaw them overnight in the fridge first. Pat them completely dry before seasoning to prevent steaming, which can make the fish soggy.
What if my sauce separates?
Don’t worry—just whisk in 1 teaspoon cold water to bring it back together. Keep the heat low when making the sauce to prevent separation.

Trained in classic French technique but raised on slow-cooked ribs and spicy rubs, she blends culinary skill with smoke and soul.
- Recipe for Boneless Pork Chops in Cast Iron Skillet: Sear and Baste to Juicy Perfection - October 3, 2026
- Recipe for Boneless Cross Rib Roast: Slow-Roasted Beef with Herb Crust - October 3, 2026
- Hamburgers in Sauce Recipe Crock Pot: Slow-Cooked Savory Delight - October 3, 2026