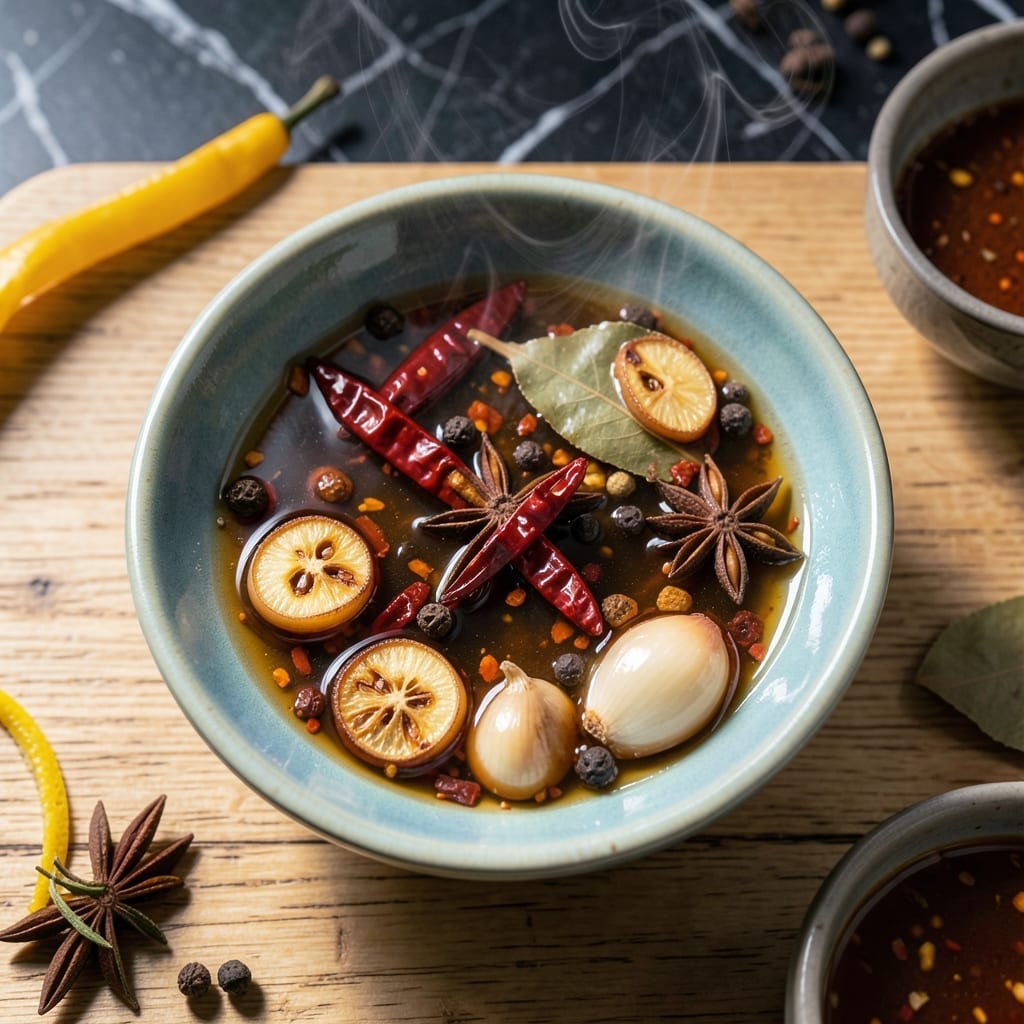
This chili oil delivers an intense aromatic heat that transforms any dish with its bold, spicy character. The crispy garlic bits add a satisfying crunch and depth of flavor that elevates the experience.
I developed this recipe to capture the authentic Thai street food essence, balancing heat with the perfect texture. The slow infusion process ensures every drop carries maximum flavor without bitterness.
What makes this special is the dual texture—crispy garlic pieces suspended in fiery oil. The result is a versatile condiment that works on noodles, dumplings, or simply drizzled over rice.
Store in a cool, dark place for up to a month. This will become your go-to for adding instant flavor complexity.
Ingredients for Fresh Thai Chili Oil
Eight ingredients. One jar. Bold, aromatic heat with every drizzle.
| Ingredient | Amount | Notes |
|---|---|---|
| Dried Thai Chilies 🌶️ | 1 cup | Stems removed, roughly chopped |
| Garlic Cloves 🧄 | 12 cloves | Thinly sliced for crispiness |
| Neutral Oil 🫒 | 2 cups | High smoke point like avocado or vegetable |
| Shallots 🧅 | 2 whole | Thinly sliced, optional for depth |
| Sichuan Peppercorns 🌿 | 1 tsp | Lightly crushed for aroma |
| Star Anise Pods ✨ | 2 whole | For infusion, remove after cooking |
| Bay Leaves 🍃 | 2 whole | Dried, for subtle flavor |
| Salt 🧂 | ½ tsp | Adjust to taste after infusion |
[recipe_ingredient_scaler]
The chilies are everything here. Look for Thai bird’s eye chilies—they pack the right punch and color. Most Asian markets carry them dried, or order online if yours doesn’t. The garlic needs to be sliced paper-thin (a mandoline helps) so it crisps up like chips. For the oil, avocado or peanut oil handles the heat best without smoking. Skip the olive oil—too low smoke point.
No Thai chilies? Korean gochugaru works in a pinch (use half the amount). Skip the Sichuan peppercorns if you can’t find them, but they add that signature tingle. Shallots can be swapped for red onion—just slice thin. For a milder version, seed the chilies before chopping. The star anise and bay leaves are subtle but worth it (don’t skip them).
This keeps 1 month in a cool, dark cabinet—no fridge needed. The flavors deepen over time, so wait 24 hours before using. If the garlic softens, just reheat the oil gently to crisp it back up. Always use a clean, dry spoon to avoid contamination.
Why You’ll Love This Recipe
- Ready in 20: Honestly, it’s just heating oil with chilies, garlic, and shallots—no fancy steps.
- Flavor Bomb: That first hit of garlic and Sichuan peppercorns? Ridiculously good.
- Drizzle on Everything: I use it on eggs, noodles, even straight-up rice. Between us, it’s my secret weapon.
- Lasts for Weeks: One batch fills a jar, and it keeps getting better in the pantry.
Step-by-Step Instructions for Fresh Thai Chili Oil
This method guarantees crispy garlic bits and a deeply fragrant oil with just the right amount of heat.
Step 1: Prep and Bloom the Aromatics
In a medium saucepan, combine the 2 cups Neutral Oil, 1 tsp Sichuan Peppercorns, 2 whole Star Anise Pods, and 2 whole Bay Leaves. Heat over medium-low until the oil reaches 250°F—you’ll see tiny bubbles forming around the spices.
Let these infuse for 5 minutes to release their essential oils and build a fragrant base. The star anise will start to smell intensely sweet, and the Sichuan peppercorns will tinglingly perfume the air. Don’t let the oil get too hot yet—that comes next.
Step 2: Fry the Garlic and Shallots to Golden Crispiness
Add the 12 cloves Garlic Cloves and 2 whole Shallots to the warm oil. Stir occasionally and fry for 8-10 minutes until both turn a deep golden brown and the garlic edges start to crisp. The oil should be gently bubbling around them.
Watch closely—this is where the magic happens. The garlic will go from white to golden to perfect crispiness in what feels like seconds. If it starts browning too fast, reduce the heat slightly. The shallots add a subtle sweetness that balances the heat. Remove the star anise and bay leaves now to prevent bitterness.
Step 3: Infuse with Chili and Finish
Turn off the heat and immediately stir in the 1 cup Dried Thai Chilies. The residual heat will continue to cook them for 2-3 minutes until they darken slightly and release their fiery aroma. You’ll smell the chili oil developing its characteristic punch.
The oil should be a vibrant red with crispy garlic and shallot bits suspended throughout. Let it cool to room temperature—this takes about 30 minutes. The flavors will meld and intensify as it sits.
Step 4: Season and Store
Once cooled, stir in the 0.5 tsp Salt and taste. Add more if needed, but remember the flavors will concentrate over time. The salt enhances all the aromatic notes without overpowering them.
Transfer to a clean jar with a tight-fitting lid. The crispy garlic and shallots will continue to infuse the oil with flavor as it stores. For the best texture, use within 2 weeks—the garlic stays crunchy and the heat remains vibrant. Store in a cool, dark place to preserve that fresh, fiery aroma.
Pro Tips For Making Fresh Thai Chili Oil
- Toast the Chilies: Heat the dried Thai chilies in oil on medium-low until they just start to darken—about 2-3 minutes. I learned this the hard way after burning a batch at high heat, which made the oil bitter.
- Slice Shallots Thin: Cut shallots paper-thin so they crisp up evenly in the oil. Sounds tedious, but it actually changes the outcome—thick pieces stay chewy and sink to the bottom.
- Watch the Garlic: Add garlic last and pull the pan off heat as soon as it turns golden. After burning three batches, I finally figured out garlic goes from perfect to burnt in seconds.
- Strain While Hot: Pour the oil through a fine-mesh sieve immediately after cooking while everything’s still sizzling. This keeps the flavors bright and prevents the solids from turning mushy in the jar.
Troubleshooting Perfect Results
Garlic Burning Too Fast
If your garlic browns before the shallots are ready, your heat is too high. Lower to medium-low and stir constantly. I learned this the hard way my first time—burnt garlic turns bitter and ruins the oil. 🔥
Chilies Not Releasing Color
If your oil stays pale, the chilies may be old or you didn’t heat them long enough. Use fresh Thai bird’s eye chilies and let them steep off-heat for 5 minutes to release their vibrant red hue.
Oil Too Spicy
If the heat is overwhelming, dilute with ½ cup fresh neutral oil and reheat gently. This balances the burn while keeping the aroma. I prefer avocado oil for its clean taste.
Garlic Not Crispy
If your garlic softens, reheat the oil to 250°F for 2-3 minutes to revive the crunch. Stir constantly to prevent burning. The garlic pieces should float like golden chips.
Cloudy Oil
Cloudiness usually means water contamination. Always use completely dry ingredients and tools. If it happens, let it settle and pour off the clear oil, leaving the sediment behind.
Storage Issues
If mold appears, your jar wasn’t sterile. Always use clean, dry containers and ensure all ingredients are moisture-free. Stored properly, it’ll keep for 1 month at room temperature. ✨
Nutrition Facts
Frequently Asked Questions
How long should I heat the oil for best flavor?
Heat to 250°F and infuse spices for 5 minutes before adding garlic. This slow start ensures deep aroma without bitterness.
Can I use fresh chilies instead of dried?
Fresh works but requires extra drying time. Slice and dry in a low oven first to prevent moisture from spoiling the oil. The flavor will be brighter but less concentrated.
Why did my garlic turn bitter?
It likely burned. Keep heat at medium-low and stir constantly. Remove garlic immediately when golden—it crisps further as it cools.
What’s the best way to store this?
Use a clean, dry jar and keep in a cool, dark place. It stays fresh for 1 month. Always use dry utensils to avoid contamination.

Trained in classic French technique but raised on slow-cooked ribs and spicy rubs, she blends culinary skill with smoke and soul.
- Recipe for Boneless Pork Chops in Cast Iron Skillet: Sear and Baste to Juicy Perfection - October 3, 2026
- Recipe for Boneless Cross Rib Roast: Slow-Roasted Beef with Herb Crust - October 3, 2026
- Hamburgers in Sauce Recipe Crock Pot: Slow-Cooked Savory Delight - October 3, 2026