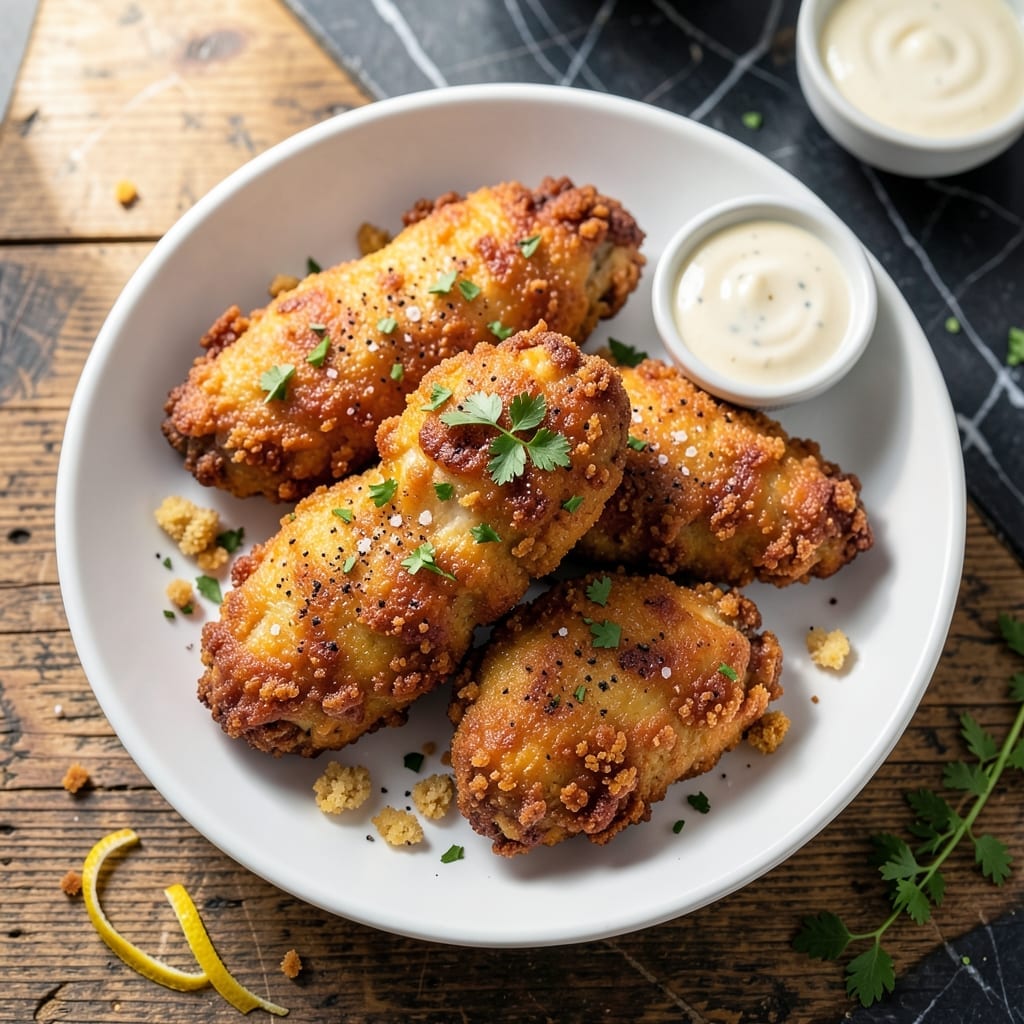
Achieving perfectly juicy fried chicken breast in a deep fryer comes down to precise temperature control and timing. This method delivers a golden, crispy exterior that gives way to tender meat inside, every single time.
I’ve tested countless variations to develop this foolproof approach. The key is maintaining a steady 350°F oil temperature and using a double-dredge technique for maximum crunch. Safety and consistency are built into every step.
What you’ll get is chicken that’s crispy on the outside, moist on the inside, with no dry spots. The seasoning penetrates deeply, ensuring flavor in every bite without overpowering the natural taste of the meat.
Pair with classic sides like coleslaw or mashed potatoes for a complete meal. Here’s how to do it right.
Ingredients for Fried Chicken Breast Recipe Deep Fryer
Precise ingredients for that golden crust and juicy center every time. No shortcuts here.
| Ingredient | Amount | Notes |
|---|---|---|
| Boneless Skinless Chicken Breasts 🍗 | 2 lb | Pounded to even 1/2-inch thickness |
| Buttermilk 🥛 | 2 cups | Full-fat for maximum tenderness |
| All-Purpose Flour 🌾 | 2 cups | Divided for double dredging |
| Cornstarch 🌽 | ½ cup | For extra crispiness |
| Kosher Salt 🧂 | 1 tbsp | Diamond Crystal preferred |
| Freshly Ground Black Pepper 🌶️ | 2 tsp | Coarse grind for texture |
| Garlic Powder 🧄 | 2 tsp | Not garlic salt |
| Onion Powder 🧅 | 2 tsp | Fine powder, no lumps |
| Paprika 🌶️ | 2 tsp | Sweet or smoked variety |
| Cayenne Pepper 🔥 | ½ tsp | Adjust for heat preference |
| Vegetable Oil 🫒 | 8 cups | For deep frying, high smoke point |
| Large Eggs 🥚 | 2 whole | For binding dredge |
| Hot Sauce 🌶️ | 2 tbsp | Added to buttermilk brine |
[recipe_ingredient_scaler]
The chicken quality is non-negotiable. Boneless, skinless breasts with even thickness ensure consistent cooking—avoid pre-cut tenders as they overcook. Buttermilk is the secret to tenderness; full-fat from a trusted brand like Organic Valley yields superior results. For the dredge, all-purpose flour with added cornstarch creates that restaurant-quality crunch. Source these from any major supermarket—Kroger or Publix reliably stock the essentials.
No buttermilk? Whole milk with 1 tbsp vinegar per cup works in a pinch. Swap cornstarch for arrowroot powder at a 1:1 ratio. For heat adjustments, reduce or omit the cayenne. The paprika can be substituted with smoked paprika for deeper flavor. If avoiding eggs, 1/4 cup aquafaba binds the dredge effectively. Always use freshly ground black pepper—pre-ground lacks the necessary punch.
Store raw chicken in the coldest part of the fridge for up to 2 days. The dredge mixture keeps in a sealed container for 1 week. Fry in small batches to maintain oil temperature—350°F is critical. Leftovers stay crispy when reheated in a 400°F oven for 10-12 minutes.
Why You’ll Love This Recipe
- Minimal Effort: I just toss the chicken in buttermilk, coat it in flour and cornstarch, and let the deep fryer do the rest.
- Crispy Perfection: That cornstarch in the batter makes the crust so shatteringly crisp it puts fast food to shame.
- Feeds the Crew: Between us, this is my go-to for game day—everyone gets a piece, and the leftovers make killer sandwiches.
- Budget Stretcher: Boneless chicken breasts stay cheap, and one batch fills us up for two meals. I’ll be real: it’s my wallet’s favorite recipe.
Step-by-Step Instructions for Fried Chicken Breast Deep Fryer
This method ensures crispy exteriors and moist interiors with precise deep-frying techniques.
Step 1: Prepare the Buttermilk Brine
In a large bowl, whisk together the 2 cups Buttermilk, 2 whole Large Eggs, and 2 tbsp Hot Sauce until fully combined. The mixture should be smooth with no streaks of egg visible.
Add the 2 lb Boneless Skinless Chicken Breasts to the brine, ensuring each piece is fully submerged. Cover and refrigerate for at least 4 hours or preferably overnight. This step tenderizes the meat and infuses it with flavor while the acid in the buttermilk begins breaking down proteins for maximum juiciness.
Step 2: Create the Seasoned Dredge
In a shallow dish, combine the 2 cups All-Purpose Flour, 0.5 cup Cornstarch, 1 tbsp Kosher Salt, 2 tsp Freshly Ground Black Pepper, 2 tsp Garlic Powder, 2 tsp Onion Powder, 2 tsp Paprika, and 0.5 tsp Cayenne Pepper. Whisk thoroughly to distribute the seasonings evenly.
The cornstarch is critical here—it creates an extra-crispy crust that stays crunchy even after frying. The blend of spices should appear uniformly distributed with no visible clumps.
Step 3: Double-Dredge for Maximum Crisp
Remove the chicken from the brine, allowing excess to drip off. Dredge each piece in the seasoned flour mixture, pressing firmly to adhere. Shake off any loose flour, then dip back into the buttermilk brine briefly before dredging a second time.
This double-dredge technique builds up layers of coating that create an audibly crisp crust when fried. Place the dredged pieces on a wire rack set over a baking sheet to allow air circulation underneath, which prevents the coating from becoming soggy before frying.
Step 4: Deep-Fry to Golden Perfection
In a deep fryer or heavy pot, heat the 8 cups Vegetable Oil to 350°F. Use a deep-fry thermometer for accuracy. Carefully lower 2-3 pieces of chicken into the hot oil, being careful not to overcrowd the fryer.
Fry for 12-15 minutes, turning occasionally, until the coating is deep golden brown and the internal temperature reaches 165°F. The oil should bubble steadily but not violently around the chicken. Drain on a wire rack to maintain crispiness rather than a paper towel, which can create steam and soften the crust.
Step 5: Rest and Serve Immediately
Allow the fried chicken to rest for 5 minutes before serving. This brief rest lets the juices redistribute throughout the meat while the coating remains at its peak crispiness.
Serve while hot. The exterior should have a satisfying crunch that gives way to tender, juicy meat inside. The double-dredge technique ensures the crust stays crisp even as the chicken sits briefly before serving.
Pro Tips For Making Fried Chicken Breast Recipe Deep Fryer
- Test Oil Temp: Drop a pinch of flour in the oil—if it sizzles and floats immediately, it’s ready. I learned this the hard way after pulling out pale, greasy chicken that sat in lukewarm oil.
- Pound Even Thickness: Use a rolling pin or heavy pan to flatten the chicken breasts to ½ inch thick. This guarantees even cooking and no chewy, underdone centers while the edges burn.
- Double Dredge: Dip the chicken in buttermilk, then flour, then buttermilk again, then flour again. Sounds like overkill, but it creates that shatteringly crisp crust that actually stays put.
- Rest Before Frying: Let the dredged chicken sit on a wire rack for 10 minutes before hitting the oil. This helps the coating adhere and prevents it from sliding off in the fryer—yes, even if you’re impatient like me.
Essential Equipment for Perfect Results
Deep Fryer Selection
Invest in a 5-6 quart electric deep fryer for home use—I love my Presto GranPappy for its precise temperature control. Look for models with adjustable thermostats and viewing windows. Avoid cheap units that can’t maintain steady 350°F heat. 💡
Oil Thermometer
A candy/deep-fry thermometer is non-negotiable. I use the Taylor Precision model with a 5-inch probe. Clip it to the pot side and monitor constantly—oil temp drops when adding chicken and needs immediate adjustment.
Dredging Station
Set up shallow dishes for buttermilk and flour mixtures. I prefer stainless steel for durability. Have a wire rack ready for draining dredged pieces. This three-piece setup prevents cross-contamination and keeps your workspace organized.
Tongs and Slotted Spoon
Use 12-inch locking tongs for safe chicken handling. A stainless steel slotted spoon helps remove bits from oil. I keep both near the fryer—I’ve learned the hard way that flimsy utensils bend under hot oil pressure.
Splatter Screen
A stainless steel splatter screen placed over your fryer catches oil pops. It’s a $10 investment that saves your stovetop from greasy messes. Position it at an angle for easy access while still protecting your workspace.
Paper Towel Setup
Line a baking sheet with paper towels for draining. I use Bounty for its absorbency. Place a wire rack on top to keep chicken elevated, preventing soggy bottoms. This dual-layer system maintains crispiness while catching excess oil.
Nutrition Facts
Frequently Asked Questions
What oil temperature is best for frying?
Maintain a steady 350°F for crispy, even cooking. Use a thermometer to monitor, as temperature drops when adding chicken and needs quick adjustments.
How do I keep the coating crispy?
Drain on a wire rack, not paper towels, to prevent steam. The double-dredge method and cornstarch in the flour also help create a crunchy crust.
Can I use chicken tenders instead of breasts?
Yes, but reduce frying time to 8-10 minutes, as they cook faster. Ensure they’re evenly sized for consistent results.
How do I prevent dry chicken?
Brine in buttermilk for at least 4 hours and avoid overcooking. Use a meat thermometer to confirm 165°F internally.

Trained in classic French technique but raised on slow-cooked ribs and spicy rubs, she blends culinary skill with smoke and soul.
- Recipe for Boneless Pork Chops in Cast Iron Skillet: Sear and Baste to Juicy Perfection - October 3, 2026
- Recipe for Boneless Cross Rib Roast: Slow-Roasted Beef with Herb Crust - October 3, 2026
- Hamburgers in Sauce Recipe Crock Pot: Slow-Cooked Savory Delight - October 3, 2026