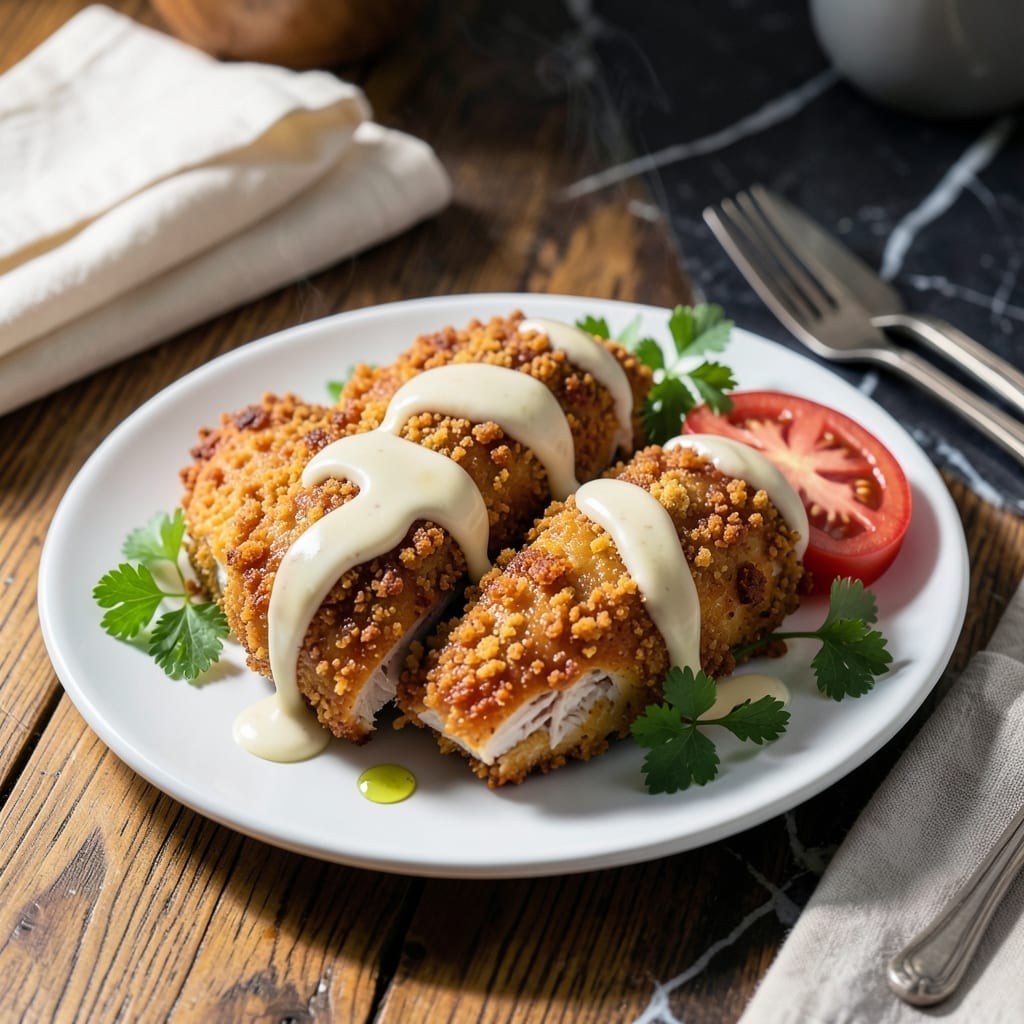
This panko-crusted chicken breast delivers an irresistibly crispy texture that sets it apart from traditional fried chicken. I developed this method after testing countless breading techniques to achieve that perfect crunch.
The secret lies in the double-dipping process and using panko breadcrumbs, which create a lighter, airier crust. Each bite offers a satisfying shatter followed by juicy, tender meat inside. The technique is simple but requires precision.
You’ll achieve restaurant-quality results with golden, crispy cutlets that stay crunchy even after resting. The panko forms a thick, even coating that locks in moisture while delivering that signature Japanese-style texture.
Serve immediately for maximum crunch, or keep warm in the oven while finishing the batch. This method never fails to impress at the dinner table.
Ingredients for Fried Chicken Breast Recipe Panko
Panko breadcrumbs and precise technique create these ultra-crispy Japanese-style cutlets with juicy interiors.
| Ingredient | Amount | Notes |
|---|---|---|
| Boneless Skinless Chicken Breasts 🍗 | 1 ½ lb | Pounded to even 1/2-inch thickness |
| Panko Breadcrumbs 🍞 | 2 cups | Japanese-style for maximum crunch |
| All-Purpose Flour 🌾 | ½ cup | For initial dredging layer |
| Large Eggs 🥚 | 2 whole | Beaten for binding agent |
| Buttermilk 🥛 | ½ cup | Full-fat for extra tenderness |
| Neutral Oil 🫒 | 3 cups | For deep frying, peanut or vegetable |
| Garlic Powder 🧄 | 1 tsp | For seasoning breading |
| Onion Powder 🧅 | 1 tsp | For depth of flavor |
| Paprika 🌶️ | 1 tsp | Sweet or smoked variety |
| Salt 🧂 | 1 ½ tsp | Diamond Crystal kosher preferred |
| Black Pepper 🌶️ | ½ tsp | Freshly ground for best results |
| Baking Powder 🧂 | ½ tsp | For extra crispiness in coating |
[recipe_ingredient_scaler]
The panko breadcrumbs are non-negotiable for that signature texture. Kikkoman brand is widely available and delivers consistent results. For the chicken, air-chilled breasts from Whole Foods or Costco stay juicier than conventional. Pounding to even thickness ensures uniform cooking—don’t skip this step (worth the extra minute). The buttermilk should be full-fat for optimal tenderness and browning.
No buttermilk? Whole milk with 1 tbsp vinegar works in a pinch. For a gluten-free version, swap the flour for cornstarch and use gluten-free panko (available at Trader Joe’s). The baking powder in the flour mixture creates micro-bubbles for extra crunch. If you’re out of paprika, cayenne adds color and a subtle kick (use half the amount).
Fry in batches to maintain oil temperature—crowding lowers the heat. Drain on a wire rack, not paper towels, to keep the crust crispy. Best served immediately, but holds up for 10 minutes in a 200°F oven. Leftovers reheat poorly—this is a make-and-serve-now dish.
Why You’ll Love This Recipe
- No-Fuss Coating: I dip, dredge, and fry in under 20 minutes—no complicated steps, just panko and buttermilk doing the heavy lifting.
- Crispy Outside, Juicy Inside: The panko gives it that shatter-crisp coating while the buttermilk keeps the chicken breast tender every single time.
- Weeknight Hero: Between us, this is my go-to for busy evenings when I need something hot and satisfying on the table fast.
- Leftovers? No Problem: Honestly, it reheats beautifully in the air fryer—still crispy, still delicious, and I’ll be real: I make extra just for this.
Step-by-Step Instructions for Ultra Crispy Panko Chicken Breasts
Master this technique for perfectly crisp, golden cutlets that stay juicy inside.
Step 1: Prep and Season the Chicken
Pound the 1.5 lb Boneless Skinless Chicken Breasts to an even ½-inch thickness between plastic wrap. This ensures even cooking and prevents dry, overdone edges.
Season both sides liberally with 1.5 tsp Salt and 0.5 tsp Black Pepper. I use Diamond Crystal kosher salt for its clean flavor and even distribution. Let the chicken rest at room temperature for 10 minutes to allow the seasoning to penetrate.
Step 2: Create the Breading Station
Set up three shallow dishes. In the first, combine 0.5 cup All-Purpose Flour, 1 tsp Garlic Powder, 1 tsp Onion Powder, 1 tsp Paprika, and 0.5 tsp Baking Powder. The baking powder creates micro-bubbles in the coating for extra crunch.
In the second dish, whisk together 2 whole Large Eggs and 0.5 cup Buttermilk until fully homogenous. The buttermilk’s acidity tenderizes the chicken while the eggs provide adhesion. Place 2 cups Panko Breadcrumbs in the third dish—Japanese-style panko’s coarse texture guarantees maximum crispiness.
Step 3: Dredge and Bread the Chicken
Working with one piece at a time, dredge the chicken in the flour mixture, pressing gently to adhere. Shake off excess—thick clumps prevent proper crisping.
Dip the floured chicken into the egg mixture, allowing excess to drip off for 5 seconds. Then press firmly into the panko, ensuring complete coverage. Transfer to a wire rack and let rest for 5 minutes to set the coating. This step prevents the breading from sliding off during frying.
Step 4: Fry to Golden Perfection
Heat 3 cups Neutral Oil in a deep, heavy-bottomed pot to 350°F. Use a thermometer for precision—oil that’s too cool yields greasy chicken, while too-hot oil burns the coating before the meat cooks.
Fry two pieces at a time to avoid crowding, which lowers the oil temperature. Cook for 4-5 minutes per side until the coating is deep golden brown and the internal temperature reaches 165°F. The panko should bubble vigorously when first submerged—a sign of proper crisping.
Step 5: Drain and Rest Before Serving
Transfer the fried chicken to a wire rack set over a baking sheet. Never drain on paper towels—they trap steam, which softens the crispy coating. Let rest for 3 minutes to allow the juices to redistribute.
The chicken should have an audibly crisp exterior with a moist, tender interior. Serve immediately while hot—the contrast between the shatteringly crisp panko and juicy chicken is what makes this dish exceptional.
Pro Tips For Making Fried Chicken Breast Recipe Panko
- Pound the Breasts: Use a rolling pin or meat mallet to even out the thickness to about ½ inch—this guarantees even cooking and prevents dry, overdone edges while the center finishes.
- Double Dip the Coating: After the buttermilk soak, dredge in flour, dip in beaten egg, then press hard into the panko so the crumbs really stick—I learned this the hard way when my first batch kept shedding breading.
- Rest Before Frying: Let the coated chicken rest on a wire rack for 10 minutes before frying; this sets the crust so it doesn’t peel off in the oil.
- Use Medium-High Heat: Keep the oil at 350°F—hot enough for a golden crust but not so high it burns the panko before the chicken cooks through.
Wine and Beer Pairings for These Flavors
Crisp White Wines
A chilled Pinot Grigio from Italy cuts through the richness beautifully—the bright acidity cleanses your palate between bites. I love Santa Margherita for its consistent quality and subtle citrus notes. 💫
Light Red Options
For red lovers, try a lightly chilled Beaujolais with its bright red fruit flavors. The Louis Jadot Beaujolais-Villages has just enough body to complement the crunch without overwhelming the dish.
Japanese Beers
The crisp, clean profile of a Japanese lager like Sapporo or Asahi pairs perfectly with this Japanese-style chicken. Their light carbonation refreshes your mouth after each crispy bite. 🍺
Craft Beer Choices
A Pilsner from Breakside Brewery here in Portland offers the same crisp qualities. Avoid hoppy IPAs—they’ll clash with the delicate panko crust.
Sparkling Alternatives
Prosecco’s gentle bubbles and slight sweetness balance the savory notes. Look for La Marca at New Seasons—it’s my go-to for celebrations with this dish.
Non-Alcoholic Pairing
For a zero-proof option, try sparkling yuzu soda from Portland’s Townshend’s Tea. The citrus-forward flavor complements the crunch wonderfully.
Nutrition Facts
Frequently Asked Questions
Can I use regular breadcrumbs instead of panko?
No, regular breadcrumbs won’t give the same texture. Panko’s coarse, airy structure creates that signature ultra-crispy coating. Regular breadcrumbs absorb more oil and create a denser, less satisfying crunch.
How do I keep the coating from falling off?
Let the breaded chicken rest for 5 minutes before frying. This sets the coating. Also, avoid moving the pieces too much in the oil and maintain 350°F oil temperature for even cooking.
Can I bake these instead of frying?
Yes, bake at 400°F for 18-20 minutes, flipping halfway. For extra crispiness, spray the breaded chicken with oil before baking. It won’t be as shatteringly crisp as frying, but still delicious.

Trained in classic French technique but raised on slow-cooked ribs and spicy rubs, she blends culinary skill with smoke and soul.
- Recipe for Dumplings in Crock Pot: Fluffy Pillows with Minimal Effort - October 3, 2026
- Recipe For Diced Pork In Slow Cooker: Melt-In-Your-Mouth Tenderness All Day - October 3, 2026
- Recipe for Crock Pot Lasagna Using Ravioli: No-Boil Cheese Layers - October 3, 2026