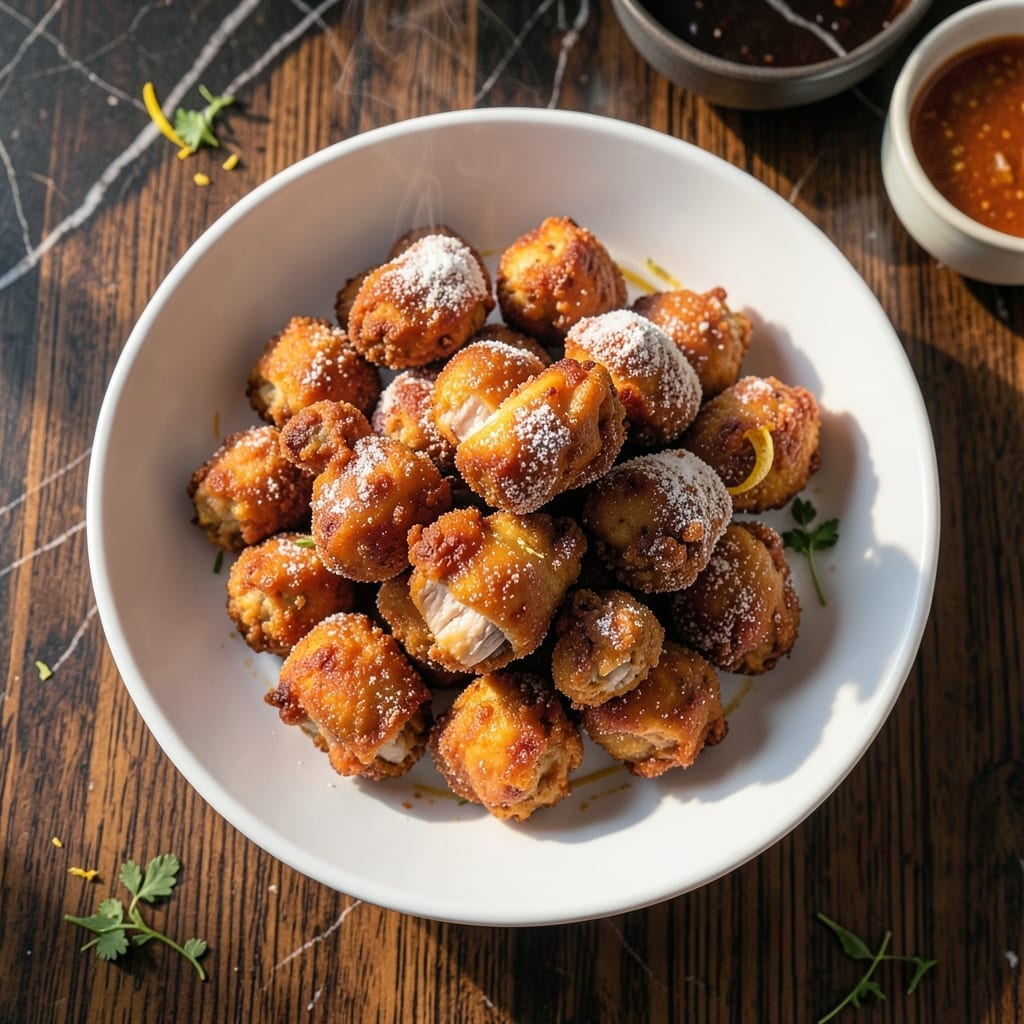
This Korean fried chicken delivers ultra crispy results without any sauce to distract from the perfect crunch. I developed this method after testing countless variations in my small kitchen, focusing on achieving that signature shatteringly crisp exterior.
The double-frying technique is non-negotiable for creating layers of crispiness that stay intact from oven to table. A thin, potato starch-based coating ensures maximum crunch while keeping the meat tender and juicy underneath.
What emerges is golden, crackling chicken with a texture so satisfying it doesn’t need any sauce. The surface stays crispy long after frying, making it ideal for serving at room temperature or packing for picnics.
Serve as a main course or appetizer with pickled vegetables for contrast. The results speak for themselves.
Ingredients for Korean Fried Chicken Recipe Plain
Eleven ingredients create that signature shatteringly crisp Korean fried chicken texture without sauce.
| Ingredient | Amount | Notes |
|---|---|---|
| Chicken Thighs 🍗 | 2 lb | Boneless, skin-on, cut into bite-sized pieces |
| Potato Starch 🥔 | 1 cup | For ultra-crispy coating |
| All-Purpose Flour 🌾 | ½ cup | Lightly coats chicken first |
| Baking Powder 🧂 | 2 tsp | Creates air pockets for crunch |
| Kosher Salt 🧂 | 1 ½ tsp | Diamond Crystal preferred |
| Ground Black Pepper 🌶️ | 1 tsp | Freshly cracked for best flavor |
| Garlic Powder 🧄 | 1 tsp | Adds subtle depth to coating |
| Onion Powder 🧅 | 1 tsp | Balances seasoning blend |
| Neutral Oil 🛢️ | 6 cups | For deep frying, peanut or vegetable oil |
| Cold Water 💧 | ½ cup | For initial dredge consistency |
| Cornstarch 🌽 | ¼ cup | Optional for extra crispiness |
[recipe_ingredient_scaler]
The chicken thighs are non-negotiable here—boneless and skin-on deliver the juiciest results with maximum surface area for crisping. Asian markets or Costco often have the best prices for bulk potato starch, which is the secret to that glass-like crunch. Look for Diamond Crystal kosher salt for even seasoning distribution. Freshly cracked black pepper makes a noticeable difference in the final flavor profile.
No potato starch? Cornstarch works at a 1:1 ratio, though the texture won’t be quite as delicate. For a gluten-free version, swap all-purpose flour for rice flour. The baking powder is key—don’t omit it—as it creates micro-bubbles in the coating for extra crunch. Chicken breasts can substitute but require 30% less cooking time to avoid dryness.
Fry in small batches to maintain oil temperature. Drain on a wire rack, not paper towels, to keep the coating crisp. Leftovers reheat best in a 400°F oven for 8-10 minutes. The coating stays shatteringly crisp for up to 2 days when stored uncovered in the fridge.
Why You’ll Love This Recipe
- Minimal Fuss: I just toss the chicken thighs in potato starch and flour, no fancy techniques or hard-to-find ingredients.
- That Crispy Bite: The baking powder in the coating makes it so light and shatteringly crisp, it’s ridiculous.
- Crowd Pleaser: Honestly, I serve this at parties and my picky nephew even clears his plate.
- Leftovers? Yes Please: It reheats in the air fryer for 3 minutes and tastes just as good the next day.
Step-by-Step Instructions for Korean Fried Chicken Plain
Master the double-fry technique for shatteringly crisp chicken without any sauce distraction.
Step 1: Season and Coat the Chicken
Pat the 2 lb chicken thighs completely dry with paper towels—this ensures the coating adheres properly. In a large bowl, whisk together the 0.5 cup all-purpose flour, 1.5 tsp kosher salt, 1 tsp ground black pepper, 1 tsp garlic powder, and 1 tsp onion powder until evenly distributed.
Add the chicken pieces to the flour mixture and toss until each piece is fully coated. Then pour in the 0.5 cup cold water and mix gently until the flour forms a thin, clumpy batter on the chicken. This initial coating helps the starch layer stick better during frying.
Step 2: Apply the Potato Starch Coating
In a separate bowl, combine the 1 cup potato starch and 2 tsp baking powder. The baking powder creates tiny air pockets that contribute to the signature crunch. For extra crispiness, mix in the 0.25 cup cornstarch as well.
Working in batches, transfer the floured chicken pieces to the starch mixture. Press each piece firmly into the starch to ensure full coverage. Shake off any excess, but don’t be shy—the thick coating is what creates that incredible crunch. Set the coated chicken aside on a wire rack for 10 minutes to allow the coating to set.
Step 3: First Fry for Even Cooking
Heat the 6 cups neutral oil in a deep, heavy pot to 325°F. Use a deep-fry thermometer for precision—maintaining the correct temperature prevents greasy or undercooked chicken. Working in batches to avoid crowding, carefully lower the coated chicken into the oil.
Fry for 6-8 minutes until the chicken is cooked through and the coating turns a pale golden color. The internal temperature should reach 165°F at this stage. Remove the chicken with a slotted spoon and drain on a wire rack set over a baking sheet. This allows air to circulate, keeping the coating crisp.
Step 4: Second Fry for Maximum Crispiness
Increase the oil temperature to 375°F. Once hot, return the chicken to the oil in batches and fry for an additional 3-4 minutes until the coating is deep golden brown and shatteringly crisp. This double-fry technique is essential for achieving the ultra-crispy texture that defines this dish.
Drain the chicken again on the wire rack. The coating should be so crisp that it crackles audibly when you bite into it. Let the chicken rest for 2-3 minutes before serving to allow the juices to redistribute.
Pro Tips For Making Korean Fried Chicken Recipe Plain
- Double-Fry for Crisp: Fry the chicken at 325°F first for 6-7 minutes, then rest 2 minutes and fry again at 350°F for 3-4 minutes. I learned this the hard way—single-frying leaves the crust soggy under the sauce.
- Dry the Thighs: Pat the chicken thighs completely dry with paper towels before dredging. Sounds weird, but it works: even a little moisture makes the starch coating slide right off.
- Skip the Crowding: Fry in small batches—no more than 4-5 pieces at once in a standard pot. After burning three batches, I finally figured out that overcrowding drops the oil temp and gives you greasy, uneven chicken.
- Use Cold Oil: Start with oil at room temp, then heat it gradually. My grandmother swore by this, and she was right: cold oil at the beginning creates a thicker, crunchier crust that clings better.
Storing and Reheating This Dish
Fridge Storage
Let the chicken cool completely on a wire rack—about 30 minutes—before storing. Use an open container or place a paper towel under the rack to absorb excess oil. In the fridge, it stays crisp for up to 2 days when stored uncovered. 💡
Freezer Storage
For longer storage, freeze in a single layer on a baking sheet first, then transfer to a ziplock bag. This prevents pieces from sticking together. It keeps well for up to 1 month without losing much texture. Squeeze out all air to prevent freezer burn.
Oven Reheating
Preheat your oven to 400°F and spread pieces on a wire rack over a baking sheet. Reheat for 8-10 minutes until the coating crisps up again. This method works best for larger batches.
Air Fryer Method
For quick reheating, use an air fryer at 375°F for 3-4 minutes. Shake the basket halfway through for even crisping. I use my Ninja Foodi for this—it restores the crunch perfectly. ✨
Microwave Warning
Avoid the microwave if possible—it makes the coating soggy. If you must, use 50% power in 30-second intervals, but I can’t promise the same results. The texture just won’t hold up.
Nutrition Facts
Frequently Asked Questions
Can I use chicken breasts instead of thighs?
Yes, but they cook faster and can dry out. Reduce frying time by 30% and monitor closely. Thighs stay juicier and hold up better to double-frying.
Why is potato starch better than regular flour?
Potato starch creates an ultra-crisp, glass-like crust that stays shatteringly crisp longer. It absorbs less oil too, resulting in a lighter texture compared to flour-based coatings.
What if I don’t have a deep-fry thermometer?
Test oil temperature with a wooden chopstick—if bubbles form steadily around it, it’s ready. But a thermometer ensures perfect 325°F and 375°F temps for consistent results.
Can I bake this instead of frying?
Baking won’t achieve the same crispiness, but use 425°F on a wire rack for 25-30 minutes, flipping halfway. Spray with oil first for better browning.

Trained in classic French technique but raised on slow-cooked ribs and spicy rubs, she blends culinary skill with smoke and soul.
- Recipe for Boneless Pork Chops in Cast Iron Skillet: Sear and Baste to Juicy Perfection - October 3, 2026
- Recipe for Boneless Cross Rib Roast: Slow-Roasted Beef with Herb Crust - October 3, 2026
- Hamburgers in Sauce Recipe Crock Pot: Slow-Cooked Savory Delight - October 3, 2026