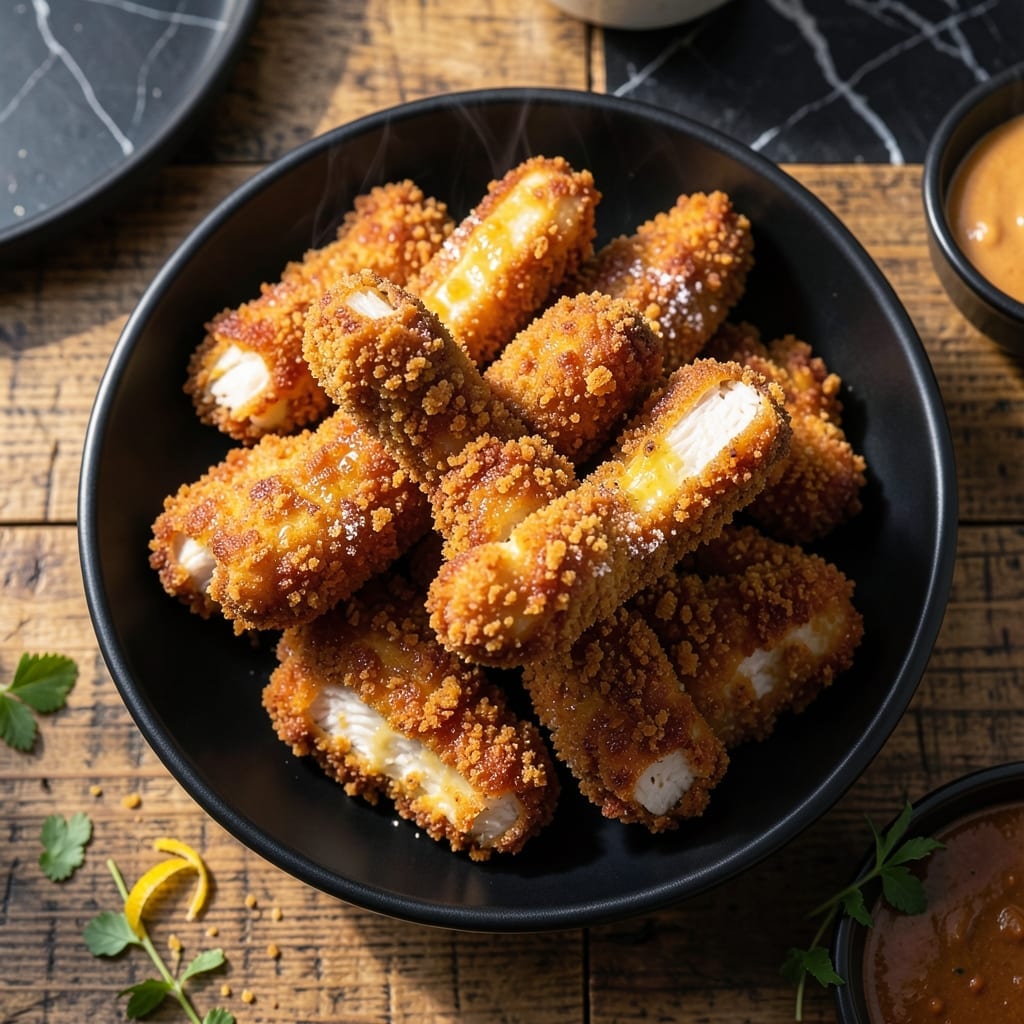
There’s a science to achieving that perfect crispy coating on chicken fingers, and panko breadcrumbs are the secret weapon. This method transforms simple chicken tenders into golden, shatteringly crispy bites that stay crunchy long after frying.
The double-dredging technique ensures maximum crunch—first a flour coating, then an egg wash, and finally a thick layer of panko. This creates a textured exterior that locks in juices while delivering that satisfying crunch with every bite.
Frying at the right temperature is key. Too low, and the coating absorbs oil; too high, and the outside burns before the inside cooks. The result is juicy chicken encased in a perfectly crispy, golden shell.
Serve with your favorite dipping sauces for a meal that’s as fun to eat as it is delicious. Here’s how to make them at home.
Ingredients for Fried Chicken Fingers Recipe Panko
Pantry staples plus chicken tenders make these golden crispy bites.
| Ingredient | Amount | Notes |
|---|---|---|
| Chicken Tenders 🍗 | 1 ½ lb | Boneless, skinless, uniform size |
| All-Purpose Flour 🌾 | 1 cup | For initial dredging |
| Large Eggs 🥚 | 2 whole | Beaten for egg wash |
| Panko Breadcrumbs 🍞 | 2 cups | Japanese-style for extra crunch |
| Cornstarch 🌾 | ¼ cup | Mixed into flour for crispiness |
| Kosher Salt 🧂 | 1 ½ tsp | Divided for seasoning layers |
| Ground Black Pepper 🌶️ | 1 tsp | Freshly ground preferred |
| Garlic Powder 🧄 | 1 tsp | For savory depth |
| Onion Powder 🧅 | 1 tsp | Complements garlic powder |
| Paprika 🌶️ | 1 tsp | Smoked or sweet variety |
| Vegetable Oil 🫒 | 4 cups | For deep frying |
| Buttermilk 🥛 | ½ cup | For tenderizing chicken |
[recipe_ingredient_scaler]
The panko is non-negotiable here—Kikkoman or Progresso brands have the right texture. Most grocery stores stock it in the Asian aisle. Chicken tenders (not breasts!) are key for uniform cooking and that perfect finger-food shape. Look for air-chilled tenders at Whole Foods or Trader Joe’s if your regular store’s selection looks sad. The buttermilk? Full-fat for maximum tenderness (don’t skimp here).
No buttermilk? Whole milk plus 1 tbsp vinegar or lemon juice works in a pinch. Out of panko? Regular breadcrumbs plus 1/4 cup crushed cornflakes adds crunch. The cornstarch in the flour mix is what keeps it extra crispy—don’t skip it. If you’re avoiding deep frying, an air fryer at 400°F gets close (spray with oil first). The oil? Any neutral type with a high smoke point—peanut or canola oil if you’ve got them.
Fry in batches so the oil temp doesn’t drop—this keeps them from getting greasy. Leftovers? They’ll lose some crunch but still taste great. Store in the fridge for up to 3 days and reheat in a toaster oven (not microwave!). Freeze uncooked breaded tenders on a tray first, then bag for up to 2 months.
Why You’ll Love This Recipe
- One Bowl Wonder: I mix the flour, eggs, and panko right in one bowl—no extra dishes, just crispy chicken fingers ready in minutes.
- Crunch Perfection: That panko-cornstarch combo gives an insane crunch that stays put, even when dipping in sauce.
- Freezer Friendly: I double the batch and freeze half for those nights I need dinner in 15 minutes flat.
Step-by-Step Instructions for Ultra Crispy Panko Chicken Fingers
This method guarantees a shatteringly crisp exterior with juicy chicken inside every time.
Step 1: Season and Tenderize the Chicken
Place the 1.5 lb Chicken Tenders in a bowl and pour over the 0.5 cup Buttermilk. Add 1 tsp Kosher Salt, 1 tsp Garlic Powder, 1 tsp Onion Powder, and 1 tsp Paprika to the buttermilk. Stir to combine and ensure all tenders are coated.
Let this marinate in the refrigerator for 30 minutes to 1 hour. This step is non-negotiable for tender, flavorful chicken. The buttermilk’s acidity breaks down proteins, while the spices infuse deep into the meat. Don’t skip this—it’s the difference between good and incredible.
Step 2: Set Up the Breading Station
In a shallow dish, whisk together the 1 cup All-Purpose Flour, 0.25 cup Cornstarch, remaining 0.5 tsp Kosher Salt, and 1 tsp Ground Black Pepper. The cornstarch is your secret weapon here—it creates micro-crispiness that flour alone can’t achieve.
In a second shallow dish, beat the 2 whole Large Eggs until uniform. In a third dish, add the 2 cups Panko Breadcrumbs. Set them up in this order: flour mixture, eggs, panko. This assembly line prevents cross-contamination and keeps your workspace organized.
Step 3: Bread the Chicken for Maximum Crunch
Remove a tender from the buttermilk, let excess drip off, then dredge it through the flour mixture. Press gently to adhere, then shake off excess. Next, dip it into the beaten eggs, letting excess drip off. Finally, roll it in the panko, pressing firmly to create a thick, even coating.
Place each breaded tender on a wire rack set over a baking sheet. This airflow prevents the coating from getting soggy while you finish breading the rest. The panko’s irregular shape creates more surface area for that coveted crunch.
Step 4: Fry to Golden Perfection
Heat the 4 cups Vegetable Oil in a deep, heavy pot to 350°F. Use a thermometer—this temperature is critical. Too low and you’ll get greasy chicken; too high and the outside will burn before the inside cooks.
Fry the tenders in batches for 4-5 minutes, turning occasionally, until they’re golden brown and floating at the surface. The internal temperature should reach 165°F. Don’t crowd the pot—this lowers the oil temperature and leads to uneven cooking.
Transfer to a wire rack or paper towels to drain. That first bite should deliver an audible crunch that gives way to perfectly seasoned, tender chicken.
Pro Tips For Making Fried Chicken Fingers Recipe Panko
- Double Dredge: I learned this the hard way—dip the tenders in flour, then egg, then panko, then back in egg and panko again for a crust that actually stays put and crunches like it should.
- Dry the Chicken: Pat the tenders bone-dry with paper towels first; even a little moisture makes the panko slide right off instead of sticking.
- Skip Cold Oil: After burning three batches, I finally figured out the oil needs to hit 350°F before the first tender goes in—any cooler and you get greasy, soggy breading.
- Rest Before Frying: Give the breaded tenders 10 minutes on a wire rack before frying—sounds weird, but it works and keeps the coating from peeling off in the oil.
Flavor Customization for This Recipe
Spicy Kick
Add 1 tbsp cayenne pepper and 1 tsp smoked paprika to your flour mixture for a fiery crunch. The heat builds gradually, so it won’t overpower the chicken’s natural flavor. I like this version with a cooling ranch dip to balance the spice. 🌶️
Cheesy Delight
Mix ½ cup grated Parmesan cheese into your panko breadcrumbs before coating. The cheese melts slightly during frying, creating golden, crispy bits that add a savory depth. Use fresh Parmesan for the best texture and flavor.
Herb-Infused
Stir 2 tbsp dried Italian seasoning or 1 tbsp each dried rosemary and thyme into the panko. The herbs toast beautifully in the oil, releasing aromatic flavors that complement the chicken perfectly.
Citrus Zing
Add 1 tbsp lemon zest and 1 tsp orange zest to the panko mixture for a bright, citrusy note. This pairs wonderfully with a honey mustard dipping sauce. The zest adds freshness without making the dish taste overpowering.
Sweet Heat
Combine 2 tbsp brown sugar and 1 tsp chili powder into your panko for a sweet and spicy coating. The sugar caramelizes slightly during frying, creating a sticky, crispy exterior with a subtle kick.
Extra Crunch Boost
For maximum texture, pulse ¼ cup crushed potato chips or cornflakes with your panko before breading. This adds an extra layer of crunch that’s especially satisfying in every bite. 💪
Nutrition Facts
Frequently Asked Questions
Why use panko instead of regular breadcrumbs?
Panko creates a lighter, crispier coating because of its larger, airier flakes. Regular breadcrumbs compress more, leading to a denser texture.
Can I bake these instead of frying?
Yes! Bake at 400°F for 15-20 minutes, flipping halfway. Spray with oil first for extra crunch. The texture will differ slightly from frying.
How do I keep them crispy after cooking?
Place cooked tenders on a wire rack, not paper towels. This prevents steam from making the coating soggy. Serve immediately for best results.
What if my oil temperature drops while frying?
Let the oil recover to 350°F between batches. Crowding the pot lowers temperature, causing greasy results. Patience ensures perfect crunch.

Trained in classic French technique but raised on slow-cooked ribs and spicy rubs, she blends culinary skill with smoke and soul.
- Recipe for Boneless Pork Chops in Cast Iron Skillet: Sear and Baste to Juicy Perfection - October 3, 2026
- Recipe for Boneless Cross Rib Roast: Slow-Roasted Beef with Herb Crust - October 3, 2026
- Hamburgers in Sauce Recipe Crock Pot: Slow-Cooked Savory Delight - October 3, 2026