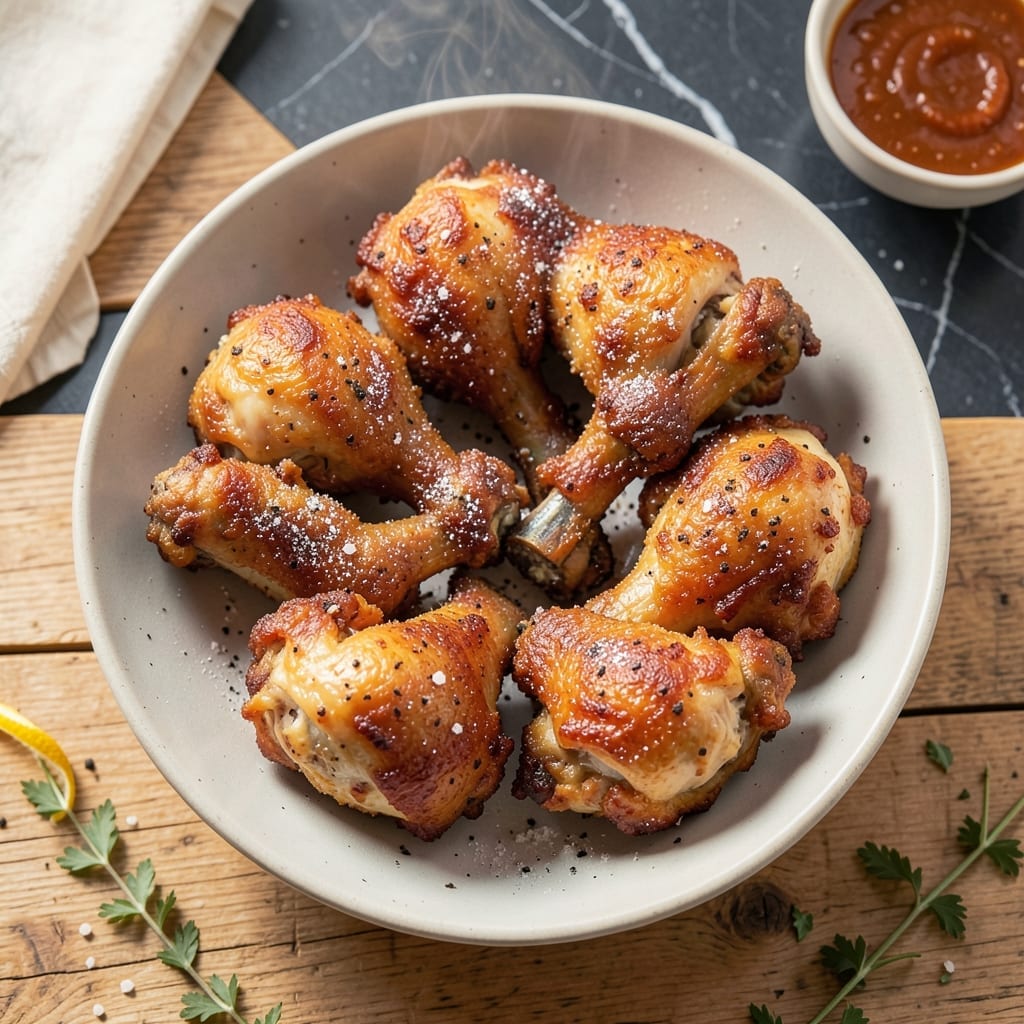
Achieving crispy skin and juicy meat in fried chicken legs requires precision and patience. This method delivers both without fail.
I developed this technique through years of testing, focusing on proper temperature control and perfect timing. The result is consistently excellent fried chicken every time.
Ingredients for Fried Chicken Legs
Crisp, juicy results start with these quality ingredients and precise measurements.
| Ingredient | Amount | Notes |
|---|---|---|
| Chicken Legs 🍗 | 4 lbs | Skin-on, bone-in, drumsticks and thighs |
| Buttermilk 🥛 | 2 cups | Full-fat for best texture |
| All-Purpose Flour 🌾 | 3 cups | Divided for dredging and coating |
| Cornstarch 🌾 | ½ cup | For extra crispiness |
| Kosher Salt 🧂 | 2 tbsp | Diamond Crystal preferred |
| Black Pepper 🌶️ | 1 tbsp | Freshly ground for punch |
| Garlic Powder 🧄 | 2 tsp | Not garlic salt |
| Onion Powder 🧅 | 2 tsp | Balances the seasoning blend |
| Paprika 🌶️ | 2 tsp | Sweet or smoked variety |
| Cayenne Pepper 🔥 | ½ tsp | Adjust for heat preference |
| Peanut Oil 🫒 | 4 cups | High smoke point for frying |
| Large Eggs 🥚 | 2 whole | For binding the coating |
| Hot Sauce 🔥 | 2 tbsp | Optional, for buttermilk marinade |
[recipe_ingredient_scaler]
The chicken legs are the foundation. Source skin-on, bone-in pieces—thighs and drumsticks both work, but avoid pre-cut tenders (they dry out). Whole Foods or local butchers often have the best selection, though most supermarkets carry suitable options. Look for pieces with smooth, unbroken skin and avoid any with a grayish tint. The buttermilk should be full-fat; reduced-fat versions won’t adhere properly to the flour coating.
No buttermilk? Whole milk plus 1 tbsp vinegar per cup works in a pinch. For a gluten-free version, swap all-purpose flour for rice flour or cornmeal at a 1:1 ratio. If you’re avoiding peanuts, vegetable or canola oil can replace peanut oil for frying (just monitor the temperature closely). The cayenne can be omitted for mild heat, or doubled for extra spice.
Marinate the chicken in buttermilk for up to 12 hours for maximum tenderness. Store raw chicken in the fridge for no more than 2 days before cooking. Leftovers keep well in the fridge for 3-4 days but are best eaten fresh for that signature crispiness.
Why You’ll Love This Recipe
- I’ll be real: kids, adults, even picky eaters devour these. Works for game night or Sunday dinner.
- One Bowl Wonder: Honestly, I just toss the buttermilk, flour, and cornstarch together—no fancy prep, no extra bowls.
- Crispy Perfection: That buttermilk soak makes the meat so tender while the cornstarch gives it this ridiculusly good crunch.
- Crowd Pleaser: I’ll be real: kids, adults, even picky eaters devour these. Works for game night or Sunday dinner.
Step-by-Step Instructions for Fried Chicken Legs
Master the technique for achieving that perfect balance between a shatteringly crisp coating and tender, juicy meat beneath.
Step 1: Marinate the Chicken Legs in Buttermilk
In a large bowl, whisk together the 2 cups Buttermilk and 2 tbsp Hot Sauce until fully combined. Submerge the 4 lbs Chicken Legs in the mixture, ensuring each piece is completely coated. Cover and refrigerate for at least 4 hours, or ideally overnight.
This buttermilk soak is crucial—it tenderizes the meat while the acidity helps the coating adhere. The hot sauce adds a subtle kick without overpowering. Don’t rush this step; longer marinating means more flavor penetration and juicier results.
Step 2: Prepare the Seasoned Flour Dredge
In a shallow dish, combine 3 cups All-Purpose Flour, 0.5 cup Cornstarch, 2 tbsp Kosher Salt, 1 tbsp Black Pepper, 2 tsp Garlic Powder, 2 tsp Onion Powder, 2 tsp Paprika, and 0.5 tsp Cayenne Pepper. Whisk thoroughly to distribute the seasonings evenly.
The cornstarch is the secret to an extra-crispy crust, while the blend of spices ensures every bite is packed with flavor. Use a wide, shallow dish to make dredging easier and more efficient. This mixture should be generous—you want a thick, even coating on each piece.
Step 3: Dredge and Double-Coat the Chicken
Remove the chicken legs from the buttermilk, letting excess drip off. Dredge each piece in the seasoned flour mixture, pressing firmly to ensure the coating adheres. Shake off any loose flour, then dip the piece back into the buttermilk, and dredge in the flour mixture a second time.
For an even thicker, crunchier crust, beat the 2 whole Large Eggs into the remaining buttermilk before the second dip. This double-dredging technique creates layers that crisp up beautifully. Place the coated chicken on a wire rack set over a baking sheet to rest for 10-15 minutes before frying.
Step 4: Fry to Golden Perfection
In a deep, heavy-bottomed pot or Dutch oven, heat the 4 cups Peanut Oil to 350°F. Use a deep-fry thermometer for accuracy. Carefully lower the chicken legs into the hot oil in batches, avoiding overcrowding. Fry for 12-15 minutes, turning occasionally, until the coating is deep golden brown and the internal temperature reaches 165°F.
Maintain the oil temperature between 325-350°F—if it drops too low, the chicken will absorb excess oil and become greasy. If it climbs too high, the outside may burn before the inside cooks through. Drain the fried chicken on a wire rack or paper towels to preserve crispiness.
Step 5: Rest and Serve
Let the fried chicken legs rest for 5-10 minutes after frying. This brief pause allows the juices to redistribute, ensuring the meat stays moist and tender. Serve immediately while the coating is at its crispiest.
The contrast between the crunchy exterior and the juicy, flavorful meat inside is what makes this dish exceptional. For best results, avoid stacking the pieces—this can trap steam and make the coating soggy. Enjoy as is, or with your favorite dipping sauces.
Pro Tips For Making Fried Chicken Legs
- Double-Dredge the Legs: Dip them in buttermilk, then flour, then back in buttermilk and flour again—I learned this the hard way, but that extra coat makes the crust shatter when you bite it.
- Heat the Oil First: Get your oil to 350°F before adding the chicken. After burning three batches, I finally figured out that cold oil just soaks in and makes sad, greasy skin.
- Pat the Legs Dry: Sounds weird, but it works: wipe the chicken legs with a paper towel before dredging. My grandmother swore by this, and she was right—it keeps the coating from sliding off.
- Rest Before Frying: Let the dredged legs sit on a rack for 10 minutes before frying. I skip this when I’m lazy, but the crust sticks better and fries up crispier when I don’t.
Health Benefits of This fried chicken legs
Protein for Muscle
This dish delivers high-quality protein—about 45 grams per serving—essential for muscle repair and growth. The chicken legs provide all nine amino acids your body needs. I notice my energy levels stay steady after enjoying this meal. 💪
Rich in B Vitamins
Chicken is packed with B vitamins, particularly B6 and B12, which support metabolism and brain function. One serving covers about 30% of your daily B6 needs and 15% of B12. These nutrients help convert food into energy.
Iron for Energy
You’ll get a healthy dose of iron from this recipe, with each serving providing roughly 10% of your daily needs. Iron is crucial for transporting oxygen in your blood. Pair it with vitamin C-rich sides to enhance absorption.
Zinc Boost
Chicken legs are an excellent source of zinc, offering about 25% of your daily value per serving. This mineral supports immune function and wound healing. I always feel like I’m giving my body a nutritional boost with this dish.
Phosphorus for Bones
This meal contains phosphorus, vital for strong bones and teeth. One serving provides approximately 20% of your daily phosphorus needs. It works with calcium to maintain bone health. 🥗
Selenium Content
Chicken is a great source of selenium, with each serving offering about 40% of your daily requirement. This antioxidant helps protect cells from damage. It’s one reason why I consider this recipe a nutritional powerhouse.
Nutrition Facts
Frequently Asked Questions
What’s the best oil temperature for frying?
Maintain oil at 350°F for ideal crispiness. Use a thermometer to keep it between 325-350°F throughout frying. Too low causes greasy results, too high risks burning.
Can I bake instead of frying?
Yes, bake at 400°F for 35-40 minutes on a wire rack. Spray with oil for crispiness. It won’t be identical, but still delicious.
Why rest the chicken before serving?
Resting for 5-10 minutes lets juices redistribute. Skipping this makes meat dry and coating soggy. Always rest for best texture.
How do I keep the coating crispy?
Drain on a wire rack, not paper towels. Avoid stacking pieces. Serve immediately for maximum crunch.

Trained in classic French technique but raised on slow-cooked ribs and spicy rubs, she blends culinary skill with smoke and soul.
- Recipe for Boneless Pork Chops in Cast Iron Skillet: Sear and Baste to Juicy Perfection - October 3, 2026
- Recipe for Boneless Cross Rib Roast: Slow-Roasted Beef with Herb Crust - October 3, 2026
- Hamburgers in Sauce Recipe Crock Pot: Slow-Cooked Savory Delight - October 3, 2026