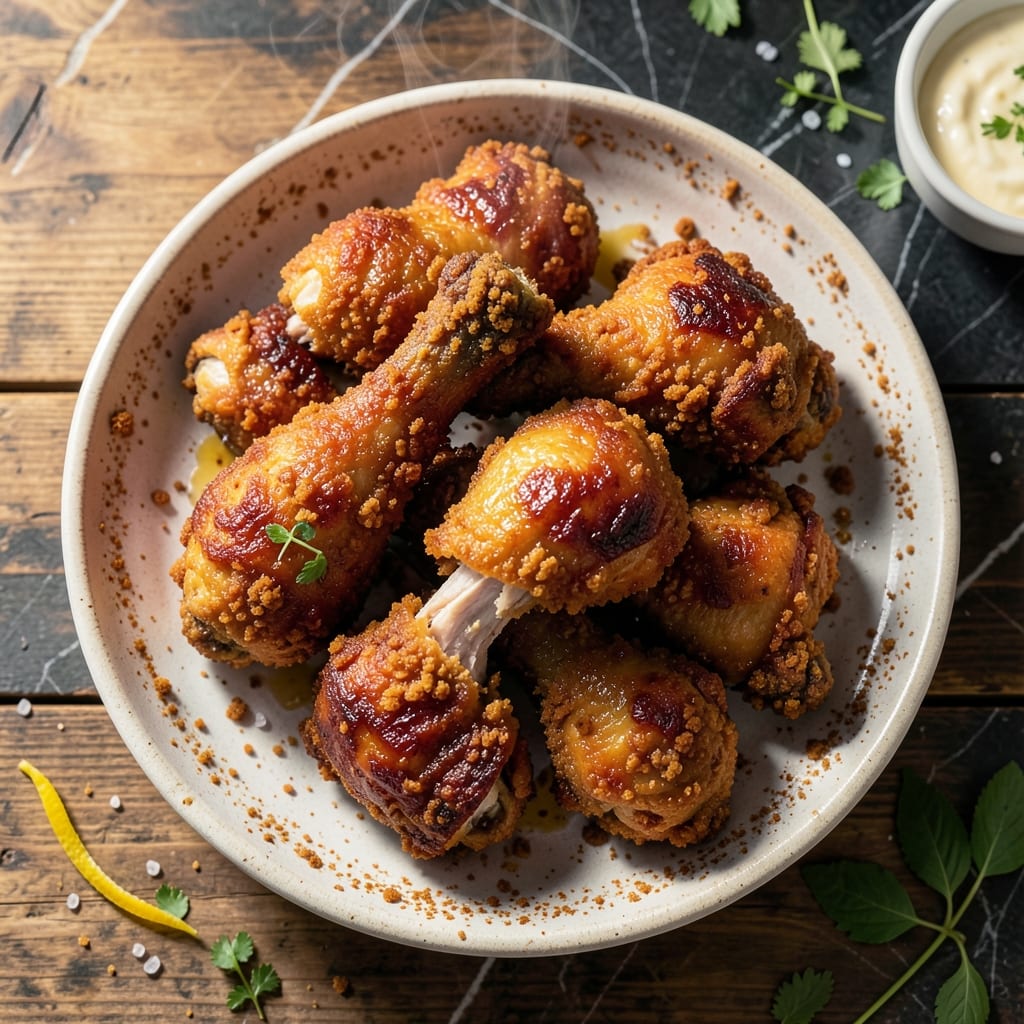
My grandmother never wrote down her fried chicken recipe, but I’ve decoded her method for achieving crispy perfection every time. This version uses a store-bought breading mix as the foundation, then elevates it with a double-brine technique that guarantees juicy meat.
The secret lies in the preparation: a buttermilk brine infuses flavor deep into the chicken, while a second dry brine with the breading mix creates an ultra-crispy crust. The result is golden, shatteringly crispy chicken with meat that stays tender and moist.
Frying at the right temperature ensures even cooking without burning the coating. I’ve perfected the timing to deliver that ideal balance of crispy exterior and succulent interior that makes fried chicken irresistible.
Serve hot for the best texture, with your favorite dipping sauces. This method proves you don’t need complicated techniques to achieve professional-quality results at home.
Ingredients for Fried Chicken Recipe Using Crispy Fry Breading Mix
Store-bought shortcut meets grandmother’s secret technique for that golden, shatteringly crisp crust.
| Ingredient | Amount | Notes |
|---|---|---|
| Chicken Thighs and Drumsticks 🍗 | 3 lb | Bone-in, skin-on for best flavor |
| Crispy Fry Breading Mix 🍞 | 2 cups | Store-bought, unseasoned preferred |
| Buttermilk 🥛 | 2 cups | Full-fat for richness |
| Kosher Salt 🧂 | ¼ cup | Diamond Crystal preferred for brining |
| Granulated Sugar 🍚 | 2 tbsp | Balances salt in brine |
| Black Pepper 🌶️ | 1 tbsp | Freshly ground for best flavor |
| Garlic Powder 🧄 | 1 tbsp | Not garlic salt |
| Onion Powder 🧅 | 1 tbsp | Adds depth to breading |
| Paprika 🌶️ | 1 tbsp | Sweet or smoked variety |
| Cayenne Pepper 🔥 | ½ tsp | Adjust to heat preference |
| Vegetable Shortening 🫒 | 4 cups | For deep frying, Crisco recommended |
| Large Eggs 🥚 | 2 whole | For egg wash binder |
| All-Purpose Flour 🌾 | ½ cup | Helps breading adhere |
| Hot Sauce 🌶️ | 1 tbsp | Optional, for brine kick |
[recipe_ingredient_scaler]
The chicken is non-negotiable—bone-in, skin-on thighs and drumsticks stay juicier than breasts. Most grocery stores sell them pre-packaged, but the butcher counter at Whole Foods or Publix will cut them fresh if you ask. The breading mix is the star here; Kraft’s Crispy Fry is my go-to (the unseasoned version lets you control the spice). Don’t skip the Diamond Crystal kosher salt—it dissolves faster in brines than table salt.
No buttermilk? Whole milk plus 1 tbsp vinegar per cup works in a pinch. Swap the shortening for peanut oil or lard (if you’re not worried about vegetarian diets)—both have a higher smoke point. Fresh chicken is ideal, but thawed frozen works (just pat it very dry). The hot sauce in the brine is optional, but I love the subtle tang—Tabasco or Crystal are my picks.
Fry in batches to avoid crowding the pan (drops oil temp = soggy crust). Leftovers keep in the fridge for 3-4 days—reheat in the oven at 375°F for 15 minutes to crisp back up. Never microwave, or you’ll lose that crunch (worth the extra minute).
Why You’ll Love This Recipe
- One Bowl Wonder: I just dump the crispy fry mix, buttermilk, and a pinch of sugar into one bowl—no whisking dry and wet mixes separately.
- Crispy Perfection: The breading mix gives that golden, shatteringly crisp shell while the buttermilk keeps the dark meat juicy inside.
- Feeds My Crew: I can fry up a double batch on Sunday and we’re set for dinner and next-day sandwiches.
- Pantry Hero: A bag of breading mix and thighs are cheap, and I always have buttermilk in the fridge for impromptu frying.
Step-by-Step Instructions for Fried Chicken Using Crispy Fry Breading Mix
Here’s the method that guarantees that golden crunch with every bite.
Step 1: Brine the Chicken for Maximum Flavor
In a large bowl, whisk together the 2 cups Buttermilk, 0.25 cup Kosher Salt, 2 tbsp Granulated Sugar, 1 tbsp Black Pepper, 1 tbsp Garlic Powder, 1 tbsp Onion Powder, 1 tbsp Paprika, 0.5 tsp Cayenne Pepper, and 1 tbsp Hot Sauce until the salt and sugar dissolve.
Submerge the 3 lb Chicken Thighs and Drumsticks completely in the brine. I press down on the chicken to ensure full coverage. Cover and refrigerate for 4-6 hours or overnight. The buttermilk tenderizes the meat while the spices infuse it with flavor.
Step 2: Heat the Frying Oil to the Perfect Temperature
In a deep, heavy-bottomed pot or Dutch oven, melt the 4 cups Vegetable Shortening over medium heat. Use a deep-fry thermometer to monitor the temperature—you want it to reach 350°F.
This temperature ensures the chicken cooks through without burning the breading. If you don’t have a thermometer, test the oil by dropping in a pinch of Crispy Fry Breading Mix—it should sizzle immediately and turn golden brown within 30 seconds.
Step 3: Dredge and Coat the Chicken
In a shallow dish, combine the 0.5 cup All-Purpose Flour with the 2 cups Crispy Fry Breading Mix. In another dish, beat the 2 whole Large Eggs lightly.
Remove the chicken from the brine and pat it dry with paper towels—this helps the coating adhere. Dip each piece into the beaten eggs, letting any excess drip off, then dredge it in the breading mixture. Press firmly to ensure the breading sticks to every crevice. Let the coated chicken rest for 5-10 minutes to help the coating set.
Step 4: Fry the Chicken to Golden Perfection
Carefully lower a few pieces of chicken into the hot Vegetable Shortening, being careful not to overcrowd the pot. Fry for 12-15 minutes for dark meat, turning occasionally, until the coating is deep golden brown and the internal temperature reaches 165°F.
The breading should be crispy and the juices should run clear when pierced. Maintain the oil temperature at 350°F throughout frying—if it dips too low, the chicken will absorb oil and become greasy. Use a slotted spoon to transfer the fried chicken to a wire rack set over a baking sheet to drain.
Step 5: Rest and Serve
Let the fried chicken rest for 5 minutes before serving. This allows the crust to set and the juices to redistribute, ensuring every bite is crispy on the outside and tender on the inside.
Serve immediately while still hot. The chicken should have a shatteringly crisp crust with a rich, golden hue. The double-brine method guarantees flavor deep into the meat, while the breading mix delivers that signature crunch.
Pro Tips For Making Fried Chicken Recipe Using Crispy Fry Breading Mix
- Double-Dip the Chicken: After the first coat of breading, dip back in buttermilk and breading again—I learned this the hard way—single-dipping leaves bald spots and a sad, patchy crust.
- Rest the Coated Pieces: Let the breaded chicken sit for 10 minutes before frying, so the coating sets and clings better. Sounds weird, but it works: fewer crumbs in the oil, more on your chicken.
- Heat the Oil Right: Use a thermometer and aim for 350°F. After burning three batches, I finally figured out that too-hot oil burns the breading before the chicken cooks through.
- Season the Buttermilk: Add 1 tablespoon kosher salt and 1 teaspoon sugar to the buttermilk before soaking the chicken—my grandmother swore by this, and she was right.
Essential Equipment for This Recipe
Deep Fry Thermometer
This is non-negotiable for perfect results. I use a Taylor Classic with a 5-inch probe—it clips to the pot and gives instant readings. Without it, you’re guessing at 350°F, and that leads to undercooked or burnt chicken. 🌡️
Heavy-Duty Pot
A 5-6 quart Dutch oven is ideal for home frying. I recommend Lodge enamel cast iron—it holds heat steadily and won’t warp. Avoid nonstick; the high heat can damage the coating over time.
Wire Rack Setup
Place a wire cooling rack over a baking sheet to drain fried chicken. This keeps the bottom crispy instead of soggy. I use a stainless steel rack from OXO—it’s sturdy and easy to clean.
Tongs for Frying
Long-handled stainless steel tongs (12-inch) let you turn chicken safely. I prefer OXO Good Grips with locking handles. Avoid plastic—they can melt near hot oil.
Paper Towel Station
Keep a roll of heavy-duty paper towels nearby for patting chicken dry before coating. The drier the chicken, the better the breading sticks. I also use them to blot excess oil after frying.
Splatter Screen
A stainless steel splatter screen prevents oil burns. Place it over the pot while frying. I got mine at Bed Bath & Beyond for under $15—it’s a small price for safety. 💡
Nutrition Facts
Frequently Asked Questions
Can I use chicken breasts instead of thighs and drumsticks?
You can, but they dry out faster. Reduce frying time to 10-12 minutes and use a thermometer to ensure they reach 165°F. Thighs stay juicier.
Why do I need to let the coated chicken rest before frying?
Resting for 5-10 minutes helps the breading adhere better. This prevents it from falling off during frying, giving you that perfect crispy crust.
Can I bake this instead of frying?
Yes, bake at 400°F for 25-30 minutes, flipping halfway. It won’t be as crispy, but it’s a healthier option. Use a wire rack for even air circulation.
How do I keep the chicken crispy if serving later?
Place on a wire rack in a 200°F oven for up to 30 minutes. Avoid stacking—it traps steam and makes the coating soggy.

Trained in classic French technique but raised on slow-cooked ribs and spicy rubs, she blends culinary skill with smoke and soul.
- Recipe for Boneless Pork Chops in Cast Iron Skillet: Sear and Baste to Juicy Perfection - October 3, 2026
- Recipe for Boneless Cross Rib Roast: Slow-Roasted Beef with Herb Crust - October 3, 2026
- Hamburgers in Sauce Recipe Crock Pot: Slow-Cooked Savory Delight - October 3, 2026