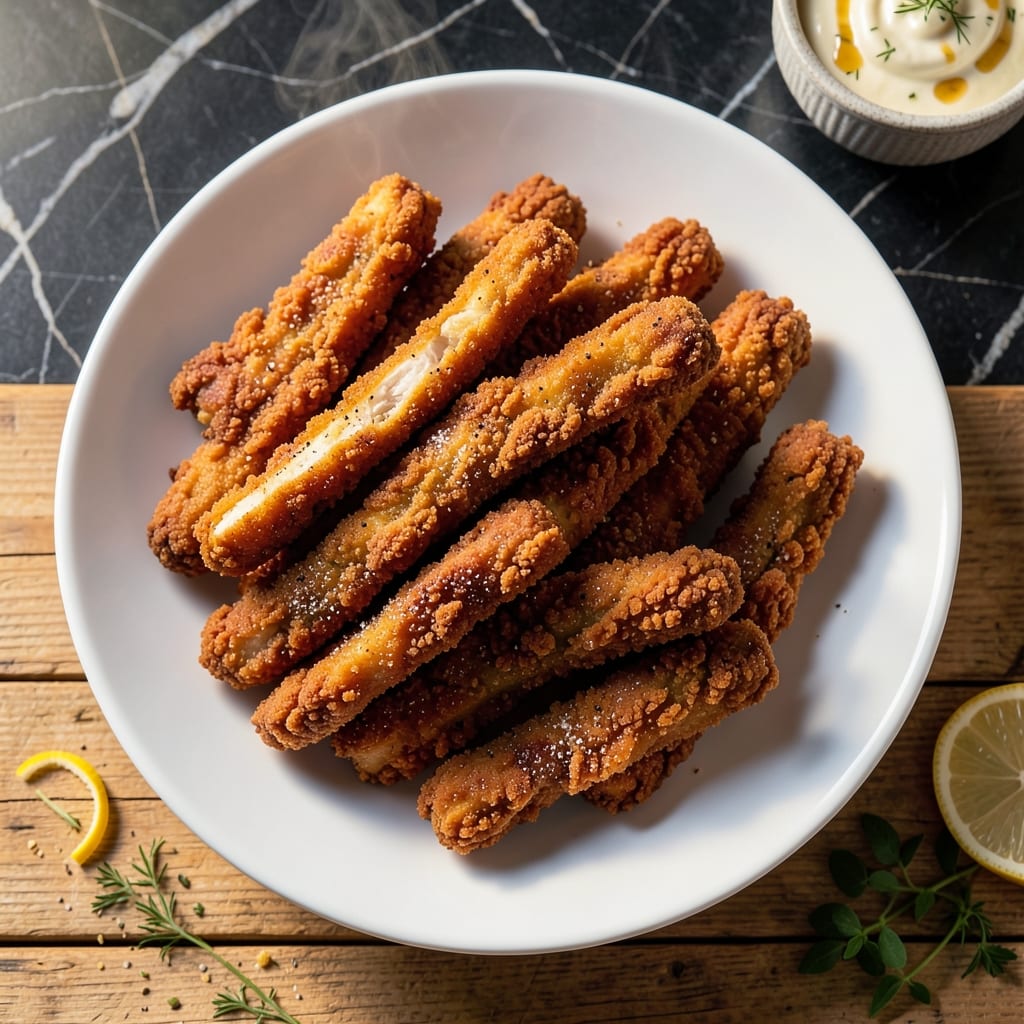
I developed this method after years of searching for the crispy yet tender chicken strips my family craves. The flour coating creates a golden crust that shatters with every bite, while the meat inside stays juicy and flavorful.
This isn’t just another fried chicken recipe—it’s a tested technique that delivers professional results at home. The key is maintaining the right oil temperature and not crowding the pan, which ensures even cooking and maximum crispiness.
You’ll end up with perfectly cooked strips that are golden-brown outside and moist inside. The flour mixture, seasoned just right, creates a coating that clings beautifully to the chicken without being too thick or doughy.
Serve these hot with your favorite dipping sauces for a meal that disappears faster than you can make it. Here’s how to achieve that ideal balance of textures every time.
Ingredients for Fried Chicken Strips Recipe with Flour
Golden, crispy strips start with simple pantry staples and a few fresh ingredients. Nothing complicated here.
| Ingredient | Amount | Notes |
|---|---|---|
| Boneless Skinless Chicken Breasts 🍗 | 1 ½ lb | Cut into 1-inch strips |
| All-Purpose Flour 🌾 | 2 cups | For crispy coating |
| Cornstarch 🌾 | ¼ cup | Adds extra crunch |
| Salt 🧂 | 1 ½ tsp | Divided for seasoning |
| Black Pepper 🌶️ | 1 tsp | Freshly ground preferred |
| Garlic Powder 🧄 | 1 tsp | For savory depth |
| Onion Powder 🧅 | 1 tsp | Balances the seasoning |
| Paprika 🌶️ | 1 tsp | Sweet or smoked variety |
| Large Eggs 🥚 | 2 whole | Beaten for egg wash |
| Whole Milk 🥛 | ½ cup | For dredging mixture |
| Vegetable Oil 🫒 | 4 cups | For frying, plus more as needed |
| Buttermilk 🥛 | ½ cup | Optional for extra tenderness |
[recipe_ingredient_scaler]
The chicken is key here—boneless, skinless breasts give you the most consistent strips. Costco or Sam’s Club are great for buying in bulk if you’re feeding a crowd. Look for pieces that are even in thickness so they cook uniformly. For the flour, any all-purpose works, but King Arthur or Gold Medal are my go-to brands. The cornstarch is what really amps up the crunch (don’t skip it).
No buttermilk? Milk with a tablespoon of vinegar works in a pinch. Want extra flavor? Swap the paprika for Cajun seasoning. If you’re avoiding eggs, a little extra buttermilk can help the coating stick, though the texture won’t be quite as crispy. The oil needs to be neutral—vegetable or canola are best. Peanut oil works too if you’re not allergic.
Raw chicken keeps in the fridge for 1-2 days max—use it fast. Leftovers (if there are any) stay crispy for 2 days in the fridge. Reheat in the oven at 375°F to keep them from getting soggy. Freeze uncooked strips for up to 3 months (thaw before cooking).
Why You’ll Love This Recipe
- No-Fuss Coating: I just toss the chicken in flour, cornstarch, salt, and pepper—no fancy prep, no marinating, done in minutes.
- Crispy Perfection: That cornstarch in the mix gives it this crazy-crisp shell with juicy chicken inside. Honestly, it’s the only way I’ll make strips now.
- Weeknight Hero: I throw these together for quick dinners, pack leftovers for lunch, or even serve them at game night. Between us, they disappear faster than I can fry them.
- Budget-Friendly Protein: Boneless chicken breasts stretch far, and the flour/cornstarch combo costs pennies. I’ll be real: it’s my go-to when I need to feed a crowd without breaking the bank.
Step-by-Step Instructions for Fried Chicken Strips
Here’s my method for achieving that perfect crunch and juicy center every time.
Step 1: Season and Prep the Chicken
Cut the 1.5 lb boneless skinless chicken breasts into 1-inch strips. Pat them dry with paper towels—this helps the coating stick. Season the strips with 1 tsp salt, 1 tsp black pepper, 1 tsp garlic powder, 1 tsp onion powder, and 1 tsp paprika. I like to toss them in a bowl to ensure even coverage.
For extra tenderness, pour the 0.5 cup buttermilk over the seasoned chicken and let it marinate for 15-20 minutes. The buttermilk helps break down the proteins, keeping the meat moist during frying. If you’re short on time, you can skip this step, but I promise it’s worth it.
Step 2: Prepare the Dredging Station
In a shallow bowl, whisk together the 2 whole large eggs and 0.5 cup whole milk until smooth. This is your wet dredge. In a separate large bowl, combine the 2 cups all-purpose flour and the 0.25 cup cornstarch with the remaining 0.5 tsp salt. The cornstarch is the secret to an ultra-crispy coating.
Set up your workspace with the wet and dry mixtures side by side. I like to place a wire rack over a baking sheet nearby for the dredged strips—this keeps them elevated so the coating doesn’t get soggy before frying.
Step 3: Dredge and Coat the Chicken
Working with one strip at a time, dip the chicken into the wet mixture, letting any excess drip off. Then, transfer it to the dry mixture, pressing gently to adhere the coating evenly. For maximum crunch, dip it back into the wet mixture and then the dry mixture again for a double coat.
Place the coated strips on the wire rack and let them rest for 10 minutes. This resting time helps the coating set, so it doesn’t fall off in the hot oil. You’ll notice the coating looks dry and slightly cracked—that’s exactly what you want.
Step 4: Fry to Golden Perfection
Heat the 4 cups vegetable oil in a deep, heavy-bottomed pot or Dutch oven over medium-high heat until it reaches 350°F. Use a kitchen thermometer for accuracy—if the oil isn’t hot enough, the chicken will absorb too much oil and turn greasy.
Carefully lower a few strips into the oil, being careful not to overcrowd the pot. Fry for 6-8 minutes, turning occasionally, until the coating is deep golden brown and the internal temperature reaches 165°F. Transfer the cooked strips to a wire rack or paper towels to drain excess oil.
Step 5: Rest and Serve
Let the strips rest for 5 minutes before serving. This allows the coating to crisp up even more and the juices to redistribute. Serve them hot with your favorite dipping sauces, like ranch or honey mustard.
The coating should crackle slightly when you bite into it, revealing tender, juicy chicken underneath. If you notice any spots that look undercooked, pop them back into the oil for another minute or two.
Pro Tips For Making Fried Chicken Strips Recipe With Flour
- Cut Even Strips: Slice the chicken breasts into uniform 1-inch thick strips so they cook at the same rate—I learned this the hard way after pulling out half-done thick pieces while the thin ones burned.
- Double Dredge: Toss the strips in flour first, then dip in a cornstarch slurry before the final flour coating. Sounds weird, but it works: the cornstarch makes the crust extra crispy.
- Hot Oil Test: Drop a pinch of flour into the oil before frying—if it sizzles immediately, it’s ready. After burning three batches, I finally figured out that oil temp is everything.
- Rest Before Frying: Let the coated strips sit for 5-10 minutes before hitting the oil. My grandmother swore by this, and she was right: it keeps the coating from sliding off.
Dietary Considerations for This Recipe
Gluten-Free Option
Swap the all-purpose flour for a 1:1 gluten-free flour blend like King Arthur Measure for Measure. Add 1 tbsp xanthan gum to improve binding. The texture will be slightly different but still crispy. I tested this with my cousin who has celiac disease—she loved it! 💛
Lower-Carb Version
Replace ½ the flour with almond flour and add 1 extra tbsp cornstarch for structure. The coating won’t be quite as golden, but it’ll still be crunchy. Bake at 400°F for 15-20 minutes instead of frying to reduce oil.
Dairy-Free Adaptation
Use unsweetened almond milk or coconut milk instead of whole milk in the wet dredge. For the buttermilk, mix ½ cup almond milk with 1 tbsp lemon juice. The flavor stays neutral, and the coating still clings perfectly.
Egg-Free Method
Make a thick slurry with ½ cup buttermilk and 2 tbsp cornstarch to replace the eggs. Dip the chicken in this mixture first, then the flour. The coating won’t be as thick, but it’ll still crisp up nicely in the oil.
Lower-Sodium Choice
Cut the salt in half and boost flavor with 1 tsp smoked paprika and ½ tsp cayenne. Use low-sodium chicken broth in the wet dredge instead of milk for extra depth. Taste as you season—you can always add more at the table.
Allergen Note
This recipe contains wheat, eggs, and dairy. For nut allergies, avoid almond flour and check your flour blend’s label. Always use fresh oil to prevent cross-contamination if frying for guests with allergies. 🔥
Nutrition Facts
Frequently Asked Questions
Can I use chicken tenders instead of breasts?
Chicken tenders are actually ideal—they’re already uniform in size. Just trim any excess fat and follow the same steps. They may cook slightly faster, so check for 165°F internal temperature after 5-6 minutes.
How do I keep the coating from falling off?
Pat the chicken completely dry before dredging and let the coated strips rest for 10 minutes. This helps the flour adhere. Also, avoid moving them too much in the oil until the coating sets.
What’s the best oil for frying?
Use a neutral oil with a high smoke point like vegetable, canola, or peanut oil. Avoid olive oil—it can burn at frying temperatures. Maintain 350°F for crispy results without greasiness.

Trained in classic French technique but raised on slow-cooked ribs and spicy rubs, she blends culinary skill with smoke and soul.
- Sanjeev Kapoor Egg Biryani Recipe: Fragrant Spiced Rice With Boiled Eggs - October 3, 2026
- Recipe for French Pork Spread Gorton: Savory Gallic Flavors in a Spreadable Delight - October 3, 2026
- Recipe for Pan Fried: Golden Crust with Savory Depth - October 3, 2026