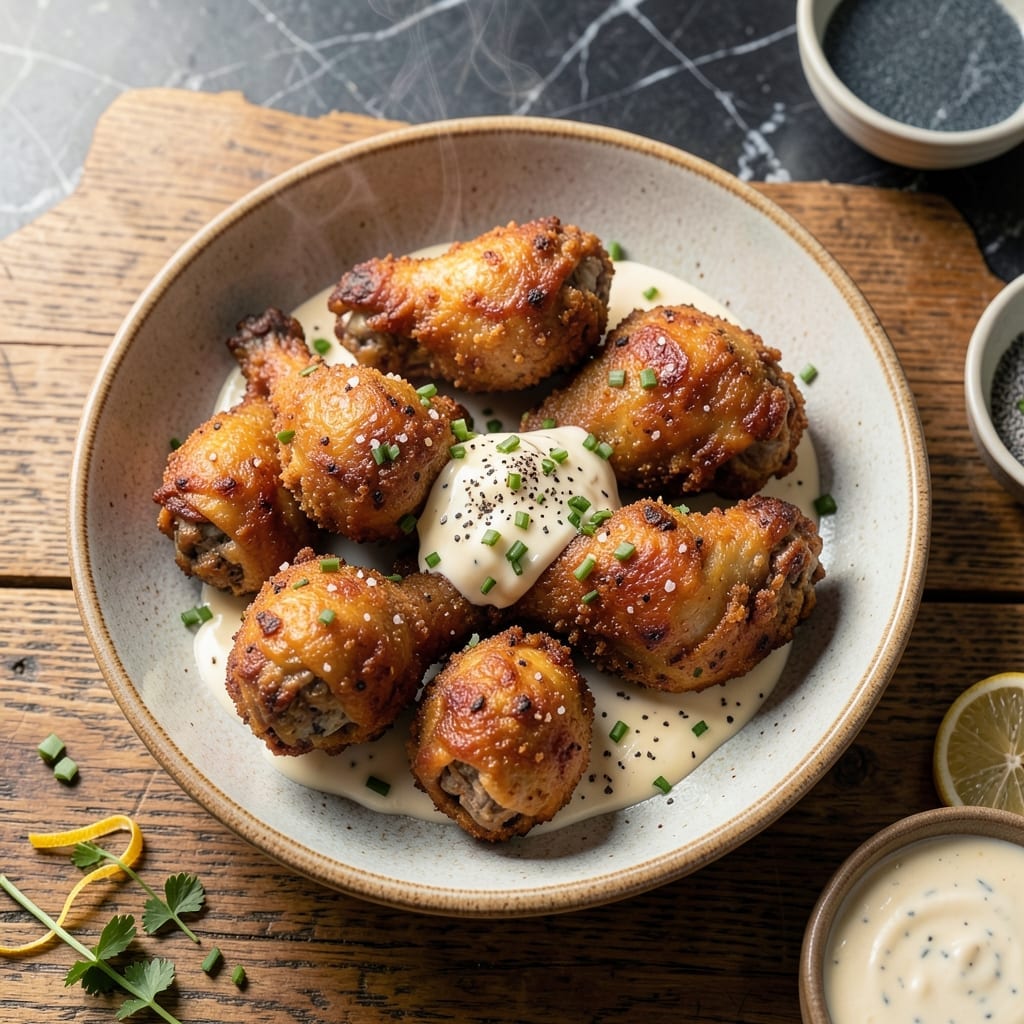
Achieving crispy fried chicken with juicy centers at home is absolutely possible with the right technique. I developed this method after years of testing, focusing on temperature control and proper breading layers.
The key is maintaining 350°F oil temperature and using a double-dredge process. This creates a shatteringly crispy crust that locks in moisture, ensuring the meat stays tender and flavorful beneath the golden coating.
Each piece emerges with a perfect golden-brown exterior and meat that pulls away from the bone with ease. The contrast between the crunchy shell and the succulent interior is what makes this dish irresistible.
Whether you prefer classic Southern style or modern variations, this foundation delivers consistent results. The technique works for bone-in pieces or boneless tenders with equal success.
Ingredients for Fried Chicken Recipe Ideas
Quality ingredients and precise measurements ensure crispy, juicy results every time.
| Ingredient | Amount | Notes |
|---|---|---|
| Chicken Thighs and Drumsticks 🍗 | 3 lb | Bone-in, skin-on for crispiness |
| Buttermilk 🥛 | 2 cups | Full-fat for tenderizing |
| All-Purpose Flour 🌾 | 2 cups | Divided for dredging |
| Cornstarch 🌽 | ½ cup | For extra crispiness |
| Large Eggs 🥚 | 2 whole | For binding breading |
| Kosher Salt 🧂 | 1 tbsp | Plus more for seasoning |
| Black Pepper 🌶️ | 1 tbsp | Freshly ground preferred |
| Paprika 🌶️ | 2 tsp | Sweet or smoked variety |
| Garlic Powder 🧄 | 1 tbsp | For depth of flavor |
| Onion Powder 🧅 | 1 tbsp | Balances seasoning blend |
| Cayenne Pepper 🔥 | ½ tsp | Adjust for heat preference |
| Vegetable Oil 🫒 | 4 cups | For deep frying |
| Hot Sauce 🌶️ | 1 tbsp | Optional, for buttermilk marinade |
[recipe_ingredient_scaler]
The chicken is critical—bone-in, skin-on thighs and drumsticks yield the juiciest meat and crispiest skin. Source from Whole Foods or a trusted butcher for fresh, high-quality pieces. Buttermilk must be full-fat; low-fat versions lack the acidity needed to tenderize properly. For the flour, King Arthur or Bob’s Red Mill all-purpose provides consistent texture for optimal breading adhesion.
No buttermilk? Mix 2 cups milk with 2 tbsp vinegar or lemon juice and let sit 5 minutes. For gluten-free, swap all-purpose flour for a 1:1 gluten-free blend. If avoiding cornstarch, use extra flour (though texture may differ). Cayenne can be omitted for mild flavor, or increased to 1 tsp for extra heat. The vegetable oil must have a high smoke point—peanut or canola oil work equally well.
Marinate chicken in buttermilk overnight for maximum tenderness, or at least 4 hours. Store unused flour mixture in an airtight container for up to 3 months. Fried chicken keeps warm in a 200°F oven for about 30 minutes before serving.
Why You’ll Love This Recipe
- One Bowl Wonder: I toss everything in a single bowl—flour, cornstarch, buttermilk—no fancy prep, no mess.
- Crispy Outside, Juicy Inside: That buttermilk soak keeps the thighs and drumsticks tender while the cornstarch gives it the crave-worthy crunch.
- Feeds a Hungry Crowd: I make a big batch for Sunday supper, and honestly, it’s the only time my teens clean their plates without complaining.
- Leftovers? Even Better: Here’s what sold me—the next day, the crust stays crispy when I reheat it in the air fryer for 5 minutes.
Step-by-Step Instructions for Fried Chicken
Master the technique for achieving a perfectly crispy exterior with tender, juicy meat every time.
Step 1: Marinate the Chicken in Buttermilk
In a large bowl, whisk together the 2 cups Buttermilk and 1 tbsp Hot Sauce. Add the 3 lb Chicken Thighs and Drumsticks and ensure each piece is fully coated. The acidity in the buttermilk tenderizes the meat while the hot sauce adds subtle depth.
Cover and refrigerate for at least 4 hours, or ideally overnight. This extended marinade guarantees maximum flavor penetration and moisture retention. You’ll notice the chicken plumps slightly as it absorbs the liquid—a sign the buttermilk is working its magic.
Step 2: Prepare the Seasoned Breading
In a shallow dish, combine the 2 cups All-Purpose Flour, 0.5 cup Cornstarch, 1 tbsp Kosher Salt, 1 tbsp Black Pepper, 2 tsp Paprika, 1 tbsp Garlic Powder, 1 tbsp Onion Powder, and 0.5 tsp Cayenne Pepper. The cornstarch is critical—it’s what creates that ultra-crispy, shatteringly thin crust.
Whisk the mixture thoroughly to distribute the spices evenly. The blend should look uniformly speckled with no clumps. This ensures every bite of fried chicken delivers balanced seasoning and that promised golden-brown finish.
Step 3: Dredge and Coat the Chicken
Remove the chicken from the buttermilk, letting any excess drip off. Dredge each piece in the seasoned flour mixture, pressing firmly to adhere the coating to every crevice. For maximum crunch, I use a two-step process: dip back into the buttermilk, then dredge in the flour mixture again.
Place the coated chicken on a wire rack set over a baking sheet. This setup allows air to circulate underneath, preventing the breading from becoming soggy as it rests. Let it sit for 15 minutes—this helps the coating set and cling better during frying.
Step 4: Fry to Golden Perfection
Heat the 4 cups Vegetable Oil in a deep, heavy pot or Dutch oven to 350°F. Use a thermometer for precision—oil temperature is everything. If it’s too low, the chicken will absorb grease; too high, and the outside will burn before the inside cooks.
Working in batches to avoid crowding, carefully lower the chicken into the hot oil. Fry for 12-15 minutes, turning occasionally, until the coating is deep golden brown and the internal temperature reaches 165°F. The crust should audibly sizzle and crisp as it cooks.
Transfer the fried chicken to a wire rack or paper towels to drain. The rack prevents steam from softening the crust, preserving that coveted crunch. Let it rest for 5 minutes before serving to allow the juices to redistribute.
Pro Tips For Making Fried Chicken Recipe Ideas
- Double Fry for Crisp: I learned this the hard way—fry once at 325°F for 12 minutes, then again at 375°F for 3-4 minutes to get that shatter-crisp crust without raw flour taste.
- Brine Overnight: Soak the thighs and drumsticks in buttermilk with 1 tablespoon of salt for at least 8 hours—this keeps them juicy even if you overcook slightly.
- Skip the Overcrowd: Resist the urge to fill the pan; fry in batches with 1 inch between pieces or the temperature drops and you’ll get greasy, sad chicken.
- Cornstarch Boost: Swap ¼ of the all-purpose flour for cornstarch in your dredge—it makes the coating lighter and extra crunchy, like my grandma’s but easier.
Pro Cooking Tips for This Recipe
Oil Temperature Control
I cannot stress this enough—maintain 350°F oil temperature consistently. Use a candy or deep-fry thermometer clipped to the pot. If the oil drops below 325°F, the chicken absorbs grease instead of crisping. I prefer peanut oil for its high smoke point. 🌡️
Double-Dredge Method
The secret to that shatteringly crisp crust is the double-dredge. After the first dredge, let the chicken rest 5 minutes before the second coating. Press firmly to adhere the flour to every crevice. This creates layers that puff and crisp beautifully.
Avoid Overcrowding
Fry in small batches—never more than 4 pieces at once in a standard Dutch oven. Overcrowding lowers the oil temperature, leading to greasy, soggy chicken. I use a Lodge enameled cast iron pot for even heat distribution.
Resting is Key
After frying, let the chicken rest on a wire rack for 5-10 minutes. This allows the juices to redistribute and the crust to set. Skipping this step risks soggy breading. I learned this the hard way after ruining my first few batches.
Drain Properly
Use a wire rack, not paper towels, for draining. Paper towels trap steam, which softens the crust. The rack allows air circulation, keeping every piece crispy. I place mine over a baking sheet to catch drips.
Season the Oil
For extra flavor, add 1 tsp salt and 1 tsp paprika to the hot oil before frying. This subtly seasons the crust from the outside in. Just be sure to strain and reuse the oil only once. 💡
Nutrition Facts
Frequently Asked Questions
Can I use chicken breasts instead of thighs?
Yes, but adjust cooking time to 10-12 minutes. Breasts cook faster and can dry out if overcooked. For juicier results, brine them in saltwater for 1 hour before marinating.
What’s the best oil for frying?
Use oils with high smoke points like peanut, vegetable, or canola. Peanut oil adds subtle flavor and handles 350°F well. Avoid olive oil—it burns at frying temperatures.
How do I keep the coating from falling off?
Pat chicken completely dry before dredging and let the breading rest 15 minutes before frying. The double-dredge method also helps create a sturdy crust that sticks better.
Can I bake instead of fry?
For a lighter version, bake at 400°F for 25-30 minutes. Spray with oil and flip halfway for crispiness. The texture won’t be identical but still delicious.

Trained in classic French technique but raised on slow-cooked ribs and spicy rubs, she blends culinary skill with smoke and soul.
- Recipe for Boneless Pork Chops in Cast Iron Skillet: Sear and Baste to Juicy Perfection - October 3, 2026
- Recipe for Boneless Cross Rib Roast: Slow-Roasted Beef with Herb Crust - October 3, 2026
- Hamburgers in Sauce Recipe Crock Pot: Slow-Cooked Savory Delight - October 3, 2026