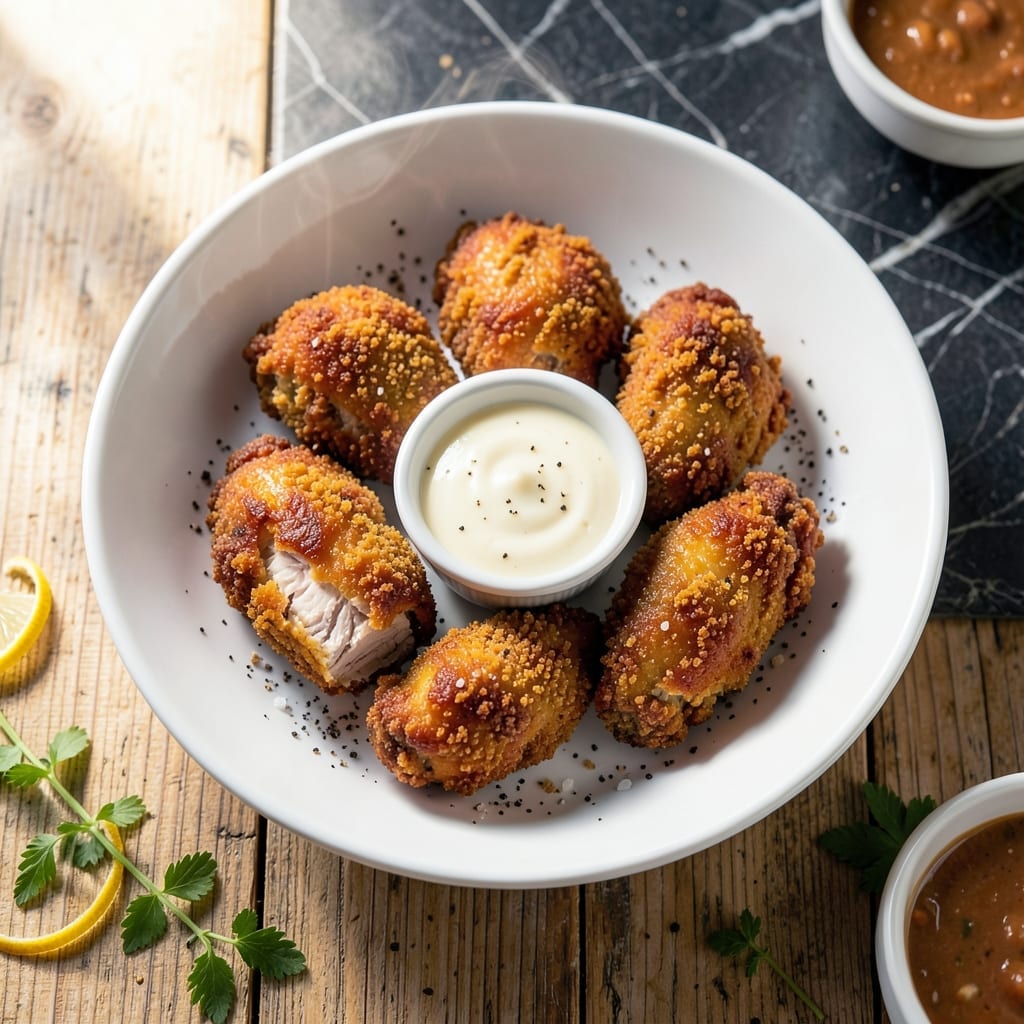
Few dishes deliver the nostalgic comfort of perfectly crispy chicken tenders straight from the fryer. This recipe transforms simple strips into golden, crispy bites with a juicy, tender center every time.
The secret lies in a buttermilk soak that guarantees moisture and flavor deep into the meat. A well-seasoned flour coating creates that signature shatter when you bite through the crust. It’s a foolproof method that never disappoints.
These tenders emerge with a deep golden hue and a texture that stays crispy long after frying. The buttermilk marinade ensures the meat remains succulent, while the seasoned coating adds layers of savory goodness.
Serve hot with your favorite dipping sauces for a meal that feels like a southern classic. The results speak for themselves.
Ingredients for Fried Chicken Tenders Recipe Paula Deen
Simple ingredients for golden, crispy tenders with a juicy center every time.
| Ingredient | Amount | Notes |
|---|---|---|
| Chicken Tenders 🍗 | 1 ½ lb | Boneless, skinless, trimmed |
| Buttermilk 🥛 | 2 cups | Full-fat for richness |
| All-Purpose Flour 🌾 | 2 cups | For dredging chicken |
| Large Eggs 🥚 | 2 whole | Beaten for coating |
| Salt 🧂 | 1 ½ tsp | Kosher or sea salt |
| Black Pepper 🌶️ | 1 tsp | Freshly ground preferred |
| Garlic Powder 🧄 | 1 tsp | For seasoning flour |
| Onion Powder 🧅 | 1 tsp | For seasoning flour |
| Paprika 🌶️ | 1 tsp | Sweet or smoked variety |
| Cayenne Pepper 🔥 | ¼ tsp | Adjust for heat preference |
| Vegetable Oil 🫒 | 3 cups | For deep frying |
| Baking Powder 🧂 | ½ tsp | For extra crispiness |
[recipe_ingredient_scaler]
The chicken makes this dish. Look for uniform-sized tenders—they cook more evenly. Buttermilk is non-negotiable here; full-fat from the dairy aisle gives the best texture and flavor. Most grocery stores carry it near the milk, but if you can’t find it, Walmart or Kroger always have it. The flour should be all-purpose—nothing fancy, just the standard stuff you use for baking.
No buttermilk? Whole milk plus a tablespoon of vinegar or lemon juice works in a pinch. Fresh out of paprika? Skip it—the garlic and onion powders carry the flavor. For extra crunch, add a handful of crushed cornflakes to the flour mix (Paula’s classic trick). The cayenne is optional, but a pinch adds depth without heat if you’re sensitive.
Fry in batches so the oil stays hot. Leftovers keep in the fridge for 2-3 days, but they’re best fresh. Reheat in the oven to revive the crisp—microwaving makes them soggy.
Why You’ll Love This Recipe
- One Bowl Wonder: I toss everything in a single bowl—flour, buttermilk, eggs—and the mess stays minimal.
- Buttermilk Magic: That tangy soak makes the chicken so tender, the crust shatters with every bite.
- Feeds the Crew: I stretch one batch to cover school lunches, picnics, and hungry teens after practice.
- Leftovers Vanish: Honestly, mine never last past day two—they’re just as good cold straight from the fridge.
Step-by-Step Instructions for Buttermilk-Soaked Crispy Chicken Tenders
Here’s the method for achieving that signature crispy exterior with juicy, tender meat inside.
Step 1: Marinate the Chicken Tenders in Buttermilk
Place the 1.5 lb Chicken Tenders in a large bowl and pour over all 2 cups Buttermilk. Make sure each piece is fully submerged. I always let this sit in the fridge for at least 4 hours, but overnight works even better.
The buttermilk tenderizes the meat and adds that classic Southern tang. You’ll notice the chicken plumps slightly as it soaks up the liquid. Don’t skip this step—it’s what makes these tenders so tender.
Step 2: Prepare the Seasoned Flour Dredge
In a shallow dish, whisk together all 2 cups All-Purpose Flour, the 1.5 tsp Salt, 1 tsp Black Pepper, 1 tsp Garlic Powder, 1 tsp Onion Powder, 1 tsp Paprika, 0.25 tsp Cayenne Pepper, and the 0.5 tsp Baking Powder.
The baking powder creates tiny air pockets in the coating for extra crunch. Mix thoroughly so every bite has that perfect seasoning balance. The flour should look uniformly speckled with all those beautiful spices.
Step 3: Create the Egg Wash and Dredge the Chicken
In another shallow dish, beat the 2 whole Large Eggs until well combined. Working with one piece at a time, remove the chicken from the buttermilk (let excess drip off), dip in the egg wash, then press into the seasoned flour.
I use my left hand for wet ingredients and right for dry to keep things clean. Press firmly so the flour adheres well—you want a thick, even coating. Place the dredged tenders on a wire rack to rest for 10 minutes before frying.
Step 4: Fry to Golden Perfection
Heat all 3 cups Vegetable Oil in a deep skillet or Dutch oven to 350°F. Use a thermometer—this temperature is crucial. Too cool and you’ll get greasy tenders; too hot and they’ll brown before cooking through.
Fry the tenders in batches to avoid crowding the pan, which would lower the oil temperature. Cook for 4-5 minutes per side until they’re deep golden brown and the internal temperature reaches 165°F. The crust should be audibly crisp when removed from the oil.
Step 5: Drain and Serve Immediately
Transfer the fried tenders to a wire rack set over a baking sheet or paper towels. This allows air to circulate on all sides, keeping them crisp. Let them drain for 2-3 minutes before serving.
Serve while hot—the contrast between the crispy exterior and tender interior is at its peak right out of the fryer. The coating should crack slightly when you bite into it, giving way to juicy, flavorful chicken that’s worth every minute of the process.
Pro Tips For Making Fried Chicken Tenders Recipe Paula Deen
- Soak Longer: I learned this the hard way—give those tenders a full 12-hour buttermilk soak, not just 30 minutes. The difference in tenderness and flavor is night and day.
- Double Dredge: After the first flour dip, let the tenders rest 5 minutes before dredging again. This builds a thicker, crunchier crust that Paula Deen would approve of.
- Oil Temp Check: Skip the guessing game—use a thermometer to keep oil at 350°F. I burned my first two batches before realizing how crucial this is for even cooking without greasy results.
- Drain Upright: Place fried tenders on a wire rack over a baking sheet, not paper towels. Sounds weird, but it keeps them crispy on all sides instead of soggy on the bottom.
Pro Cooking Tips for Great fried chicken tenders recipe paula deen
Oil Temperature Control
Maintain 350°F oil temperature religiously—I use a Taylor digital thermometer clipped to the pot. If the oil dips below 325°F, your tenders will absorb grease. If it climbs above 375°F, they’ll burn before cooking through. 🌡️
Double-Dredge Technique
For extra-crispy coating, repeat the egg and flour dredge after the 10-minute rest. This creates layers that puff up beautifully during frying. I learned this trick from my grandma’s old Cincinnati chicken joint.
Batch Frying Wisdom
Never crowd the pan—fry in batches of 4-5 tenders at a time. Overcrowding drops oil temp by 50°F instantly. Use a spider strainer to transfer tenders to the rack for even draining.
Rest Between Batches
Let the oil recover to 350°F between batches, about 2-3 minutes. I pass the time by singing to Pickles—my orange tabby loves a good fry-day serenade. Honestly, it makes the wait fly by.
Crispiness Preservation
Keep finished tenders warm on a rack in a 200°F oven while frying remaining batches. This prevents steam buildup that turns crisp coating soggy. Serve all tenders within 15 minutes of frying for peak texture.
Pro Drainage Setup
Use a wire rack over a sheet pan, not paper towels. The elevation allows air circulation on all sides, maintaining that shatter-crisp crust. I grab mine from New Seasons Market for $8—best kitchen investment ever.
Nutrition Facts
Frequently Asked Questions
Can I use chicken breasts instead of tenders?
Yes, you can! Cut boneless chicken breasts into 1-inch strips for similar results. Just be sure to pound them to an even thickness so they cook consistently.
Why does the buttermilk soak matter?
The buttermilk tenderizes the meat and adds flavor deep into the chicken. Skipping this step risks dry, tough tenders. For best results, soak for at least 4 hours or overnight.
How do I keep them crispy after frying?
Drain on a wire rack, not paper towels, to allow air circulation. Keep finished tenders warm in a 200°F oven while frying the rest. Serve within 15 minutes for peak crispiness.
What if my oil temperature drops too much?
If the oil dips below 325°F, the tenders will absorb grease. Let it recover to 350°F between batches, which takes about 2-3 minutes.

Trained in classic French technique but raised on slow-cooked ribs and spicy rubs, she blends culinary skill with smoke and soul.
- Recipe for Boneless Pork Chops in Cast Iron Skillet: Sear and Baste to Juicy Perfection - October 3, 2026
- Recipe for Boneless Cross Rib Roast: Slow-Roasted Beef with Herb Crust - October 3, 2026
- Hamburgers in Sauce Recipe Crock Pot: Slow-Cooked Savory Delight - October 3, 2026