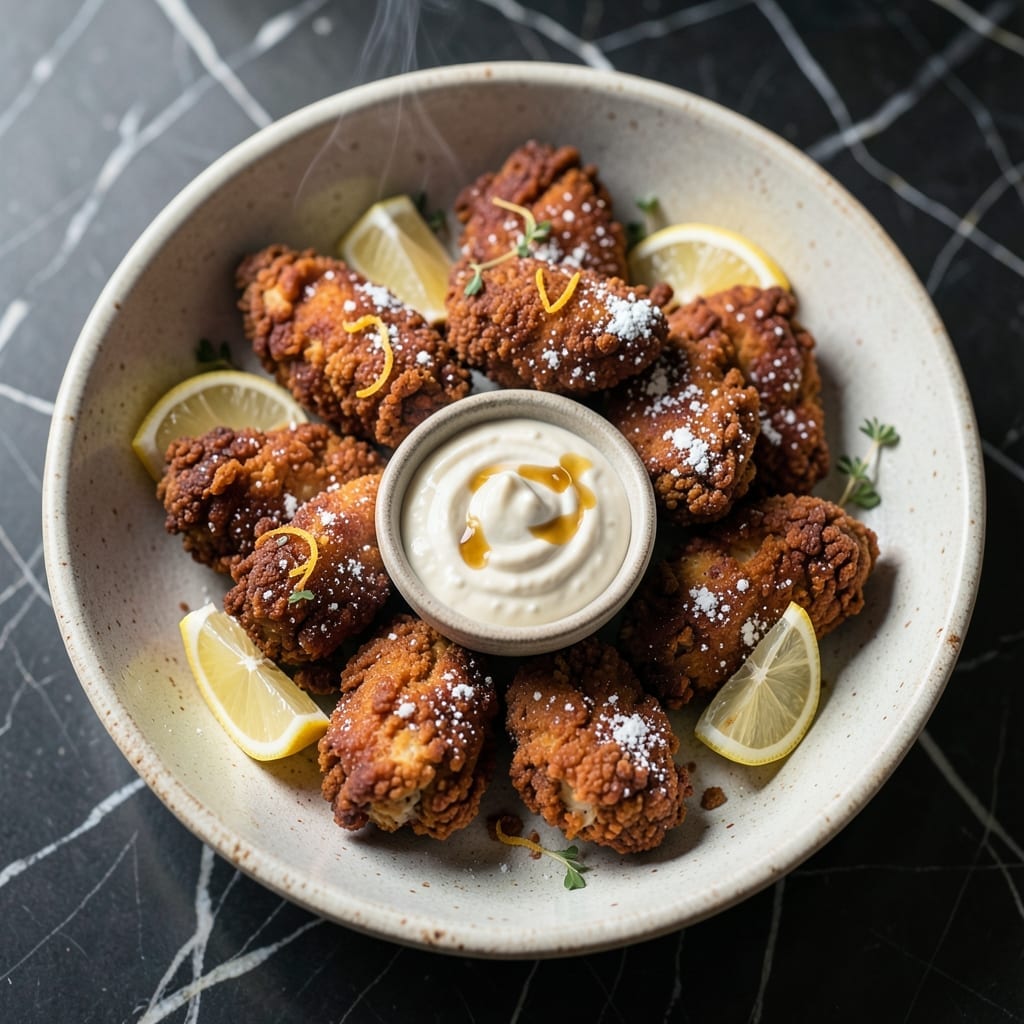
This recipe delivers tender chicken tenders with a perfectly crispy coating every time. The buttermilk marinade is the key to juicy meat that stays moist through frying.
I developed this method to replicate that classic diner-style crunch without the guesswork. A simple flour and spice blend creates the ideal crust that browns beautifully in hot oil.
The result is golden tenders that are crisp outside and remarkably tender inside. Each bite offers that satisfying contrast that makes fried chicken irresistible.
Serve these hot with your favorite dipping sauces for a meal that satisfies every craving. The technique works for both quick dinners and weekend gatherings.
Ingredients for Fried Chicken Tenders Recipe Pioneer Woman
Crispy, golden tenders start with these quality ingredients for perfect texture and flavor.
| Ingredient | Amount | Notes |
|---|---|---|
| Chicken Tenders 🍗 | 1 ½ lb | Boneless, skinless, uniform size |
| Buttermilk 🥛 | 2 cups | Full-fat for best marinade |
| All-Purpose Flour 🌾 | 2 cups | For dredging coating |
| Cornstarch 🌽 | ¼ cup | Adds extra crispiness |
| Garlic Powder 🧄 | 1 tbsp | Enhances savory flavor |
| Onion Powder 🧅 | 1 tbsp | Complements garlic perfectly |
| Paprika 🌶️ | 1 tbsp | Sweet or smoked variety |
| Salt 🧂 | 1 tsp | Kosher or sea salt preferred |
| Black Pepper 🌶️ | ½ tsp | Freshly ground for best results |
| Cayenne Pepper 🔥 | ¼ tsp | Adjust for heat preference |
| Vegetable Oil 🫒 | 4 cups | For deep frying |
| Large Eggs 🥚 | 2 whole | Helps coating adhere |
[recipe_ingredient_scaler]
The chicken tenders should be uniform in size for even cooking—look for about 1-inch thickness. A full-fat buttermilk marinade is essential for that signature Pioneer Woman tenderness. For the flour coating, King Arthur all-purpose flour is a professional choice. The oil must reach 350°F before frying, so a deep-fry thermometer is recommended.
No buttermilk? Mix 2 cups milk with 2 tbsp vinegar or lemon juice, let sit 5 minutes. For a gluten-free version, swap all-purpose flour for 1:1 gluten-free blend. The cornstarch can be replaced with arrowroot powder if needed. If you prefer less heat, omit the cayenne entirely—the paprika still provides beautiful color.
Marinated tenders keep in the fridge for 24 hours before cooking. Fry in batches to avoid crowding the pan. Leftovers stay crispy when reheated in a 400°F oven for 10 minutes. Consume within 3 days for optimal texture.
Why You’ll Love This Recipe
- No-Fuss Coating: So easy. Just dip in buttermilk then toss in the flour-cornstarch mix—no fancy steps or special equipment.
- That Crunch: The cornstarch and garlic powder combo gives it this ridiculous crispy outside, tender inside thing going on.
- Weeknight Hero: Honestly, I throw these together after soccer practice and everyone’s happy—yes, even on a Tuesday night.
- Budget Stretcher: One pound of tenders feeds my family of four with leftovers, and the ingredients are all pantry staples.
Step-by-Step Instructions for Crunchy Buttermilk Fried Chicken Tenders
Master the technique for crispy, golden tenders with juicy interiors using this professional method.
Step 1: Marinate the Chicken Tenders in Buttermilk
Submerge all 1.5 lb Chicken Tenders in 2 cups Buttermilk in a large bowl, ensuring each piece is fully coated. I cover and refrigerate for at least 4 hours, though overnight yields maximum tenderness and flavor penetration.
The buttermilk’s acidity breaks down proteins in the chicken, guaranteeing a moist, tender result. Stir once halfway through marinating to redistribute the liquid. Don’t skip this—it’s the foundation of perfect texture.
Step 2: Prepare the Seasoned Dredging Mixture
In a shallow dish, whisk together all 2 cups All-Purpose Flour, 0.25 cup Cornstarch, 1 tbsp Garlic Powder, 1 tbsp Onion Powder, 1 tbsp Paprika, 1 tsp Salt, 0.5 tsp Black Pepper, and 0.25 tsp Cayenne Pepper. The cornstarch is critical—it creates that ultra-crispy crust.
Use a fork to break up any lumps and ensure even distribution of spices. This blend delivers a well-balanced, savory coating with just the right amount of heat. The paprika adds color as well as flavor.
Step 3: Create the Egg Wash and Dredge the Chicken
In a separate shallow bowl, whisk the 2 whole Large Eggs until thoroughly combined. Remove the chicken from the buttermilk, letting excess drip off, then dip each piece in the egg wash, coating completely.
Transfer immediately to the flour mixture, pressing firmly to adhere. Turn to coat all sides, then lift and shake gently to remove excess. Place on a wire rack—this prevents sogginess by allowing air circulation. The double-dip method ensures maximum crunch.
Step 4: Deep-Fry to Golden Perfection
Heat 4 cups Vegetable Oil in a deep, heavy pot to 350°F. Use a candy or deep-fry thermometer for accuracy. Carefully lower 4-5 tenders into the oil, avoiding overcrowding which lowers the temperature.
Fry for 6-8 minutes, turning occasionally, until deep golden brown and the internal temperature reaches 165°F. The coating should be crisp and audibly crackle when removed. Drain on a wire rack set over a baking sheet to maintain crispness.
Step 5: Rest and Serve Immediately
Let the tenders rest for 5 minutes after frying. This brief pause allows the coating to set and the juices to redistribute, preventing a dry first bite. The tenders should be piping hot inside with a shatteringly crisp exterior.
Serve immediately while at peak temperature and texture. The contrast between the crunchy coating and succulent interior delivers the signature experience. Any leftovers? Reheat in a 400°F oven for 10 minutes to restore crispness.
Pro Tips For Making Fried Chicken Tenders Recipe Pioneer Woman
- Double-Dredge the Tenders: Dip them in buttermilk, then flour, then back in buttermilk and flour again—I learned this the hard way after my first batch had a sad, patchy crust.
- Heat the Oil First: Use a thermometer and aim for 350°F before adding the chicken. After burning three batches, I finally figured out that cold oil just makes greasy, soggy tenders.
- Dry the Chicken Well: Pat the tenders completely dry with paper towels before dredging. Sounds weird, but it works: the coating sticks better and fries up crispier.
- Add Cornstarch Last: Mix the cornstarch into the flour right before dredging, not ahead of time. My grandmother swore by this, and she was right: it keeps the coating light and extra crunchy.
Best Sauces and Condiments for These Flavors
Classic Dipping Sauces
I always pair these tenders with ranch dressing—the cool, creamy contrast is unbeatable. Mix ½ cup mayonnaise with ¼ cup buttermilk and 1 tbsp dried dill for a quick homemade version. Hidden Valley is my go-to store-bought option. 💪
Spicy Kick Options
Buffalo sauce delivers that tangy heat I crave. Combine ½ cup Frank’s RedHot with 2 tbsp melted butter for the perfect balance. For extra creaminess, stir in ¼ cup blue cheese dressing—it mellows the spice beautifully.
Sweet and Tangy
Honey mustard is a crowd-pleaser that even kids love. Whisk ¼ cup Dijon mustard with ¼ cup honey and 1 tbsp apple cider vinegar. I use Grey Poupon for its smooth texture and bold flavor.
Southern Favorites
Comeback sauce is my secret weapon—mix ½ cup mayo, ¼ cup ketchup, 1 tbsp Worcestershire, and 1 tsp hot sauce. This Mississippi staple adds a smoky, slightly sweet depth that complements the crispy coating perfectly. 🌟
Quick and Easy
For zero effort, ketchup and yellow mustard always work. I prefer Heinz ketchup and French’s mustard for their classic flavors. Keep small bowls of each on the table for dipping flexibility.
Nutrition Facts
Frequently Asked Questions
Can I use chicken breasts instead of tenders?
Yes, cut boneless breasts into 1-inch strips for even cooking. The marinade and coating work the same.
How do I keep the coating from falling off?
Pat chicken dry before dredging and press firmly into the flour. The egg wash helps it adhere.
What oil is best for frying at home?
Use oils with high smoke points like vegetable, peanut, or canola. Maintain 350°F throughout.
Can I bake these instead of frying?
Bake at 400°F for 20-25 minutes on a wire rack. Spray with oil first for crispiness.

Trained in classic French technique but raised on slow-cooked ribs and spicy rubs, she blends culinary skill with smoke and soul.
- Recipe for Boneless Pork Chops in Cast Iron Skillet: Sear and Baste to Juicy Perfection - October 3, 2026
- Recipe for Boneless Cross Rib Roast: Slow-Roasted Beef with Herb Crust - October 3, 2026
- Hamburgers in Sauce Recipe Crock Pot: Slow-Cooked Savory Delight - October 3, 2026