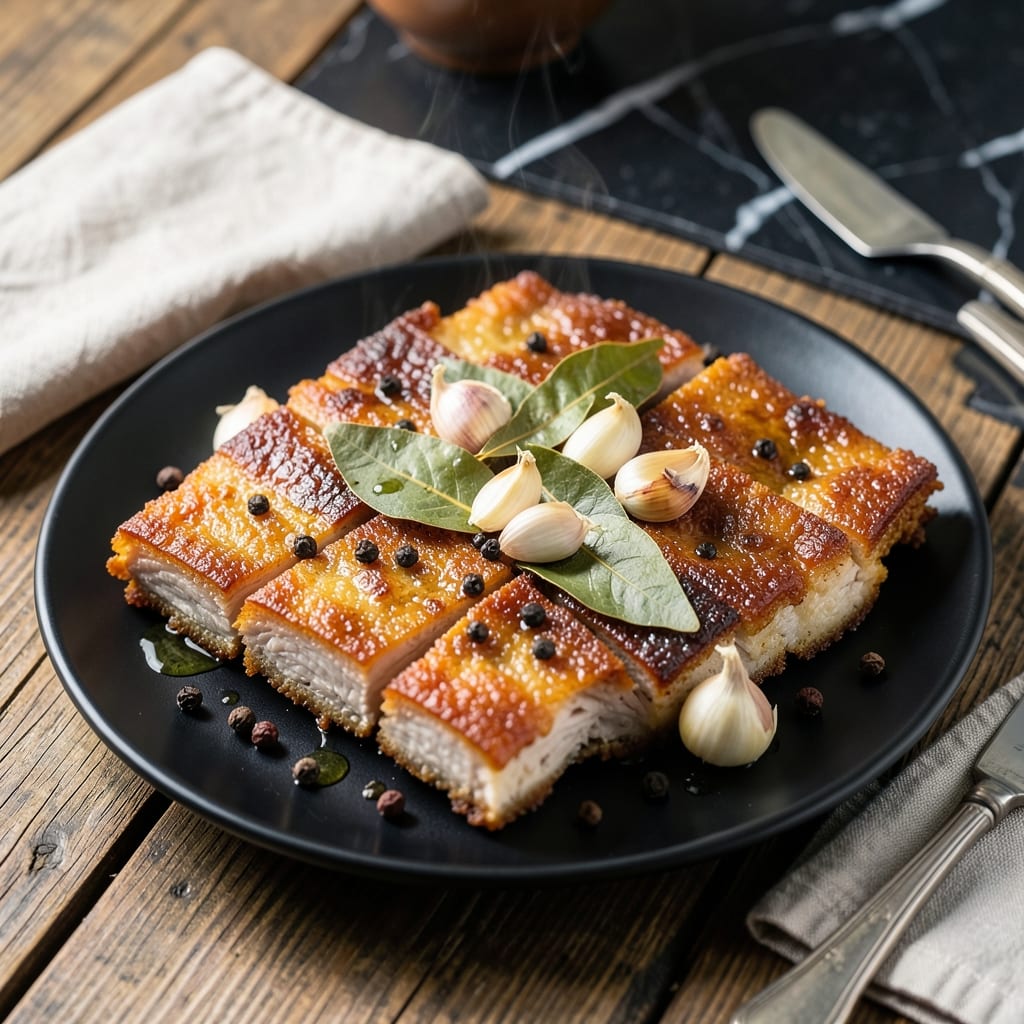
I developed this method after testing countless variations to achieve crispy pork with golden edges and tender meat inside. The key is a two-step frying process that renders the fat while locking in moisture.
Traditional Filipino flavors shine through with simple seasonings—garlic, salt, and pepper—that let the pork’s natural richness take center stage. This approach ensures every bite delivers that signature crunch without drying out the meat.
What you’ll get is pork belly so crispy it shatters between your teeth, with juicy, flavorful meat beneath. The technique works consistently, whether you’re cooking for two or feeding a crowd.
Serve with steamed rice and your favorite dipping sauce for an authentic taste of Filipino home cooking. Here’s how to make it perfectly every time.
Ingredients for Fried Pork Recipe Panlasang Pinoy
Simple ingredients deliver that signature Filipino crispy pork belly everyone loves at home.
| Ingredient | Amount | Notes |
|---|---|---|
| Pork Belly 🥓 | 2 lb | Skin-on, cut into 1-inch strips |
| Garlic Cloves 🧄 | 8 cloves | Minced for maximum flavor |
| Coarse Sea Salt 🧂 | 1 ½ tbsp | Adjust to taste preference |
| Black Pepper 🌶️ | 1 tbsp | Freshly ground for best results |
| White Vinegar 💧 | ½ cup | For tenderizing the meat |
| Bay Leaves 🌿 | 3 whole | Dried, for boiling aromatics |
| Water 💧 | 4 cups | For initial boiling step |
| Cooking Oil 🫒 | 2 cups | Neutral high-smoke point oil |
| Soy Sauce 🥢 | ¼ cup | For added umami depth |
| Brown Sugar 🍚 | 1 tbsp | Optional for caramelizing |
| Green Onions 🧅 | 4 whole | Sliced, for garnish |
| Calamansi or Lemon Juice 🍋 | 2 tbsp | For serving dipping sauce |
[recipe_ingredient_scaler]
The pork belly is everything here. Look for skin-on pieces with even fat marbling—this is what gives you that shatteringly crisp texture. I get mine from Filipino markets or Asian grocery stores, where they often sell it pre-cut into strips. If you’re buying a whole slab, ask the butcher to cut it into 1-inch thick pieces. Avoid lean cuts—they won’t crisp up the same way.
No pork belly? Pork shoulder cut into thick strips works in a pinch, though it won’t be as crispy. Out of white vinegar? Apple cider vinegar at the same amount is fine. The bay leaves can be skipped if needed, but they add that subtle depth. For the dipping sauce, regular lemon juice subbed for calamansi still tastes great. Don’t have soy sauce? Fish sauce at half the amount adds saltiness with extra umami.
Pork belly keeps in the fridge for 3-4 days raw, or 3 months frozen. Cooked leftovers? They reheat beautifully in the oven—10 minutes at 350°F brings the crisp back. The dipping sauce stays fresh for about 1 week refrigerated.
Why You’ll Love This Recipe
- One Pan Wonder: I toss pork belly with garlic, salt, and pepper, then fry—no fancy steps, just crispy perfection in minutes.
- Garlic Crisp Magic: The garlic cloves fry up golden and crunchy, infusing the pork with that irresistible savory punch.
- Weeknight Hero: Honestly, it’s my go-to when I need something fast yet impressive for dinner (yes, even on a Tuesday night).
- Budget Stretcher: Pork belly is affordable, and leftovers taste just as good reheated for lunch the next day.
Step-by-Step Instructions for Crispy Filipino-Style Pork Belly
This method guarantees perfect crispiness with tender meat underneath every time.
Step 1: Boil the Pork Belly with Aromatics
In a large pot, combine the 2 lb Pork Belly, 4 cups Water, 8 cloves Garlic Cloves, 3 whole Bay Leaves, 1.5 tbsp Coarse Sea Salt, 1 tbsp Black Pepper, and 0.5 cup White Vinegar. Bring to a boil over medium-high heat, then reduce to a simmer.
Cook for 30-40 minutes until the pork is tender but not falling apart. The vinegar helps tenderize the meat while the aromatics infuse flavor. You’ll know it’s ready when a fork slides in with little resistance. Drain and pat the pork very dry with paper towels—this is crucial for crispiness later.
Step 2: Season and Air-Dry the Pork
Rub the boiled pork strips with the 1 tbsp Brown Sugar and any remaining Coarse Sea Salt and Black Pepper from the boiling step. The sugar will help create a beautiful caramelized crust during frying.
Arrange the pork strips on a wire rack set over a baking sheet. Let them air-dry at room temperature for 20-30 minutes, or refrigerate uncovered for 1 hour for even better results. This drying step ensures the surface moisture evaporates, which means less splattering and maximum crispiness when fried.
Step 3: Deep-Fry to Golden Perfection
Heat the 2 cups Cooking Oil in a deep, heavy pot over medium heat until it reaches 350°F. To test without a thermometer, drop in a small piece of pork—if it sizzles immediately and floats to the surface, the oil is ready.
Carefully add the pork strips in batches to avoid overcrowding. Fry for 8-10 minutes, turning occasionally, until they’re golden brown and crispy all over. The pork should have a deep, rich color and a satisfying crunch when touched with tongs. Transfer to a paper towel-lined plate to drain excess oil.
Step 4: Serve with Dipping Sauce and Garnish
Slice the 4 whole Green Onions thinly on the bias. In a small bowl, mix the 0.25 cup Soy Sauce and 2 tbsp Calamansi or Lemon Juice for a tangy dipping sauce. This bright, acidic contrast cuts through the richness of the crispy pork.
Arrange the crispy pork belly on a serving platter and sprinkle with the sliced green onions. Serve immediately with the dipping sauce on the side. The pork should be crispy on the outside, tender on the inside, and packed with garlicky, savory flavor in every bite.
Pro Tips For Making Fried Pork Recipe Panlasang Pinoy
- Dry the Belly: Pat the pork belly completely dry with paper towels before seasoning—any moisture left on the surface will steam the meat instead of frying it to that crisp finish.
- Crush the Garlic: Lightly crush the garlic cloves with the side of your knife before frying; it releases more flavor into the oil without burning as quickly as minced garlic would.
- Skip the Lid: I learned this the hard way—covering the pan traps steam and turns your crispy pork belly into a soggy disappointment, so fry it uncovered the whole time.
- Vinegar Last: Add the white vinegar only in the last 2 minutes of frying; adding it too early can make the pork tough and prevent it from browning properly.
Best Sauces and Condiments for These Flavors
Classic Toyo Calamansi
The simplest and most authentic dipping sauce pairs ¼ cup soy sauce with 2 tbsp calamansi or lemon juice. I tested Silver Swan soy sauce for this—its balanced saltiness lets the citrus shine. This combo cuts through the pork’s richness beautifully. 🍋
Spicy Vinegar Dip
Mix ½ cup white vinegar with 2 tbsp soy sauce, 1 tbsp brown sugar, and 1 tsp crushed red pepper. The sugar balances the acidity while the chili adds a kick. I use Datu Puti vinegar for authentic Filipino flavor.
Creamy Garlic Sauce
Blend ½ cup mayonnaise with 2 minced garlic cloves, 1 tbsp lemon juice, and 1 tsp soy sauce. This creamy version adds a luxurious touch. I recommend Lady’s Choice mayo for the perfect texture.
Sweet Chili Glaze
Combine ¼ cup sweet chili sauce with 1 tbsp soy sauce and 1 tsp calamansi juice. The glaze adds a sticky, sweet contrast to the crispy pork. Drizzle lightly just before serving. ✨
Sour Cream & Onion
Mix ½ cup sour cream with 2 tbsp minced green onions and 1 tsp white vinegar. This cooling dip balances the heat if you’ve added chili to your pork. It’s my go-to for spicy variations.
Nutrition Facts
Frequently Asked Questions
Why boil the pork before frying?
Boiling removes impurities and renders some fat, ensuring a cleaner fry. It also tenderizes the meat so it stays juicy inside while getting crispy outside. This step is key for that perfect texture contrast.
Can I use pork shoulder instead of belly?
Yes, but expect less crispiness. Shoulder has less fat, so it won’t get as shatteringly crisp. For best results, cut into 1-inch strips and follow the same process.
How do I keep it crispy after frying?
Drain on a wire rack, not paper towels, to prevent steam from softening the crust. Serve immediately, or reheat in a 350°F oven for 5-10 minutes to restore crispiness.
What if my oil isn’t hot enough?
Low oil temp makes pork absorb grease and turn soggy. Test with a small piece first—it should sizzle immediately. Maintain 350°F throughout frying for even browning.

Trained in classic French technique but raised on slow-cooked ribs and spicy rubs, she blends culinary skill with smoke and soul.
- Recipe for Boneless Pork Chops in Cast Iron Skillet: Sear and Baste to Juicy Perfection - October 3, 2026
- Recipe for Boneless Cross Rib Roast: Slow-Roasted Beef with Herb Crust - October 3, 2026
- Hamburgers in Sauce Recipe Crock Pot: Slow-Cooked Savory Delight - October 3, 2026