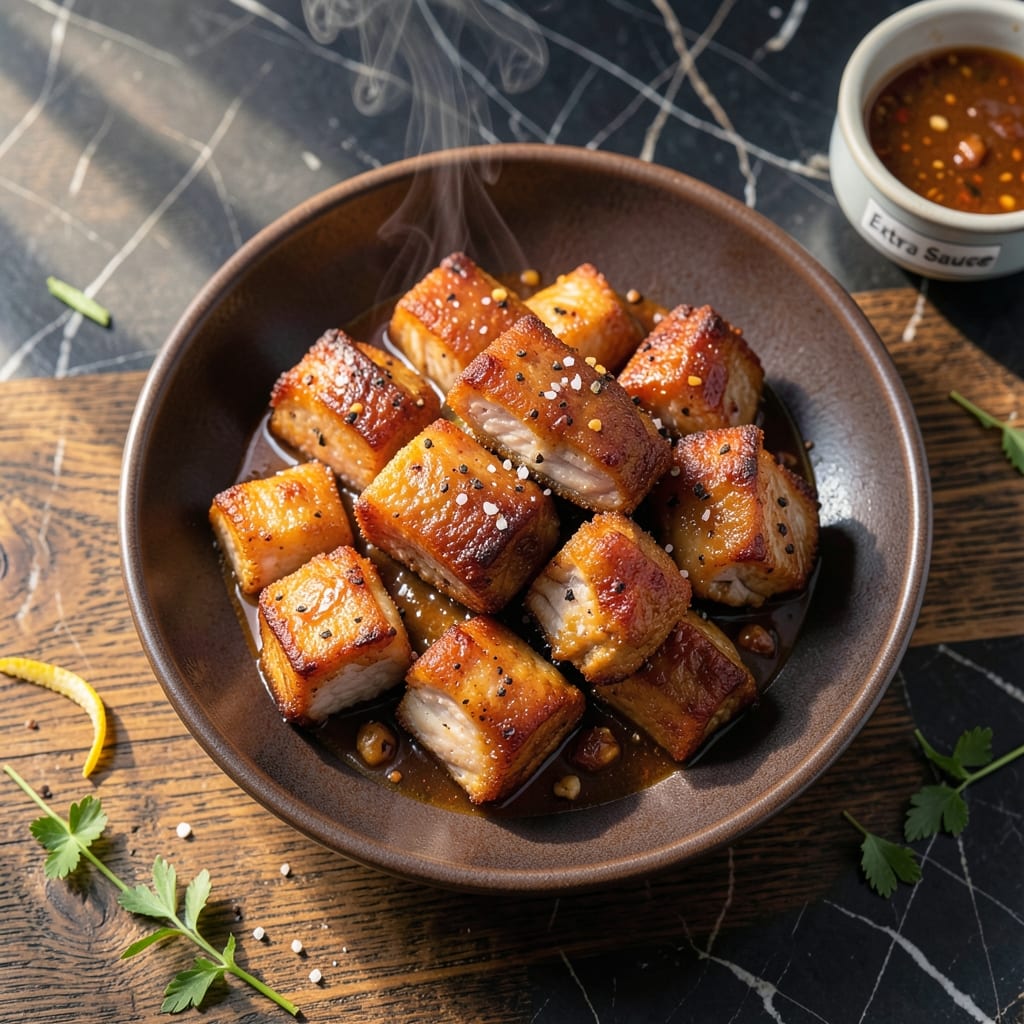
Achieving crispy fried pork with a rich, complementary sauce requires precision and patience. This method delivers perfectly golden bites every time.
I developed this technique after multiple trials in my small Boston kitchen, ensuring forgiving steps for home cooks. The pork cooks to ideal tenderness while maintaining a shatteringly crispy exterior.
The accompanying sauce elevates each bite with balanced sweetness and depth. It clings beautifully to the pork without overwhelming its natural flavor.
Serve these immediately for the best texture. The contrast between the crispy pork and velvety sauce makes this dish unforgettable.
Ingredients for Fried Pork Recipe with Sauce
Pork shoulder, a crispy cornstarch coating, and a rich sauce with balanced sweetness and depth.
| Ingredient | Amount | Notes |
|---|---|---|
| Pork Shoulder 🐖 | 1 ½ lb | Cut into 1-inch cubes, boneless |
| Kosher Salt 🧂 | 1 tbsp | Diamond Crystal preferred for even seasoning |
| Black Pepper 🌶️ | 1 tsp | Freshly ground for optimal flavor |
| Garlic Powder 🧄 | 1 tsp | Not garlic salt for pure flavor |
| Onion Powder 🧅 | 1 tsp | Adds depth to seasoning blend |
| Paprika 🌶️ | 1 tsp | Sweet or smoked for color |
| Cornstarch 🌾 | ½ cup | For ultra-crispy coating |
| All-Purpose Flour 🌾 | ½ cup | Light coating for texture |
| Vegetable Oil 🫒 | 3 cups | High smoke point for frying |
| Soy Sauce 💧 | ¼ cup | Low-sodium for controlled saltiness |
| Honey 🍯 | ¼ cup | For sauce sweetness and glaze |
| Rice Vinegar 💧 | 2 tbsp | Balances sauce sweetness |
| Fresh Ginger 🌿 | 1 tbsp | Minced for sauce depth |
| Garlic Cloves 🧄 | 3 cloves | Minced for sauce base |
| Sesame Oil 🫒 | 1 tsp | Toasted, for finishing aroma |
| Green Onions 🧅 | 4 pieces | Thinly sliced for garnish |
[recipe_ingredient_scaler]
The pork quality is non-negotiable. Pork shoulder (often labeled Boston butt) offers the ideal fat-to-meat ratio for juicy, tender results. Look for pieces with good marbling at Whole Foods or your trusted butcher. For consistent cooking, cut uniform 1-inch cubes—this ensures even browning and prevents some pieces from drying out while others remain undercooked.
No pork shoulder? Pork loin works in a pinch but requires careful monitoring to avoid dryness. For the sauce, agave syrup at a 1:1 ratio replaces honey if needed. Low-sodium soy sauce is key—regular can make the sauce overwhelmingly salty. Fresh ginger is ideal, but ground ginger at half the amount works if that’s what’s on hand.
Fry the pork in batches to maintain oil temperature—crowding causes steaming, not crisping. The sauce keeps in an airtight container for up to 1 week in the fridge. Reheat gently to preserve the velvety texture, and always garnish with fresh green onions just before serving for that vibrant finish.
Why You’ll Love This Recipe
- One Pan Magic: I just season the pork shoulder with salt, pepper, and those powdered spices—no fancy prep, no mess.
- That Saucy Crunch: The garlic and onion powder in the crust pair with the sauce for a flavor that’s honestly hard to resist.
- Feeds the Crew: I’ve served this for Sunday dinner and weeknight rushes with equal success.
- Budget Hero: Pork shoulder stays affordable, and leftovers (if any) make killer sandwiches the next day.
Step-by-Step Instructions for Glazed Crispy Pork Bites
Master the technique for perfectly crispy pork with a glossy, rich sauce every time.
Step 1: Season and Coat the Pork for Maximum Crisp
Begin by patting the 1.5 lb Pork Shoulder cubes completely dry with paper towels—moisture prevents crispiness. In a large bowl, combine the pork with 1 tbsp Kosher Salt, 1 tsp Black Pepper, 1 tsp Garlic Powder, 1 tsp Onion Powder, and 1 tsp Paprika. Toss until every piece is evenly coated.
In a separate shallow dish, whisk together the 0.5 cup Cornstarch and 0.5 cup All-Purpose Flour. Dredge each seasoned pork cube in the mixture, pressing gently to adhere. The cornstarch is the secret to that ultra-crispy texture, while the flour adds structure to the coating.
Step 2: Fry to Golden Perfection
Heat the 3 cups Vegetable Oil in a heavy-bottomed pot or deep skillet over medium-high heat until it reaches 350-375°F. Use a thermometer for accuracy—oil that’s too cool will make the pork greasy, while oil that’s too hot burns the coating before the meat cooks through.
Working in batches to avoid crowding, carefully lower the coated pork into the hot oil. Fry for 4-5 minutes, turning occasionally, until the exterior is deep golden brown and crisp. Transfer the fried pork to a wire rack or paper towels to drain excess oil. The pork is done when it reaches an internal temperature of 145°F.
Step 3: Prepare the Glossy Dipping Sauce
In a small saucepan, combine the 0.25 cup Soy Sauce, 0.25 cup Honey, 2 tbsp Rice Vinegar, minced 1 tbsp Fresh Ginger, and minced 3 cloves Garlic Cloves. Bring to a gentle simmer over medium heat and cook for 3-4 minutes, stirring frequently, until the sauce thickens slightly and becomes glossy.
Remove the saucepan from heat and stir in the 1 tsp Sesame Oil. This adds a nutty depth that complements the sweet and savory notes. The sauce should coat the back of a spoon but still be pourable—if it’s too thick, thin it with a splash of water.
Step 4: Serve and Garnish
Transfer the crispy pork to a serving platter and drizzle with some of the warm sauce, or serve it on the side for dipping. Garnish with thinly sliced 4 pieces Green Onions for a fresh, vibrant finish. The contrast of the crispy pork with the rich, sticky sauce is what makes this dish unforgettable.
For best results, serve immediately while the pork is still hot and the coating is at its crispiest. The sauce will cling to every bite, delivering a perfect balance of sweet, savory, and umami flavors.
Pro Tips For Making Fried Pork Recipe With Sauce
- Dry the Pork: Pat the pork shoulder dry with paper towels before seasoning—this guarantees a better sear and crispier edges. I learned this the hard way after my first few batches came out steamed instead of fried.
- Season Generously: Don’t be shy with the kosher salt, garlic powder, and onion powder; pork shoulder can handle bold seasoning. Sounds weird, but it works: the sauce will balance it out.
- Skip the Crowding: Fry the pork in batches if needed—overcrowding the pan drops the temperature and turns your crispy pork into a soggy mess. My grandmother swore by this, and she was right.
- Rest Before Slicing: Give the pork a solid 5-10 minutes to rest under foil after frying—it keeps the juices locked in. I used to skip this and wondered why my sauce always seemed watery.
Pro Cooking Tips for fried pork recipe with sauce
Oil Temperature Control
I learned the hard way that maintaining 350-375°F oil temperature is non-negotiable for crispy pork. Use a candy thermometer—I rely on Taylor Precision—and adjust heat as needed. Too cool, and you’ll get greasy pork instead of crispy. 🌡️
Batch Frying Technique
Never overcrowd your pot. I fry in 3-4 batches for 1.5 lb pork shoulder to avoid oil temperature drops. Crowding steams the pork, ruining that shatteringly crisp texture we worked so hard to create.
Double-Fry Secret
For restaurant-level crispiness, try a double-fry method. First fry at 325°F for 3 minutes, rest 5 minutes, then fry again at 375°F for 2 minutes. This technique, inspired by Korean fried chicken, delivers incredible crunch.
Sauce Consistency
The sauce should reduce by about 25% during cooking. If it thickens too much, whisk in 1-2 tsp water. For extra shine, I finish with a quick swirl of toasted sesame oil just before serving.
Resting for Maximum Crisp
After frying, let the pork rest on a wire rack for 2-3 minutes before saucing. This prevents steam from making the coating soggy. I learned this trick after many failed attempts in my tiny Boston kitchen.
Garnish Timing
Always add green onions right before serving. Their fresh crunch contrasts perfectly with the crispy pork. Slice them thinly—about 1/8 inch pieces—for the best texture and visual appeal.
Nutrition Facts
Frequently Asked Questions
What oil works best for frying?
Use oils with a high smoke point like vegetable, peanut, or canola. These handle 350-375°F without breaking down or adding off-flavors. Avoid olive oil—it burns at frying temperatures.
How do I keep the coating crispy?
Fry in small batches to maintain oil temperature, and drain on a wire rack—not paper towels—to prevent steam. Serve immediately for maximum crunch.
Can I make the sauce ahead?
Yes! The sauce keeps in an airtight container for up to 1 week in the fridge. Reheat gently on the stove before serving.
Why is my pork tough?
Overcooking is the usual culprit. Use a thermometer—pull pork at 145°F internal temperature. Also, cut uniform pieces to ensure even cooking.

Trained in classic French technique but raised on slow-cooked ribs and spicy rubs, she blends culinary skill with smoke and soul.
- Recipe for Boneless Pork Chops in Cast Iron Skillet: Sear and Baste to Juicy Perfection - October 3, 2026
- Recipe for Boneless Cross Rib Roast: Slow-Roasted Beef with Herb Crust - October 3, 2026
- Hamburgers in Sauce Recipe Crock Pot: Slow-Cooked Savory Delight - October 3, 2026