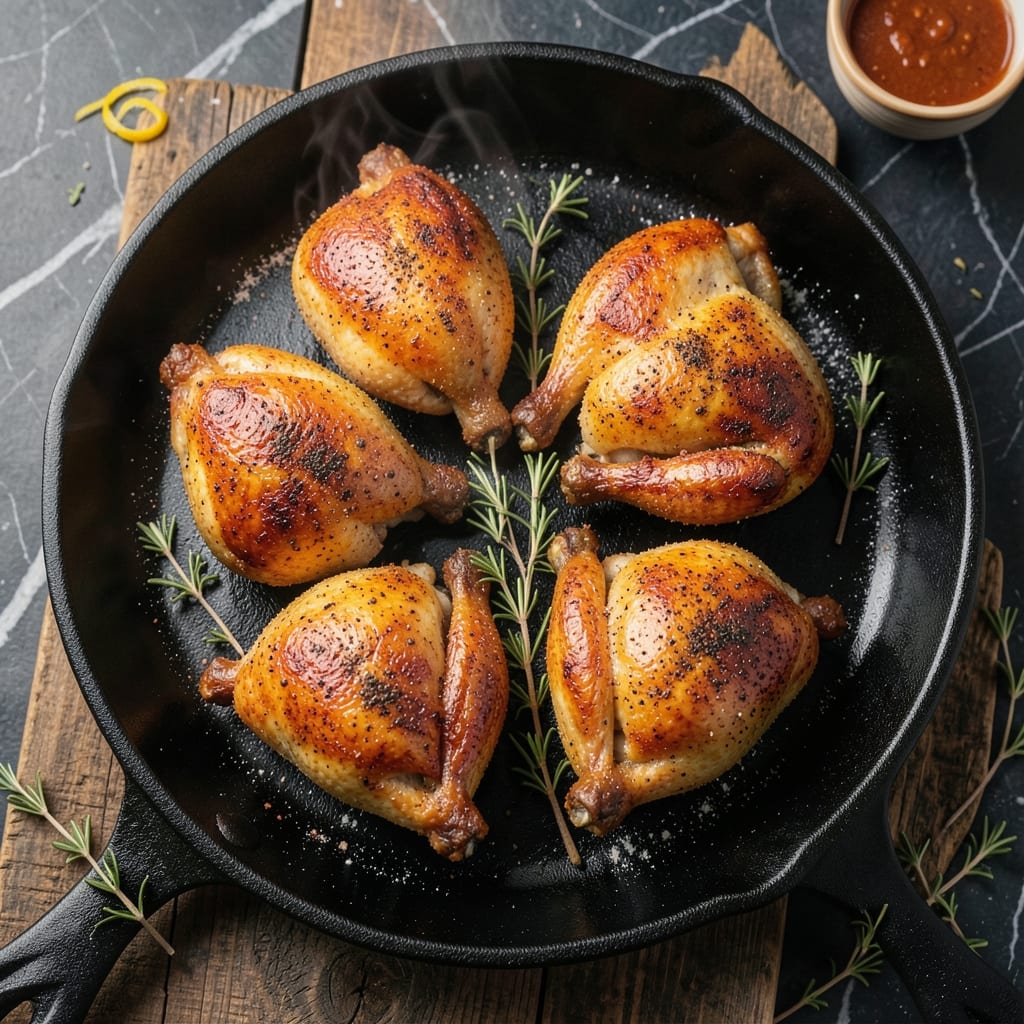
There’s no comparison between homemade deep-fried quail and restaurant versions. This method guarantees crispy skin while keeping the meat tender and juicy every time.
The secret lies in proper preparation and precise temperature control. A short brine enhances flavor and moisture, while a light dusting of seasoned flour creates the perfect coating for frying.
When done right, you’ll achieve golden-brown quail with shatteringly crispy skin that gives way to moist, flavorful meat. The contrast in textures makes each bite unforgettable.
Serve immediately with your favorite dipping sauce or alongside classic Southern sides. This technique works for both whole quail and individual pieces.
Ingredients for Fried Quail Recipe Deep Fried
Whole quail, seasoned flour, and buttermilk create that iconic crispy coating for perfect deep frying.
| Ingredient | Amount | Notes |
|---|---|---|
| Whole Quail 🐦 | 4 whole | Thawed if frozen, patted dry |
| Kosher Salt 🧂 | ¼ cup | Diamond Crystal preferred for brining |
| Water 💧 | 4 cups | For brine solution |
| All-Purpose Flour 🌾 | 2 cups | For dredging coating |
| Black Pepper 🌶️ | 1 tbsp | Freshly ground coarse |
| Paprika 🌶️ | 1 tbsp | Sweet or smoked variety |
| Garlic Powder 🧄 | 1 tsp | For seasoned flour blend |
| Onion Powder 🧅 | 1 tsp | Enhances savory depth |
| Cayenne Pepper 🔥 | ½ tsp | Optional for heat adjustment |
| Buttermilk 🥛 | 1 cup | For tenderizing dip |
| Vegetable Oil 🫒 | 4 cups | For deep frying, high smoke point |
| Fresh Thyme 🌿 | 2 tsp | Chopped, optional garnish |
| Lemon Wedges 🍋 | 4 pieces | For serving accompaniment |
[recipe_ingredient_scaler]
The quail quality is non-negotiable. Source from specialty butchers like D’Artagnan or Snake River Farms for consistent size and freshness. Whole birds (8-10 oz each) yield the best texture—avoid pre-cut pieces which dry out faster. Diamond Crystal kosher salt in the brine ensures even seasoning without over-salting. The buttermilk should be full-fat for maximum tenderizing power and coating adhesion.
No buttermilk? Whole milk with 1 tbsp vinegar per cup works in a pinch. For gluten-free coating, rice flour or cornstarch substitutes well (use one-third more by volume). Want extra crisp? Double-dredge in flour after the buttermilk dip. The oil must reach 350°F—use a thermometer. Peanut oil offers superior flavor but vegetable or canola oil are neutral alternatives.
Brine the quail for 4-12 hours maximum—longer risks over-curing. Fried quail holds at 170°F for 30 minutes if you need to wait. Leftovers? Unlikely, but they’ll keep 2 days refrigerated. Reheat in a 400°F oven to revive crispness (microwave ruins the texture).
Why You’ll Love This Recipe
- 5-Ingredient Magic: I love that I only need quail, salt, water, flour, and pepper—no fancy shopping required.
- Crispy Perfection: The hot oil turns that flour coating into the most satisfying crunch with every bite.
- Weeknight Upgrade: Honestly, it’s my go-to when I want something special without the all-day effort.
- Leftovers? Rare: Between us, the first batch never lasts past dinner—everyone always wants more.
Step-by-Step Instructions for Fried Quail
Master the technique for perfectly crispy skin and juicy meat with this proven method.
Step 1: Brine the Quail for Maximum Flavor and Moisture
In a large bowl, dissolve the 0.25 cup Kosher Salt in the 4 cups Water until fully incorporated. Submerge the 4 whole Whole Quail completely in the brine solution, ensuring they are fully covered.
Refrigerate and let them brine for 4-6 hours. This step is non-negotiable—it seasons the meat deeply and keeps it moist during frying. I’ve found that Diamond Crystal kosher salt works best here due to its consistent grain size and purity.
Step 2: Prepare the Seasoned Flour Dredge
In a shallow dish, combine the 2 cups All-Purpose Flour, 1 tbsp Black Pepper, 1 tbsp Paprika, 1 tsp Garlic Powder, 1 tsp Onion Powder, and 0.5 tsp Cayenne Pepper. Whisk until the spices are evenly distributed throughout the flour.
This blend creates a flavorful crust that complements the richness of the quail. The paprika adds a subtle smokiness, while the cayenne provides a gentle heat that balances the dish. Use sweet or smoked paprika based on your preference.
Step 3: Dredge and Fry to Golden Perfection
Remove the quail from the brine, pat them thoroughly dry with paper towels, and dip each piece into the 1 cup Buttermilk. Allow any excess to drip off, then coat them completely in the seasoned flour mixture, pressing gently to adhere.
Heat the 4 cups Vegetable Oil in a deep, heavy-bottomed pot to 350°F. Carefully lower the dredged quail into the oil, working in batches to avoid overcrowding. Fry for 8-10 minutes until the skin is deep golden brown and the internal temperature reaches 165°F.
Step 4: Drain and Serve Immediately
Transfer the fried quail to a wire rack set over a baking sheet to drain excess oil. This prevents the skin from becoming soggy. Let them rest for 2-3 minutes—just enough time to allow the juices to settle.
Garnish with the 2 tsp Fresh Thyme and serve hot with the 4 pieces Lemon Wedges on the side. The acidity of the lemon cuts through the richness, while the thyme adds a fresh, aromatic note. Serve immediately for the crispiest experience.
Pro Tips For Making Fried Quail Recipe Deep Fried
- Dry the Skin: Pat the quail completely dry with paper towels before dredging—any moisture left on the skin will make the flour coating slide right off.
- Test the Oil: Drop a pinch of flour into the oil first; if it sizzles and rises immediately, it’s ready for frying.
- Skip the Crowding: Fry one or two quail at a time so the oil temperature doesn’t drop, or you’ll end up with greasy, soggy birds.
- Rest Before Serving: Let the fried quail rest on a rack for 5 minutes after cooking—this keeps the crust crisp while the juices settle.
Dietary Considerations for This Recipe
Gluten-Free Adaptation
Swap the all-purpose flour for rice flour or cornstarch—use one-third more by volume for better crisp. I’ve tested both, and rice flour gives the closest texture to traditional. The coating will be slightly more delicate, so handle gently. 💡
Dairy-Free Option
Replace buttermilk with unsweetened almond milk + 1 tbsp vinegar per cup. Let it curdle for 5 minutes before using. The acidity still tenderizes the meat, though the coating may be slightly less thick.
Lower-Sodium Approach
Reduce the brine kosher salt by half and add 1 tbsp sugar to balance. Brine for only 2-3 hours to avoid over-salting. I find this works well for those watching their sodium intake without sacrificing flavor.
Keto-Friendly Version
Use almond flour or crushed pork rinds for the dredge instead of all-purpose. The pork rinds create an incredibly crispy crust. Fry in avocado oil for a higher smoke point and healthier fats.
Nut Allergy Consideration
For nut-free cooking, ensure your oil and flour are processed in nut-free facilities. Sunflower oil is a safe, high-smoke-point alternative to vegetable oil. Always check labels to prevent cross-contamination.
Lighter Preparation
For less oil absorption, use an air fryer at 375°F for 12-15 minutes. Spray the quail lightly with oil before cooking. The result won’t be identical, but it’s a great lower-fat alternative with decent crisp. 🔥
Nutrition Facts
Frequently Asked Questions
What oil works best for frying?
Use oils with a high smoke point like peanut or vegetable oil. Peanut oil adds superior flavor while vegetable oil remains neutral. Maintain 350°F throughout frying for best results.
How do I know when it’s done?
The skin should be deep golden brown and internal temperature must reach 165°F. This typically takes 8-10 minutes per bird. Always use a meat thermometer for accuracy.
Can I reuse the frying oil?
Yes, but strain it through a fine mesh sieve to remove food particles first. Store in a cool, dark place and use within 1 month. Discard if it smells rancid or smokes excessively.
Why did my coating fall off?
This usually happens if the quail wasn’t patted completely dry before dredging. Ensure each piece is bone-dry and press the flour coating firmly to adhere. Let it rest 5 minutes before frying.

Trained in classic French technique but raised on slow-cooked ribs and spicy rubs, she blends culinary skill with smoke and soul.
- Hamburgers in Sauce Recipe Crock Pot: Slow-Cooked Savory Delight - October 3, 2026
- Sanjeev Kapoor Egg Biryani Recipe: Fragrant Spiced Rice With Boiled Eggs - October 3, 2026
- Recipe for French Pork Spread Gorton: Savory Gallic Flavors in a Spreadable Delight - October 3, 2026