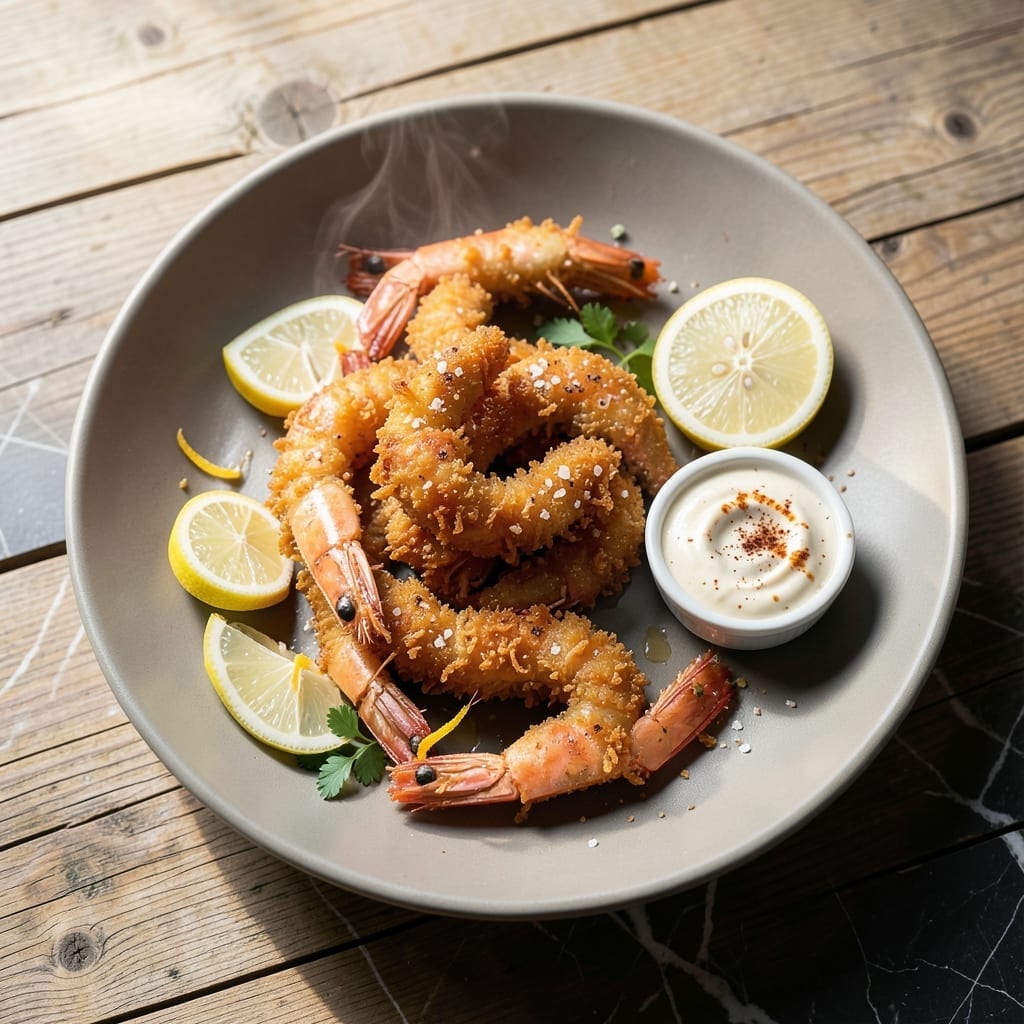
There’s a simple secret to achieving crispy, golden shrimp without dairy. My grandmother’s handwritten method used water instead of milk, creating a light yet sturdy batter that fries to perfection.
This approach transforms plain shrimp into restaurant-quality bites with a shatteringly crispy exterior. The batter clings beautifully while allowing the shrimp’s natural flavor to shine through, with no milk required.
After testing variations, I’ve refined the technique to ensure consistent results every time. The key lies in the right flour-to-liquid ratio and proper frying temperature to achieve that ideal golden finish.
Ready in under 30 minutes, this method delivers professional-quality results in any home kitchen. The shrimp emerge with a satisfying crunch that’s impossible to resist.
Ingredients for Fried Shrimp Batter Recipe No Milk
Simple pantry staples create that shatteringly crispy coating without any dairy at all.
| Ingredient | Amount | Notes |
|---|---|---|
| Large Shrimp 🍤 | 1 ½ lb | Peeled, deveined, tails on or off |
| All-Purpose Flour 🌾 | 1 ½ cups | Sifted for lump-free batter |
| Cornstarch 🌾 | ¼ cup | For extra crispiness |
| Ice-Cold Water 💧 | 1 ¼ cups | Chilled for light batter |
| Baking Powder 🧂 | 1 tsp | For airy texture |
| Salt 🧂 | 1 tsp | Fine sea salt preferred |
| Garlic Powder 🧄 | 1 tsp | Fine grind for even distribution |
| Onion Powder 🧅 | 1 tsp | Balances the seasoning |
| Paprika 🌶️ | ½ tsp | Sweet or smoked variety |
| Cayenne Pepper 🔥 | ¼ tsp | Optional for heat |
| Neutral Oil 🫒 | 4 cups | For deep frying, like vegetable or canola |
| Lemon Wedges 🍋 | 4 pieces | For serving |
[recipe_ingredient_scaler]
The shrimp quality matters most here. Wild-caught from a trusted seafood counter gives superior flavor and texture—avoid previously frozen if possible (it releases too much moisture). For the flour, all-purpose works perfectly, but I’ve had excellent results with a 50/50 blend of all-purpose and rice flour for an even lighter crust. The cornstarch is non-negotiable for that restaurant-level crunch.
No cornstarch? Replace with an equal amount of arrowroot powder. Out of baking powder? Self-rising flour at 1:1 ratio works in a pinch (skip the salt). For a gluten-free version, swap in a GF all-purpose blend with xanthan gum. The ice-cold water is key—warm water activates the gluten too early, making the batter dense instead of crispy.
Batter holds 10 minutes before frying (don’t let it sit longer). Leftover cooked shrimp keep 2-3 days in the fridge, but they’re best eaten immediately. Reheat in a 350°F oven for 5 minutes to restore some crispness—microwaving turns them soggy.
Why You’ll Love This Recipe
- No-Fuss Mix: I just dump flour, cornstarch, and ice-cold water in a bowl—no milk to worry about, no extra trips to the store.
- Crispy Perfection: The baking powder gives the batter that light, airy crunch that shatters with every bite.
- Weeknight Hero: Honestly, I’ve served this for casual dinners and last-minute get-togethers with zero stress.
- Budget Friendly: Large shrimp stretch further than you’d think, and the batter costs pennies compared to takeout.
Step-by-Step Instructions for Crispy Fried Shrimp Batter Without Dairy
Master this technique for a golden, shatteringly crisp coating that holds up to frying.
Step 1: Prepare the Dry Batter Base
In a large mixing bowl, whisk together the 1.5 cups all-purpose flour, 0.25 cup cornstarch, 1 tsp baking powder, 1 tsp salt, 1 tsp garlic powder, 1 tsp onion powder, 0.5 tsp paprika, and 0.25 tsp cayenne pepper until uniformly combined.
The cornstarch is critical here—it creates that ultra-crisp texture we’re after. Sifted flour ensures no lumps in your batter, which means a smoother, more even coating on the shrimp.
Step 2: Create the Light, Airy Batter
Gradually pour in the 1.25 cups ice-cold water while whisking continuously until the mixture forms a smooth batter with the consistency of heavy cream. The cold water prevents the baking powder from activating prematurely, ensuring maximum lift during frying.
You’ll notice the batter thickens slightly as it rests. This is normal. Don’t be tempted to thin it with additional water—you want it to cling to the shrimp without sliding off.
Step 3: Heat the Oil to Optimal Temperature
Pour the 4 cups neutral oil into a deep, heavy-bottomed pot or Dutch oven, leaving at least 2 inches of space from the rim to prevent overflow. Heat the oil over medium-high heat until it reaches 350-375°F on a deep-fry thermometer.
The right temperature is non-negotiable. Too cool and your shrimp will absorb oil and turn greasy; too hot and the outside will burn before the inside cooks. You’ll see the oil shimmer and ripple slightly when it’s ready.
Step 4: Fry the Shrimp to Golden Perfection
Pat the 1.5 lb large shrimp completely dry with paper towels. Working in batches to avoid crowding, dip each shrimp into the batter, allowing excess to drip off, then carefully lower into the hot oil.
Fry for 2-3 minutes per side until the coating turns deep golden brown and crisp. The shrimp should float to the surface when done. Don’t rush this—proper cooking time ensures the batter sets completely.
Use a slotted spoon to transfer the fried shrimp to a wire rack or paper towel-lined plate to drain. The rack allows air circulation, preventing the coating from becoming soggy on the bottom.
Step 5: Serve Immediately with Lemon
Serve the shrimp hot, straight from the fryer, with the 4 pieces lemon wedges on the side. The acid from the lemon cuts through the richness and enhances the crispness of the batter.
Each piece should have an audibly crisp exterior that gives way to tender, perfectly cooked shrimp. The batter should maintain its structure without falling off or becoming greasy. This is where your temperature control really pays off.
Pro Tips For Making Fried Shrimp Batter Recipe No Milk
- Chill the Water: Use ice-cold water straight from the fridge—it keeps the batter light and crispy by slowing gluten development. I learned this the hard way after my first few batches came out dense and gummy.
- Dry the Shrimp: Pat the shrimp completely dry with paper towels before dipping. Any moisture left on the surface will make the batter slide right off.
- Skip Overmixing: Stir the batter just until the flour is mostly combined—a few lumps are fine. Overmixing activates the gluten, and you’ll end up with tough, chewy shrimp instead of crispy ones.
- Double Fry for Crisp: Fry once at 350°F for 2 minutes, rest 1 minute, then fry again at 375°F for 1-2 minutes. Sounds like a hassle, but it’s the only way to get that shatteringly crisp shell that stays put.
Creative Variations of fried shrimp batter recipe no milk
Spicy Cajun Kick
Add 1 tbsp Cajun seasoning to your dry mix for a bold Louisiana-style twist. I also toss in ½ tsp smoked paprika for depth. The cayenne in the original recipe already gives a hint of heat, but this variation brings serious flavor. Serve with remoulade sauce. 🌶️
Beer Batter Upgrade
Replace ½ cup ice-cold water with chilled light beer for a crispier, more complex batter. The carbonation creates air pockets, while the malt adds subtle sweetness. I use Pilsner for the cleanest flavor. The shrimp fry up lighter than air.
Herb-Infused Version
Stir 2 tbsp finely chopped fresh parsley and 1 tbsp chives into the batter just before frying. The herbs add freshness that balances the richness. I grow these in my windowsill garden—nothing beats homegrown flavor. The green specks look beautiful too.
Gluten-Free Adaptation
Swap the all-purpose flour for a 1:1 gluten-free blend with xanthan gum, like King Arthur. Add ¼ cup extra cornstarch for crispness. The batter behaves slightly differently, so fry at 340°F to prevent burning. Still just as delicious.
Asian-Inspired Twist
Add 1 tbsp soy sauce and 1 tsp grated ginger to the wet ingredients. Replace paprika with ½ tsp five-spice powder. The result is a savory, aromatic coating perfect with sweet chili dipping sauce. I discovered this at a neighborhood Asian market. 💫
Extra Crunch Layer
After dipping in batter, roll shrimp in ½ cup panko breadcrumbs mixed with 1 tsp lemon zest before frying. This double-coating method creates an incredible crunch. My grandmother would call this “fancy,” but it’s worth the extra step.
Nutrition Facts
Frequently Asked Questions
Can I use sparkling water instead of regular?
Yes! Sparkling water makes the batter even lighter and crispier. The carbonation creates air pockets for extra crunch. Use the same 1.25 cups measurement.
Why did my batter slide off the shrimp?
This usually happens if the shrimp weren’t patted completely dry first. Excess moisture creates a barrier. Also, let the batter rest for 5 minutes before dipping to thicken slightly.
What oil works best for frying?
Use a neutral oil with a high smoke point like vegetable, canola, or peanut oil. Avoid olive oil—it has a lower smoke point and can impart a bitter flavor. Heat to 350-375°F.
Can I bake instead of fry?
Yes, but the texture will differ. Bake at 425°F on a wire rack for 12-15 minutes, flipping halfway. The coating won’t be as crispy but will still be delicious.

Trained in classic French technique but raised on slow-cooked ribs and spicy rubs, she blends culinary skill with smoke and soul.
- Recipe for Boneless Pork Chops in Cast Iron Skillet: Sear and Baste to Juicy Perfection - October 3, 2026
- Recipe for Boneless Cross Rib Roast: Slow-Roasted Beef with Herb Crust - October 3, 2026
- Hamburgers in Sauce Recipe Crock Pot: Slow-Cooked Savory Delight - October 3, 2026