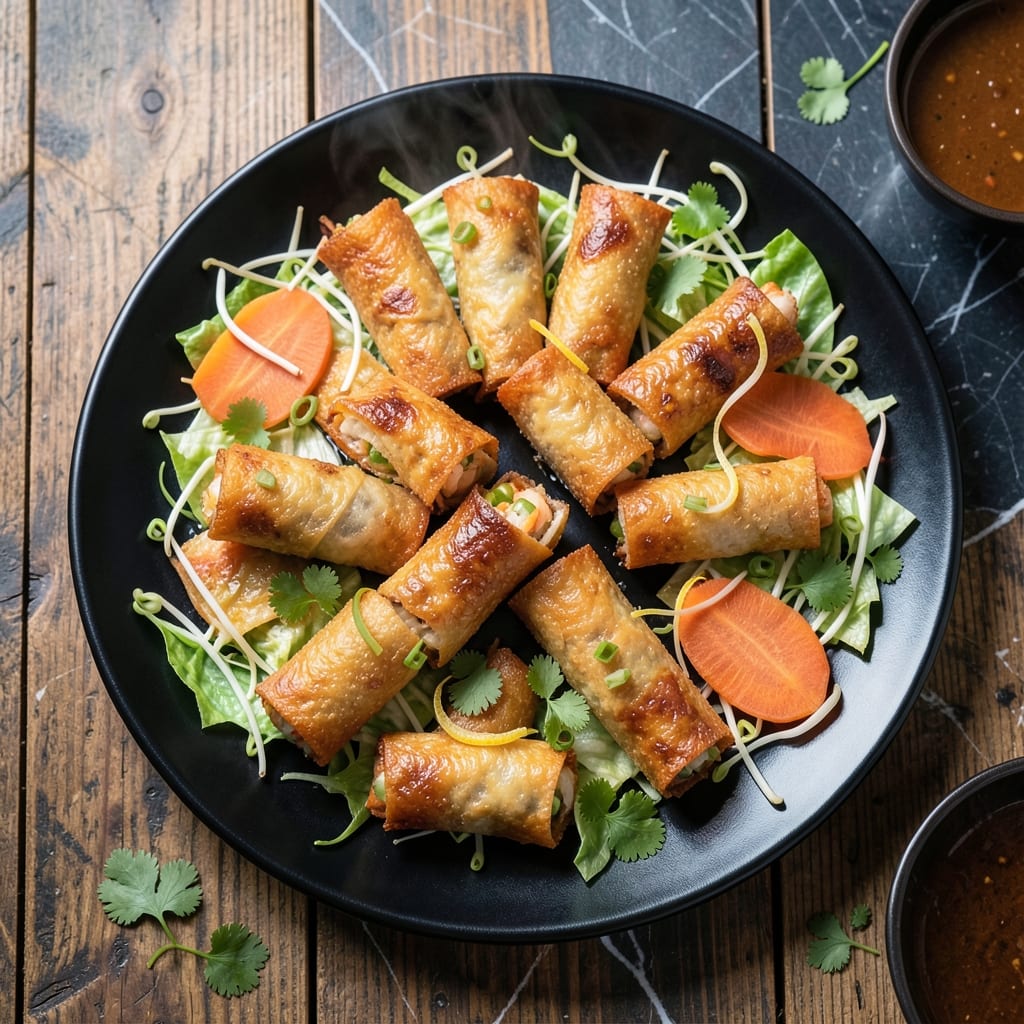
This spring roll recipe delivers crispy, golden-brown wrappers encasing tender shrimp and fresh vegetables in every bite.
I developed this method after testing multiple techniques to ensure the perfect crunch without soggy fillings. The key lies in proper frying temperature and keeping the filling tightly wrapped.
What emerges from the oil is a roll with a shatteringly crispy exterior giving way to a flavorful, textured filling. The shrimp stays plump and juicy while the vegetables retain just the right amount of bite.
Serve these hot with your favorite dipping sauce for an appetizer that disappears faster than you can fry them.
Ingredients for Fried Shrimp Spring Rolls
Crispy wrappers meet juicy shrimp and fresh veggies in every bite. Simple ingredients, big flavor.
| Ingredient | Amount | Notes |
|---|---|---|
| Spring Roll Wrappers 🥟 | 12 sheets | Rice paper or wheat-based, 8-inch size |
| Medium Shrimp 🍤 | 1 lb | Peeled, deveined, tails removed |
| Green Cabbage 🥬 | 2 cups | Finely shredded for texture |
| Carrots 🥕 | 1 cup | Julienned or matchstick cut |
| Bean Sprouts 🌱 | 1 cup | Rinsed and drained well |
| Fresh Cilantro 🌿 | ½ cup | Chopped, stems removed |
| Green Onions 🧅 | 3 whole | Thinly sliced, white and green parts |
| Garlic Cloves 🧄 | 3 cloves | Minced for filling flavor |
| Soy Sauce 🫙 | 2 tbsp | Low-sodium preferred for balance |
| Fish Sauce 🐟 | 1 tbsp | Optional for umami depth |
| Sesame Oil 🫒 | 1 tsp | Toasted variety for aroma |
| Vegetable Oil 🛢️ | 4 cups | For deep frying, high smoke point |
| Cornstarch 🌾 | 2 tbsp | For sealing wrappers |
| Salt 🧂 | ½ tsp | To taste for seasoning |
| Black Pepper 🌶️ | ¼ tsp | Freshly ground preferred |
[recipe_ingredient_scaler]
The shrimp is the star here. Wild-caught from a trusted fishmonger is ideal, but frozen shrimp from Costco works great too—just thaw it properly in cold water. Look for 16-20 count per pound for the right size. Spring roll wrappers are in the refrigerated section at Asian markets or the international aisle. Rice paper is gluten-free if that matters to you (it does to me).
No shrimp? Chopped firm tofu or crab meat makes a solid swap. Out of cabbage? Shredded lettuce or Napa cabbage works. For a vegetarian twist, mushrooms add that meaty texture. Fish sauce can be skipped, but add a little extra soy sauce if you do. The cilantro can be swapped for Thai basil or mint—same fresh vibe, different flavor profile.
Wrap unused wrappers tightly in plastic and refrigerate for up to 1 week. The filling veggies will last 3-4 days in the fridge. Fry in batches and keep finished rolls warm in a 200°F oven on a rack (don’t stack or they’ll get soggy).
Why You’ll Love This Recipe
- Ready in 20: I can have these crispy rolls from wrapper to table faster than takeout arrives. Honestly, the chopping is the longest part.
- Crunchy Perfection: That first bite—shrimp snaps, cabbage crunches, and the wrapper shatters. The bean sprouts add this fresh little pop that keeps me reaching for more.
- Party Starter: I bring these to potlucks and they’re always the first to disappear. Even my picky nephew devours them (after pulling out the carrots).
- Budget Friendly: A pound of shrimp and a head of cabbage makes two dozen rolls. Leftovers? They reheat in the toaster oven like they’re fresh.
Step-by-Step Instructions for Fried Shrimp Spring Rolls
Here’s the method I use for achieving that perfect crispy texture with every bite.
Step 1: Prepare the Shrimp and Vegetable Filling
Start by finely chopping the 1 lb Medium Shrimp into small, bite-sized pieces. I find this creates a more even distribution in each roll. In a large bowl, combine the shrimp with the 2 cups Green Cabbage, 1 cup Carrots, 1 cup Bean Sprouts, 0.5 cup Fresh Cilantro, and 3 whole Green Onions.
Add the 3 cloves Garlic Cloves (minced), 2 tbsp Soy Sauce, 1 tbsp Fish Sauce, 1 tsp Sesame Oil, 0.5 tsp Salt, and 0.25 tsp Black Pepper. Mix well to ensure every component is evenly coated. The filling should be moist but not watery—if it seems too wet, let it sit for 5 minutes to allow the vegetables to release excess moisture.
Step 2: Assemble the Spring Rolls
Lay a Spring Roll Wrapper on a clean surface in a diamond shape. Place about 3 tbsp of the filling near the bottom corner, leaving a 1-inch border. Fold the bottom corner over the filling, then fold in the sides, and roll tightly upward, similar to a burrito.
Before sealing the final edge, dip your finger in a small bowl of water mixed with the 2 tbsp Cornstarch to create a slurry. This acts as a glue to keep the wrapper securely closed. Repeat with the remaining 12 sheets Spring Roll Wrappers and filling. Keep the assembled rolls under a damp towel to prevent them from drying out while you work.
Step 3: Fry to Golden Perfection
Heat the 4 cups Vegetable Oil in a deep, heavy-bottomed pot to 350°F. To test if the oil is ready, drop in a small piece of wrapper—it should sizzle and rise to the surface immediately. Carefully lower 3-4 spring rolls at a time into the hot oil, being careful not to overcrowd the pot.
Fry for 3-4 minutes until they turn a deep, golden brown and the wrappers are crispy. Turn them occasionally with a slotted spoon to ensure even cooking. Drain on a wire rack or paper towels to remove any excess oil. The key here is maintaining the oil temperature—if it drops too low, the rolls will absorb oil and become greasy instead of crispy.
Step 4: Rest and Serve Immediately
Let the spring rolls rest for 2-3 minutes after frying. This allows the filling to set slightly and the wrappers to reach their maximum crispiness. Serve them hot, while the contrast between the crunchy exterior and tender filling is at its peak.
I like to arrange them on a platter with a dipping sauce made from leftover Soy Sauce and a touch of Sesame Oil for an extra layer of flavor. These are best enjoyed fresh, so gather everyone around and dig in while they’re still hot and crispy.
Pro Tips For Making Fried Shrimp Spring Rolls
- Dry the Shrimp: Pat the shrimp completely dry with paper towels before chopping—excess moisture makes the filling soggy and can cause the wrappers to tear.
- Shred Veggies Fine: Use a mandoline or sharp knife to julienne the cabbage and carrots into matchstick pieces no thicker than 1/8 inch. Chunky bits make rolling difficult and cook unevenly.
- Seal with Cornstarch: Mix a little cornstarch with water to make a slurry and use it to seal the edges of the wrappers. It holds better than water alone and prevents blowouts during frying.
- Fry in Small Batches: I learned this the hard way—overcrowding the pan lowers the oil temp, leading to greasy, limp spring rolls. Stick to 3-4 at a time for a crisp finish.
Perfect Pairings for This fried shrimp spring rolls
Dipping Sauces
I always serve these with a classic sweet chili sauce—mix ½ cup with 1 tbsp lime juice for brightness. Sriracha mayo (equal parts mayo and Sriracha) adds a creamy kick that balances the crispiness perfectly. 🌶️
Fresh Accompaniments
A simple cucumber salad with rice vinegar, sugar, and sesame seeds cuts through the richness. I toss 2 cups sliced cucumbers with 1 tbsp vinegar and ½ tsp sugar for a refreshing side.
Beverage Pairings
An ice-cold Vietnamese iced coffee with condensed milk complements the savory flavors beautifully. For beer lovers, a light Asian lager like Sapporo or Singha cleanses the palate without overpowering. 🍺
Starchy Sides
Steamed jasmine rice or sticky rice soaks up any extra dipping sauce. I like to serve the rolls over a bed of butter lettuce for a fresh presentation that adds color to the plate.
Quick Pickles
For tangy contrast, quick-pickle ½ cup shredded carrots and daikon in ¼ cup vinegar, 1 tbsp sugar, and ½ tsp salt for 30 minutes. These add crunch and acidity that elevate every bite.
Nutrition Facts
Frequently Asked Questions
Can I bake these instead of frying?
Yes, brush with oil and bake at 400°F for 15-20 minutes, flipping halfway. They won’t be as crispy but will be lighter. Use a wire rack for even air circulation.
How do I keep them crispy after frying?
Drain on a wire rack, not paper towels, to prevent steam buildup. Keep in a 200°F oven on a rack until serving. Avoid stacking them to maintain texture.
Can I make these ahead of time?
Assemble and refrigerate uncooked rolls for up to 4 hours under a damp towel. Fry just before serving for best results. Freezing isn’t recommended as it softens the wrappers.
What if my wrappers tear while rolling?
Keep wrappers moist under a damp towel until ready to use. If they tear, patch with a small piece of wrapper and cornstarch slurry. Handle gently but firmly for tight rolls.

Trained in classic French technique but raised on slow-cooked ribs and spicy rubs, she blends culinary skill with smoke and soul.
- Recipe for Boneless Pork Chops in Cast Iron Skillet: Sear and Baste to Juicy Perfection - October 3, 2026
- Recipe for Boneless Cross Rib Roast: Slow-Roasted Beef with Herb Crust - October 3, 2026
- Hamburgers in Sauce Recipe Crock Pot: Slow-Cooked Savory Delight - October 3, 2026