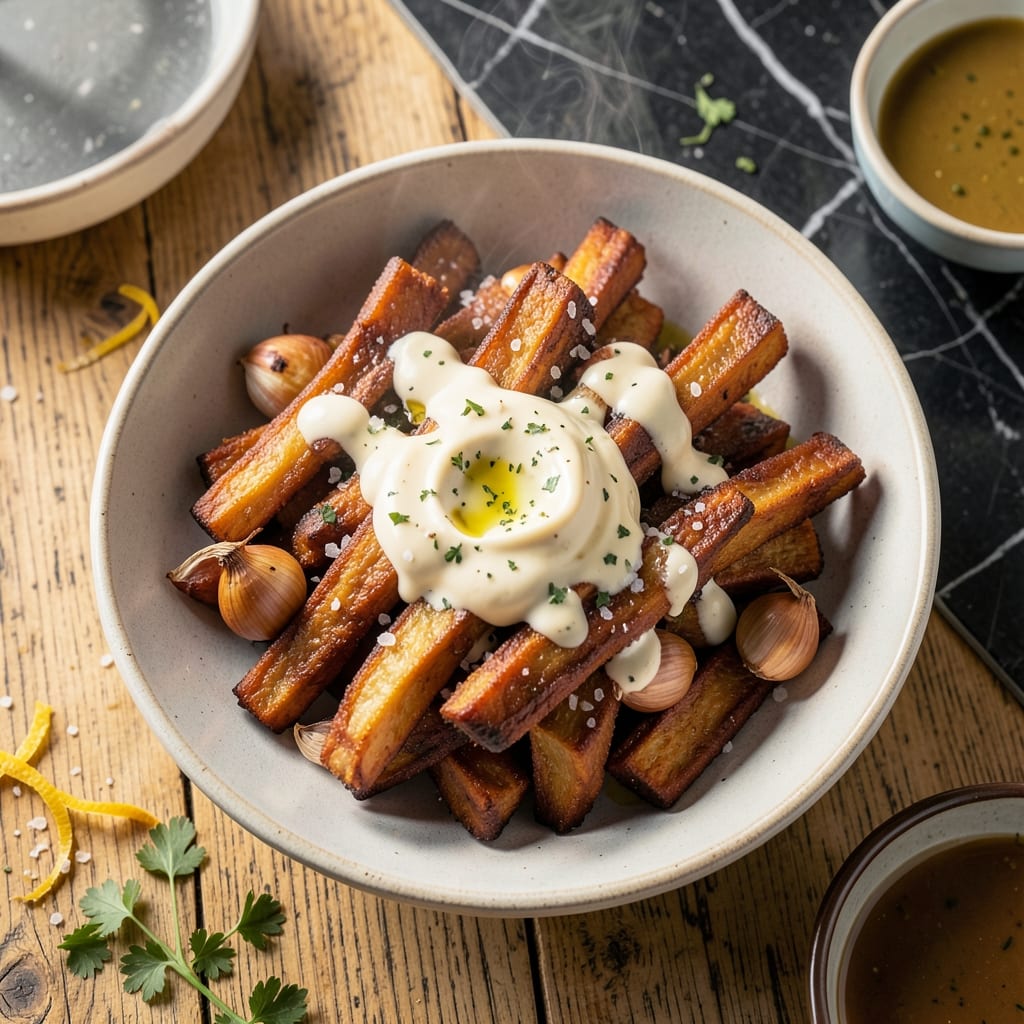
I tested this method in my tiny Boston kitchen until I achieved the perfect crispy texture every time. The key is properly thawing and drying the yuca before frying.
This recipe transforms frozen yuca into crispy, golden fries with a fluffy interior. A quick soak removes excess starch, which prevents sogginess and ensures even cooking.
The garlic aioli adds a creamy, flavorful contrast that elevates the dish. Both components come together quickly with minimal effort and maximum reward.
Serve these fries as a side or appetizer. They’re naturally vegan and gluten-free, making them a crowd-pleasing option for any occasion.
Ingredients for Frozen Yuca
Transform frozen yuca into crispy golden fries with just a few pantry staples and fresh herbs.
| Ingredient | Amount | Notes |
|---|---|---|
| Frozen Yuca 🥔 | 2 lb | Peeled, cut into sticks |
| Cold Water 💧 | 4 cups | For soaking yuca |
| Olive Oil 🫒 | ½ cup | For frying, divided |
| Salt 🧂 | 1 tsp | Kosher or sea salt |
| Garlic Cloves 🧄 | 4 cloves | Minced for aioli |
| Vegan Mayonnaise 🥫 | ½ cup | For creamy aioli base |
| Lemon Juice 🍋 | 1 tbsp | Freshly squeezed |
| Dijon Mustard 🟡 | 1 tsp | Smooth variety preferred |
| Black Pepper 🌶️ | ½ tsp | Freshly ground |
| Smoked Paprika 🌶️ | ½ tsp | Optional, for depth |
| Fresh Parsley 🌿 | 2 tbsp | Chopped, for garnish |
[recipe_ingredient_scaler]
The yuca must be fully thawed and thoroughly dried for maximum crispiness. Look for pre-peeled frozen yuca at Latin markets or Whole Foods—it saves prep time and ensures consistent texture. Avoid brands with added preservatives; the ingredient list should just say yuca. If buying fresh, peel and cut it yourself, but frozen works perfectly here (and is often more accessible).
No vegan mayo? Blend silken tofu with a splash of lemon juice for a similar creamy base. Olive oil can be swapped for avocado oil if you prefer a higher smoke point. For extra flavor in the aioli, add a pinch of nutritional yeast (it mimics the cheesy depth). If you don’t have Dijon, any whole-grain mustard works—just avoid yellow mustard, which can overpower the dish.
Fries are best eaten immediately but reheat well in an oven at 400°F for 5-10 minutes. Store aioli in the fridge for up to 5 days in a sealed jar. Leftovers? Toss cold fries in a hot pan with a little oil to revive their crispiness.
Why You’ll Love This Recipe
- No Thaw Needed: I just toss the frozen yuca straight into cold water—no waiting, no planning ahead.
- Garlic Lover’s Dream: The cloves roast right alongside the yuca, so every bite carries that deep, golden aroma.
- Weeknight Sidekick: I’ve served these crispy edges with chicken, steak, even eggs. Honestly, they fit everywhere.
Step-by-Step Instructions for Crispy Golden Yuca Fries with Garlic Aioli
This method ensures perfectly crispy results with a creamy, garlicky dipping sauce to match.
Step 1: Thaw and Soak the Yuca
Place the 2 lb frozen yuca sticks in a large bowl and cover completely with the 4 cups cold water. Let them soak for 30 minutes to remove excess starch and prevent stickiness during frying.
This step is crucial for achieving that ideal crispy texture. You’ll notice the water becomes slightly cloudy as the starch releases. Drain and pat the yuca thoroughly dry with a clean towel before frying—any moisture will cause splattering.
Step 2: Fry the Yuca in Batches
Heat 0.5 cup olive oil in a deep skillet over medium-high heat until shimmering. Working in batches to avoid crowding, carefully add the yuca sticks in a single layer. Fry undisturbed for 4-5 minutes until the edges turn golden brown.
Flip and cook for another 3-4 minutes until all sides are evenly deep golden and crispy. The yuca should be tender inside with a satisfying crunch outside. Transfer to a paper towel-lined plate and sprinkle immediately with the 1 tsp salt while hot.
Step 3: Prepare the Garlic Aioli
In a small bowl, combine the 0.5 cup vegan mayonnaise, 1 tbsp lemon juice, 1 tsp Dijon mustard, and 4 cloves minced garlic cloves. Whisk until smooth and fully incorporated.
Season with the 0.5 tsp black pepper and 0.5 tsp smoked paprika. The smoked paprika adds a subtle depth that pairs beautifully with the earthy yuca. Taste and adjust seasoning if needed, then cover and refrigerate until ready to serve.
Step 4: Finish and Serve Immediately
Transfer the crispy yuca fries to a serving platter while still hot. Garnish with the 2 tbsp chopped fresh parsley for a pop of color and freshness. The contrast of the vibrant green parsley against the golden fries makes for an appetizing presentation.
Serve the fries immediately with the chilled garlic aioli on the side for dipping. The aioli should be thick and creamy, with a pronounced garlic flavor that doesn’t overpower. For best results, enjoy the fries fresh from the pan when they’re at peak crispiness.
Pro Tips For Making Frozen Yuca
- Thaw Completely First: I learned this the hard way—frozen yuca must sit in cold water for at least 4-6 hours to soften fully before cooking. Skip this and you’ll end up with a rock-hard center, no matter how long you fry or boil it.
- Boil Before Frying: After thawing, parboil the yuca for 8-10 minutes to remove excess starch and soften it. This keeps the pieces from falling apart in the hot oil and gives that perfect crispy exterior later.
- Dry Thoroughly: Pat the boiled yuca completely dry with a towel before frying—any moisture left will cause dangerous oil splatter. Sounds tedious, but it’s the difference between golden fries and a greasy mess.
- Crisp in Batches: Resist the urge to crowd the pan, even if it takes longer. A single layer in hot oil (about 350°F) guarantees even browning, while overcrowding steams the yuca instead of frying it.
Storing and Reheating This frozen yuca
Refrigerator Storage
Let the fries cool completely before storing in an airtight container lined with paper towels to absorb excess oil. They’ll keep in the fridge for up to 3 days. I learned this trick after my pot pie disaster—paper towels are a game-changer for crispiness. ❄️
Freezer Storage
For longer storage, freeze the fries in a single layer on a baking sheet first. Once solid, transfer to a freezer bag with parchment between layers to prevent sticking. They’ll stay fresh for up to 2 months without losing texture.
Oven Reheating
Spread fries on a baking sheet and reheat at 400°F for 8-10 minutes, flipping halfway. This restores the crispiness better than any other method. I tested this in my tiny Boston kitchen—it works every time. 🔥
Air Fryer Revival
A quick 3-4 minute stint in a preheated air fryer at 375°F revives leftover fries beautifully. Shake the basket halfway for even crisping. This is my go-to for small batches.
Aioli Storage
Keep the garlic aioli in a sealed jar in the fridge for up to 5 days. Stir before using, as the oils may separate. The flavors actually deepen over time, making it even tastier.
Nutrition Facts
Frequently Asked Questions
Do I need to peel the yuca before freezing?
Nope! Frozen yuca is already peeled and cut for convenience. Just thaw and soak as directed to remove excess starch before cooking.
Can I bake instead of frying?
Yes! Toss soaked and dried yuca with 2 tablespoons oil and bake at 425°F for 25-30 minutes, flipping halfway. The texture will be slightly less crispy but still delicious.
Why did my fries turn out soggy?
This usually happens if the yuca wasn’t thoroughly dried after soaking. Pat them completely dry with a towel before frying. Crowding the pan can also cause steaming instead of crisping.
Can I use fresh yuca instead of frozen?
Peel, cut into sticks, and boil for 5 minutes before soaking and frying. Fresh yuca has a slightly longer prep time but works just as well.

Trained in classic French technique but raised on slow-cooked ribs and spicy rubs, she blends culinary skill with smoke and soul.
- Recipe for Boneless Pork Chops in Cast Iron Skillet: Sear and Baste to Juicy Perfection - October 3, 2026
- Recipe for Boneless Cross Rib Roast: Slow-Roasted Beef with Herb Crust - October 3, 2026
- Hamburgers in Sauce Recipe Crock Pot: Slow-Cooked Savory Delight - October 3, 2026