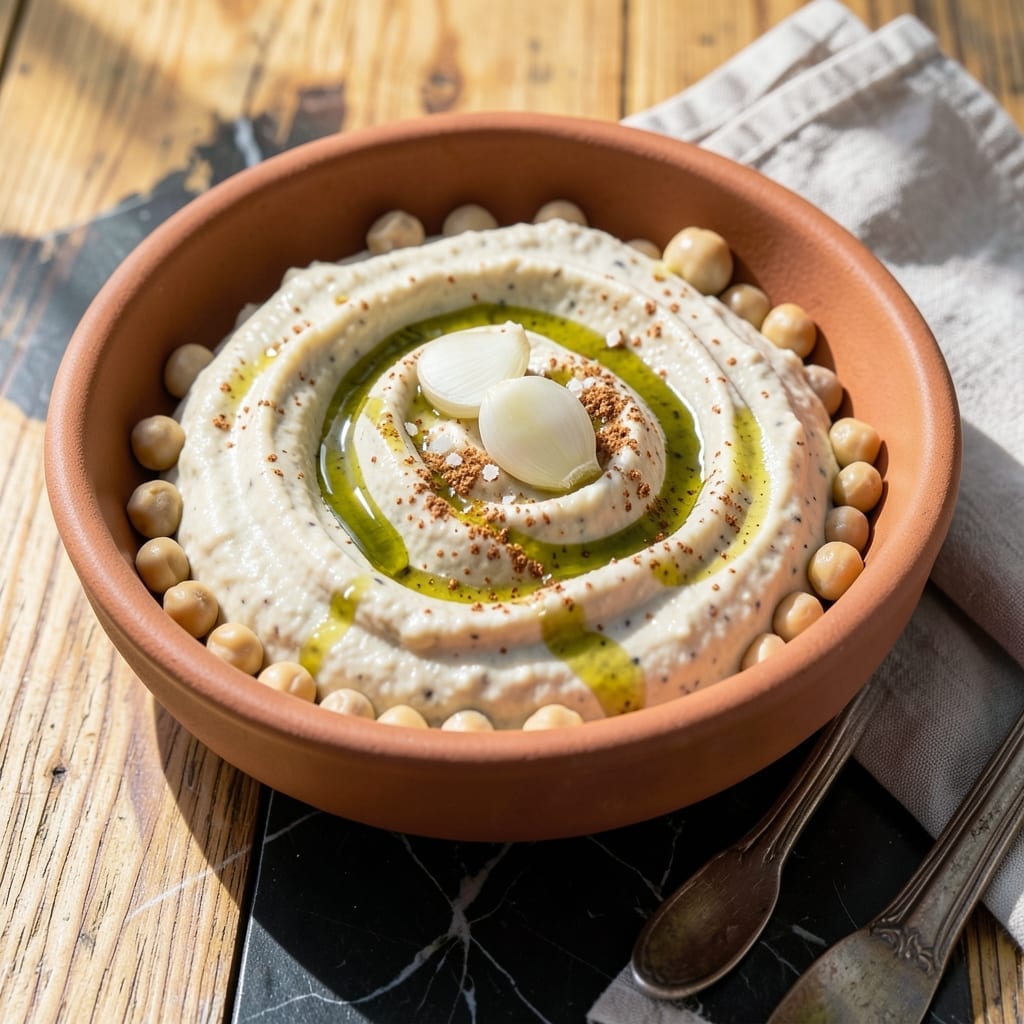
This tahini-free version delivers the same creamy texture you love, with an extra garlic kick and bright lemon finish. The secret lies in using chickpea liquid to achieve that perfect smooth consistency.
It comes together in minutes with simple pantry staples, proving you don’t need tahini for authentic flavor. Serve with warm pita or fresh vegetables for a dip that’s always a crowd-pleaser.
Ingredients for Garlic Hummus Recipe No Tahini
Pantry staples plus fresh garlic and lemon make this dip sing.
| Ingredient | Amount | Notes |
|---|---|---|
| Canned Chickpeas 🥫 | 2 cans | 15 oz each, liquid reserved |
| Garlic Cloves 🧄 | 6 cloves | Fresh, peeled and minced |
| Lemon Juice 🍋 | ¼ cup | Freshly squeezed preferred |
| Extra-Virgin Olive Oil 🫒 | ¼ cup | Plus extra for drizzling |
| Ground Cumin 🌿 | 1 tsp | Toasted for deeper flavor |
| Sea Salt 🧂 | 1 tsp | Adjust to taste |
| Smoked Paprika 🌶️ | ½ tsp | Optional, for garnish |
| Fresh Parsley 🌿 | 2 tbsp | Chopped, for garnish |
| Water 💧 | 2 tbsp | From chickpea can |
[recipe_ingredient_scaler]
The chickpeas are everything here. Goya or Eden Organic cans have the creamiest texture—avoid brands with added sodium if possible. Reserve that aquafaba (the chickpea liquid) for the dip, it’s the magic ingredient that replaces tahini. Fresh garlic is non-negotiable for that bold kick, and I always grab mine from Trader Joe’s or the farmers market for the best flavor.
Out of fresh lemons? Bottled lemon juice at half the amount works in a pinch, but fresh is brighter. No smoked paprika? Regular paprika or a pinch of cayenne adds color and heat. If you want extra creaminess, a spoonful of cashew butter blends in beautifully. The olive oil should be something you’d eat with bread—California Olive Ranch is my go-to.
Keeps beautifully in the fridge for 5 days—the flavors actually deepen overnight. Freeze extras in ice cube trays for up to 3 months. Always drizzle fresh olive oil on top before serving to keep it vibrant.
Why You’ll Love This Recipe
- Blender Magic: I just dump everything in—chickpeas, garlic, lemon, cumin—and blend. No tahini hunting required.
- Garlic Lovers’ Dream: Honestly, the raw garlic and cumin give it that bold, zesty kick I crave with every bite.
- Party or Pita: Between us, it’s my go-to for potlucks, snack plates, or just slathering on toast at midnight.
- Budget Stretcher: One can of chickpeas makes a big batch. I’ll be real: it’s cheaper than store-bought and twice as good.
Step-by-Step Instructions for Garlic Hummus No Tahini
Here’s how I make this creamy dip with bright lemon flavor and no tahini required.
Step 1: Process the Chickpeas and Garlic
Drain the 2 cans Canned Chickpeas, reserving the liquid. Rinse the chickpeas under cold water to remove any excess sodium. Add them to your food processor along with the 6 cloves Garlic Cloves.
Pulse until the mixture resembles coarse crumbs. You’ll see the garlic break down first, then the chickpeas will start to crumble. This initial pulsing helps prevent overworking the hummus later, which can make it dense rather than creamy.
Step 2: Add the Liquid Ingredients
With the processor running, pour in the 0.25 cup Lemon Juice, 0.25 cup Extra-Virgin Olive Oil, and 2 tbsp Water from the chickpea can. Process for 1-2 minutes, stopping to scrape down the sides as needed.
The mixture will start to smooth out as the liquids help break down the chickpeas. You’re looking for a thick but pourable consistency. If it seems too thick, add another 1-2 tablespoons of the reserved chickpea liquid and process again.
Step 3: Season and Blend to Perfection
Add the 1 tsp Ground Cumin and 1 tsp Sea Salt. Process for another 30-60 seconds until the hummus is completely smooth and creamy. The cumin adds a warm, earthy depth that balances the bright lemon.
Taste and adjust the seasoning. Here’s the thing—I often find it needs a bit more salt, but start with what you have and add gradually. The flavors will meld as it sits, so slightly under-seasoned is better than over at this stage.
Step 4: Finish and Serve
Transfer the hummus to a serving bowl. Use the back of a spoon to create swirls in the top. Drizzle with a little extra olive oil and sprinkle with the 0.5 tsp Smoked Paprika and 2 tbsp Fresh Parsley.
The smoked paprika adds a subtle smokiness and a pop of color, while the parsley brings freshness. Let it sit for 10-15 minutes before serving to allow the flavors to develop fully. Serve with warm pita, fresh veggies, or as a spread on sandwiches.
Pro Tips For Making Garlic Hummus Recipe No Tahini
- Drain and Rinse: Always drain and rinse the canned chickpeas thoroughly to remove excess starch and sodium—this prevents a grainy texture and bitter aftertaste.
- Toast the Cumin: Lightly toast the ground cumin in a dry pan for 30 seconds before adding it to the blend; it wakes up the flavor in a way raw cumin just can’t.
- Skip Cold Chickpeas: I learned this the hard way—use room-temperature chickpeas to avoid a dull, thick hummus that refuses to smooth out, even with extra olive oil.
- Thin with Ice Water: If your hummus is too thick, add 1-2 tablespoons of ice water while blending instead of more oil—it lightens the texture without diluting the garlic and lemon flavors.
Best Sauces and Condiments for garlic hummus recipe no tahini
Classic Olive Oil Drizzle
A high-quality extra-virgin olive oil drizzle is non-negotiable. I use California Olive Ranch for its fruity notes that complement the garlic. Drizzle in a zigzag pattern just before serving for that restaurant-style presentation. 🫒
Lemon Zest Garnish
After adding the lemon juice, grate 1 tsp lemon zest over the top. The oils in the zest release when mixed with the hummus, adding an extra layer of citrus brightness that makes the flavors pop.
Spicy Harissa Swirl
For heat lovers, swirl in 1-2 tbsp harissa paste (I recommend Dea brand). Create a well in the center of your hummus bowl, add the harissa, then drag a spoon through it for a marbled effect. The smoky chili pairs perfectly with garlic.
Herb Infused Oil
Heat ¼ cup olive oil with 3 sprigs fresh rosemary until warm, then strain. This infused oil adds an aromatic depth when drizzled over the hummus. It’s my go-to for impressive presentations.
Roasted Garlic Topping
Roast 3 extra garlic cloves at 400°F for 15 minutes until soft, then mash and sprinkle over the dip. This creates a sweeter, deeper garlic flavor that contrasts nicely with the fresh garlic in the base. 💡
Toasted Pine Nuts
Toast 2 tbsp pine nuts in a dry pan until golden, then sprinkle over the hummus. The crunch adds texture contrast, and their buttery flavor complements the earthy chickpeas beautifully.
Nutrition Facts
Frequently Asked Questions
Can I use dried chickpeas instead of canned?
Yes, but soak 1 cup dried chickpeas overnight first. Cook until very soft (1-2 hours) before blending. Canned are more convenient and consistent for this recipe.
How do I make it less garlicky?
Start with 3-4 cloves instead of 6. Roast the garlic first at 400°F for 15 minutes to mellow the flavor. Taste and adjust as you blend.
Why is my hummus grainy?
Blend longer (3-5 minutes) or add more reserved chickpea liquid. Ensure your food processor is powerful enough. Strain chickpeas well before using.
How long will it keep?
Store in an airtight container in the fridge for up to 5 days. The flavors deepen overnight. Freeze for up to 3 months in portions.

Trained in classic French technique but raised on slow-cooked ribs and spicy rubs, she blends culinary skill with smoke and soul.
- Recipe for Boneless Pork Chops in Cast Iron Skillet: Sear and Baste to Juicy Perfection - October 3, 2026
- Recipe for Boneless Cross Rib Roast: Slow-Roasted Beef with Herb Crust - October 3, 2026
- Hamburgers in Sauce Recipe Crock Pot: Slow-Cooked Savory Delight - October 3, 2026