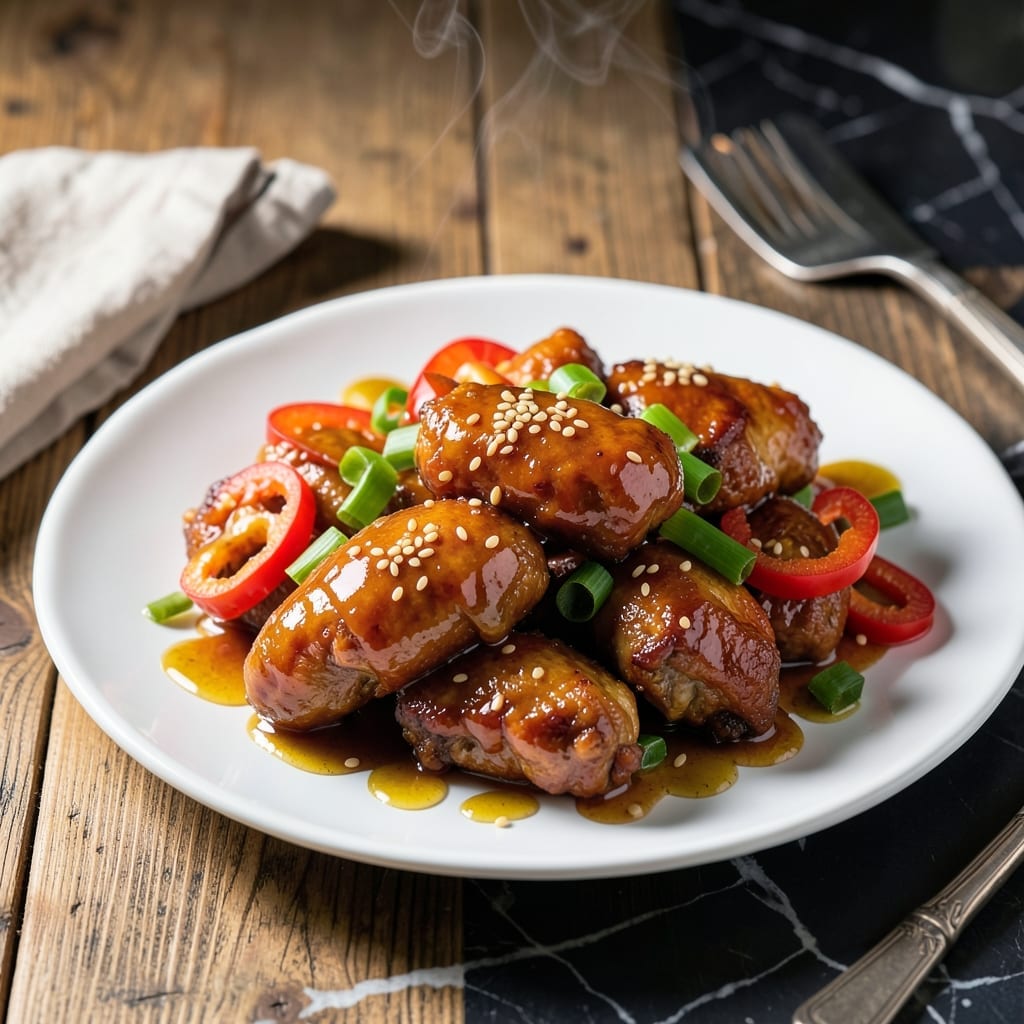
This takeout classic delivers sweet and spicy flavors with restaurant-quality results right from your kitchen. The secret lies in achieving that signature crispy coating while keeping the chicken tender inside.
I’ve perfected this method through careful testing, balancing the sauce’s tangy heat with just enough sweetness. The double-frying technique ensures each piece stays crunchy even after being coated in the glossy glaze.
The dish comes together with simple ingredients and straightforward steps, proving that homemade can taste better than delivery. The sauce clings perfectly to every crispy bite, creating that addictive sweet-spicy balance.
Serve it over steamed rice with steamed broccoli for a complete meal. This version stays true to the classic while making it accessible for home cooks.
Ingredients for General Tso Chicken Recipe Tasty
A few simple ingredients transform into that addictive sweet-spicy takeout favorite at home.
| Ingredient | Amount | Notes |
|---|---|---|
| Boneless Skinless Chicken Thighs 🍗 | 1 ½ lb | Cut into 1-inch pieces |
| Soy Sauce 🫙 | 3 tbsp | Low-sodium preferred |
| Rice Vinegar 🍚 | 2 tbsp | Or substitute apple cider vinegar |
| Hoisin Sauce 🥢 | 2 tbsp | Found in Asian aisle |
| Granulated Sugar 🍚 | 3 tbsp | Adjust for sweetness preference |
| Garlic Cloves 🧄 | 4 cloves | Minced finely |
| Fresh Ginger 🌿 | 1 tbsp | Grated or minced |
| Cornstarch 🌾 | ½ cup | For coating chicken |
| All-Purpose Flour 🌾 | ¼ cup | For dredging |
| Large Egg 🥚 | 1 whole | Beaten for egg wash |
| Vegetable Oil 🫒 | 3 cups | For frying (peanut oil works too) |
| Dried Red Chili Peppers 🌶️ | 3 whole | Optional for heat |
| Green Onions 🧅 | 3 whole | Thinly sliced for garnish |
| Sesame Seeds 🌰 | 1 tsp | Toasted for garnish |
| Kosher Salt 🧂 | 1 tsp | Plus more to taste |
[recipe_ingredient_scaler]
The chicken is everything here. Thighs stay juicier than breasts after double-frying—look for boneless, skinless at Whole Foods or your local butcher. The hoisin sauce is non-negotiable for depth; Kikkoman or Lee Kum Kee are reliable brands. For the chili peppers, any Asian market will have them dried—whole or crushed both work (just adjust quantity).
Need to swap the hoisin? Oyster sauce plus a touch of molasses gets close (though not strictly vegetarian). No rice vinegar? Apple cider vinegar at equal amount works. For gluten-free, use cornstarch only for coating and tamari instead of soy. The sugar can be brown for deeper flavor. Fresh ginger is best, but ground ginger at one-third the amount in a pinch.
The sauce keeps 5 days refrigerated in an airtight container. Chicken is best eaten fresh, but leftovers reheat surprisingly well on a wire rack in a 375°F oven. Freeze cooked chicken pieces without sauce for up to 3 months—re-crisp in oil before saucing.
Why You’ll Love This Recipe
- One Pan Wonder: I toss everything in a skillet—chicken, soy, hoisin—and it’s done in 20. No fuss, no extra dishes.
- Sweet-Spicy Fix: The rice vinegar cuts through the sugar and hoisin for that sticky, tangy bite I crave every time.
- Feeds the Gang: Between us, it’s my go-to for picky eaters and adults alike—everyone cleans their plate.
- Leftovers Win: Honestly, it tastes even better the next day. I pack it for lunch and get jealous stares.
Step-by-Step Instructions for General Tso Chicken
Master the technique for crispy, saucy perfection with these precise, professional steps.
Step 1: Prepare the Chicken and Coating
Cut the 1.5 lb boneless skinless chicken thighs into 1-inch pieces and pat them completely dry with paper towels. This ensures the coating adheres properly and creates that signature crispiness. Season the pieces with 1 tsp kosher salt to enhance the flavor from within.
In a shallow bowl, whisk together the 0.5 cup cornstarch and 0.25 cup all-purpose flour until fully combined. In a separate bowl, beat the 1 whole large egg lightly. Dip each piece of chicken into the egg, allowing any excess to drip off, then dredge it thoroughly in the cornstarch mixture. Press gently to ensure an even, thick coating.
Step 2: Fry to Golden, Crispy Perfection
Heat the 3 cups vegetable oil in a deep, heavy-bottomed pot or Dutch oven over medium-high heat until it reaches 350°F. Use a deep-fry or candy thermometer for accuracy. Working in batches to avoid crowding, carefully lower the coated chicken pieces into the hot oil.
Fry for 4-5 minutes until the chicken is golden brown and crispy, turning occasionally for even cooking. The coating should be uniformly crisp with no raw spots. Transfer the fried chicken to a wire rack set over a paper towel-lined baking sheet to drain excess oil while maintaining crispiness.
Step 3: Create the Signature Sweet and Spicy Sauce
In a large skillet, combine the 3 tbsp soy sauce, 2 tbsp rice vinegar, 2 tbsp hoisin sauce, 3 tbsp granulated sugar, minced 4 cloves garlic cloves, and grated 1 tbsp fresh ginger. Cook over medium heat for 2-3 minutes, stirring constantly until the sugar fully dissolves and the mixture begins to simmer.
Add the 3 whole dried red chili peppers for heat, if desired, and let the sauce cook for an additional 1-2 minutes until it thickens slightly and becomes glossy. Taste and adjust the sweetness or saltiness if needed, though the hoisin and soy provide a balanced base.
Step 4: Coat and Serve Immediately
Add all the fried chicken pieces to the skillet with the sauce. Toss gently but thoroughly to ensure every piece is evenly coated. Cook for an additional 1-2 minutes over medium-low heat, allowing the chicken to absorb the flavors of the sauce without losing its crispiness.
Transfer to a serving platter and garnish with thinly sliced 3 whole green onions and 1 tsp sesame seeds. Serve immediately while the chicken is still crispy and the sauce is hot and glossy. The contrast of textures and the balance of sweet, spicy, and umami flavors will deliver that authentic takeout-style experience.
Pro Tips For Making General Tso Chicken Recipe Tasty
- Double Fry the Chicken: Fry the chicken once at 325°F for 4 minutes, rest it, then fry again at 375°F for 2 minutes. I learned this the hard way—single frying leaves it soggy under the sauce.
- Use Thighs, Not Breasts: Boneless skinless chicken thighs stay juicier and soak up the soy-hoisin glaze better than breasts. After using breasts once and getting dry, stringy meat, I never went back.
- Reduce the Sauce First: Simmer the soy sauce, rice vinegar, hoisin, and sugar for 3-4 minutes before adding the chicken. Sounds weird, but it works—thicker sauce clings better and doesn’t slide off.
- Skip the Cornstarch Bath: Toss the chicken in cornstarch just before frying instead of soaking it. My grandmother swore by this, and she was right: it makes a crispier, more uneven crust that grabs the sauce.
Common Mistakes When Making Perfect Results
Overcrowding the Fryer
This is the most common mistake home cooks make. Adding too many chicken pieces at once lowers the oil temperature, resulting in soggy, greasy chicken. I fry in batches of 8-10 pieces at a time, giving each piece plenty of space to crisp up properly. 🔥
Skipping the Double Fry
That signature crispiness comes from frying twice. After the first fry at 350°F, let the chicken rest for 5-10 minutes, then fry again at 375°F for 2-3 minutes. This second fry ensures the coating stays crunchy even after being coated in sauce.
Cold Chicken in Hot Oil
Adding cold chicken straight from the fridge to hot oil causes the temperature to drop dramatically. Always let your chicken sit at room temperature for 15-20 minutes before frying. Pat it completely dry first—any moisture will cause splattering and prevent crispiness.
Sauce Too Thick or Thin
The sauce should coat the back of a spoon but still be pourable. If it’s too thin, let it reduce for 1-2 extra minutes. If too thick, add 1-2 tbsp water and stir. I test mine by dipping a piece of chicken in—it should cling but not overload the piece.
Premature Saucing
Never toss the chicken in sauce until you’re ready to serve. The moisture in the sauce will soften the crispy coating. I keep the sauce warm in the skillet while frying the final batch, then combine everything at the very end. This timing ensures maximum crunch.
Neglecting the Garnish
Those final touches make a difference. Always garnish with thinly sliced green onions and toasted sesame seeds. They add freshness and visual appeal. I also like to serve with extra chili peppers on the side for heat lovers. ✨
Nutrition Facts
Frequently Asked Questions
Can I use chicken breast instead of thighs?
Yes, but thighs stay juicier. If using breast, cut into 1-inch pieces and reduce first frying time to 3-4 minutes to prevent dryness. The double-fry method still works for crispiness.
What oil works best for frying?
Use oils with high smoke points like vegetable, peanut, or canola. Maintain oil at 350°F for first fry and 375°F for second. Avoid olive oil as it burns at these temperatures.
How do I make it less spicy?
Omit the chili peppers entirely or use just 1 pepper for mild heat. Balance with extra 1 tbsp sugar in the sauce. The hoisin already adds depth without overwhelming spice.
Can I bake instead of fry?
For a lighter version, bake coated chicken at 400°F for 20-25 minutes, flipping halfway. Toss with sauce after baking. The texture won’t be as crispy but still delicious.

Trained in classic French technique but raised on slow-cooked ribs and spicy rubs, she blends culinary skill with smoke and soul.
- Recipe for Cream of Rice: Silky Smooth Breakfast Comfort - October 3, 2026
- Old Fashioned Beef and Noodles Recipe Crock Pot: Set-It-and-Forget-It Hearty Meal - October 3, 2026
- Recipe for Deep Fry Turkey: Crispy Golden Skin and Juicy Meat - October 3, 2026