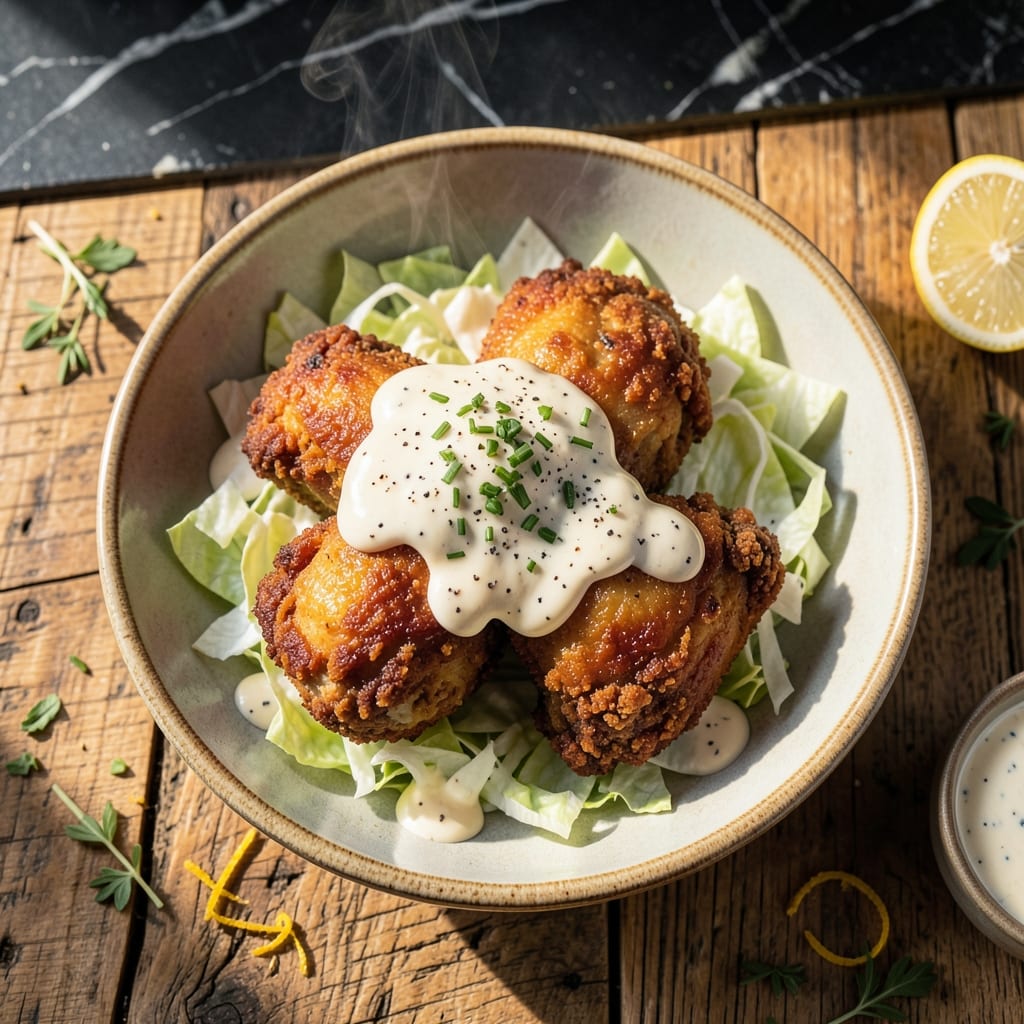
Achieving crispy fried chicken without gluten requires the right technique and ingredients. I developed this method after years of testing various gluten-free flours and binding agents to perfect the texture.
The buttermilk marinade tenderizes the chicken while adding flavor depth. The secret lies in a precise combination of gluten-free flours and starches that create a coating which stays crispy even after frying.
This approach delivers the traditional experience you expect from fried chicken. The coating adheres perfectly during frying, resulting in that satisfying crunch with every bite.
Whether for a family dinner or special occasion, this recipe proves gluten-free can be just as delicious as the original. The results speak for themselves.
Ingredients for Gluten Free Fried Chicken Recipe Buttermilk
The perfect blend of gluten-free flours and buttermilk creates that signature crispy texture everyone loves.
| Ingredient | Amount | Notes |
|---|---|---|
| Chicken Thighs 🍗 | 2 lb | Boneless, skin-on for crispiness |
| Buttermilk 🥛 | 2 cups | Full-fat for best texture |
| Rice Flour 🌾 | 1 ½ cups | Fine white rice flour |
| Cornstarch 🌽 | ½ cup | For extra crispiness |
| Almond Flour 🌰 | ½ cup | Blanched, fine texture |
| Tapioca Starch 🌾 | ¼ cup | Helps binding |
| Salt 🧂 | 2 tsp | Diamond Crystal kosher preferred |
| Black Pepper 🌶️ | 1 tsp | Freshly ground |
| Paprika 🌶️ | 1 tbsp | Sweet or smoked variety |
| Garlic Powder 🧄 | 1 tbsp | Not garlic salt |
| Onion Powder 🧅 | 1 tbsp | Fine grind preferred |
| Cayenne Pepper 🔥 | ½ tsp | Adjust for heat preference |
| Peanut Oil 🫒 | 4 cups | High smoke point for frying |
[recipe_ingredient_scaler]
The chicken thighs are critical for juiciness—boneless, skin-on gives you that perfect crunch without drying out. Buttermilk is non-negotiable here; full-fat from a local dairy or Whole Foods works best. For the gluten-free coating, Bob’s Red Mill rice flour and almond flour are reliable. The cornstarch and tapioca starch combo is what locks in that crispiness after frying.
No buttermilk? Whole milk plus a tablespoon of vinegar gets you close. Out of rice flour? Sorghum flour at a 1:1 ratio works. The almond flour can be swapped for coconut flour at half the amount, but texture will differ slightly. For the oil, vegetable or canola oil are solid substitutes if you’re avoiding peanuts.
Marinate the chicken for at least 4 hours (overnight is ideal). The coating stays crispy for 1-2 days in the fridge, but best served fresh. Freeze uncooked marinated chicken for up to 3 months—thaw before frying.
Why You’ll Love This Recipe
- One Bowl Wonder: I mix the buttermilk marinade and dry coating right in the same bowl—no extra dishes, just easy cleanup.
- That Crispy Crunch: The rice flour and cornstarch combo gives it a golden, shatteringly crisp shell while the buttermilk keeps the chicken juicy inside.
- Feeds a Crowd: I’ve served this at picnics and weeknight dinners alike—everyone digs in, and it’s always the first thing to disappear.
- Leftovers? Yes Please: Honestly, it reheats surprisingly well in the air fryer, so I make a double batch for lazy lunches the next day.
Step-by-Step Instructions for Gluten Free Fried Chicken Buttermilk
Here’s the method. Straightforward, tested, works every time.
Step 1: Marinate Chicken in Buttermilk
Place the 2 lb Chicken Thighs in a large bowl and pour over the 2 cups Buttermilk. Ensure each piece is fully submerged for even tenderization.
Cover and refrigerate for at least 4 hours or overnight. This buttermilk soak is crucial—it breaks down proteins in the meat, ensuring juiciness while the acidity helps the coating adhere. The longer the marinade, the more flavorful and tender your creation will be.
Step 2: Prepare the Gluten-Free Coating
In a shallow dish, whisk together the 1.5 cups Rice Flour, 0.5 cup Cornstarch, 0.5 cup Almond Flour, 0.25 cup Tapioca Starch, 2 tsp Salt, 1 tsp Black Pepper, 1 tbsp Paprika, 1 tbsp Garlic Powder, 1 tbsp Onion Powder, and 0.5 tsp Cayenne Pepper.
This blend mimics traditional flour dredging while delivering superior crispness. The cornstarch and tapioca starch create a light, airy texture, while almond flour adds depth of flavor. Mix thoroughly to distribute spices evenly throughout the dry ingredients.
Step 3: Dredge and Rest the Chicken
Remove each chicken thigh from the buttermilk, allowing excess to drip off. Dredge in the dry mixture, pressing firmly to ensure an even, thick coating on all sides. The buttermilk’s tackiness helps the coating cling effectively.
Place the coated thighs on a wire rack set over a baking sheet. Let them rest for 15-20 minutes at room temperature. This resting period allows the coating to set, preventing it from falling off during frying while ensuring maximum crispiness.
Step 4: Fry to Golden Perfection
Heat the 4 cups Peanut Oil in a deep, heavy-bottomed pot to 350°F. Use a deep-fry thermometer for accuracy—maintaining consistent temperature is key to even cooking and preventing greasiness.
Working in batches to avoid crowding, carefully lower the chicken into the hot oil. Fry for 12-15 minutes, turning occasionally, until the coating is deep golden brown and the internal temperature reaches 165°F. The oil should bubble steadily around each piece.
Step 5: Drain and Serve Immediately
Transfer the fried chicken to a wire rack or paper towel-lined plate to drain excess oil. Avoid stacking the pieces, as this can trap steam and make the coating soggy.
Let rest for 5 minutes to allow the crust to set fully. Serve immediately while hot and crispy. The coating should shatter slightly when bitten into, revealing juicy, tender meat underneath. This method guarantees a crunchy exterior that stays crispy even after cooling slightly.
Pro Tips For Making Gluten Free Fried Chicken Recipe Buttermilk
- Double Dredge: Coat the chicken twice in the rice flour and cornstarch mix—first dip, then buttermilk, then back in the flour. I learned this the hard way after my first batch had bald spots.
- Rest the Coated Chicken: Let the dredged pieces sit for 10 minutes before frying so the almond flour sticks better and fries up crisper.
- Skip Cold Buttermilk: Take the buttermilk out of the fridge 30 minutes early; cold marinade makes the coating slide right off the thighs.
- Use a Thermometer: Keep the oil between 350°F and 365°F—any lower and the crust soaks up grease, any higher and the almond flour burns before the meat cooks.
Perfect Pairings for This Recipe
Side Dish Pairings
I love serving this with a simple kale slaw—toss 4 cups chopped kale with 2 tbsp apple cider vinegar and 1 tbsp olive oil. The tangy crunch complements the crispy coating beautifully. 🥗
Comfort Food Classics
Mashed potatoes made with 2 lbs Yukon Golds and ½ cup buttermilk mirror the marinade flavors. For extra richness, fold in ¼ cup cream cheese. I make mine with garlic and chives from my Portland garden.
Fresh Salad Options
A tomato cucumber salad with 1 pint cherry tomatoes and 1 English cucumber adds brightness. Toss with 2 tbsp red wine vinegar and 1 tbsp Dijon mustard for a zesty contrast to the rich chicken.
Beverage Pairings
For drinks, I reach for sweet tea with lemon—its crispness cuts through the oiliness. A local Portland IPA with citrus notes also pairs wonderfully with the spices. Avoid heavy beers that can overpower the meal. 🍺
Non-alcoholic? Sparkling water with lime wedge refreshes your palate between bites.
Nutrition Facts
Frequently Asked Questions
Can I use a different flour blend?
Yes, but stick to fine, light flours. A 1:1 gluten-free baking blend works, though you may need extra cornstarch for crispiness. Avoid dense flours like coconut or chickpea.
Why does the coating fall off during frying?
Usually from skipping the 15-20 minute rest after dredging. Also, ensure oil is at 350°F before adding chicken. Too-low heat makes coating absorb oil and detach.
Can I bake this instead of frying?
Yes, but texture differs. Bake at 400°F for 20-25 minutes on a wire rack. Spray with oil first for extra crispiness. It won’t be as crunchy as fried, though.
How do I keep it crispy for leftovers?
Reheat in a 400°F oven for 10-12 minutes on a wire rack. Microwaving makes it soggy. Store in a single layer, not stacked, to prevent steam buildup.

Trained in classic French technique but raised on slow-cooked ribs and spicy rubs, she blends culinary skill with smoke and soul.
- Recipe for Boneless Pork Chops in Cast Iron Skillet: Sear and Baste to Juicy Perfection - October 3, 2026
- Recipe for Boneless Cross Rib Roast: Slow-Roasted Beef with Herb Crust - October 3, 2026
- Hamburgers in Sauce Recipe Crock Pot: Slow-Cooked Savory Delight - October 3, 2026