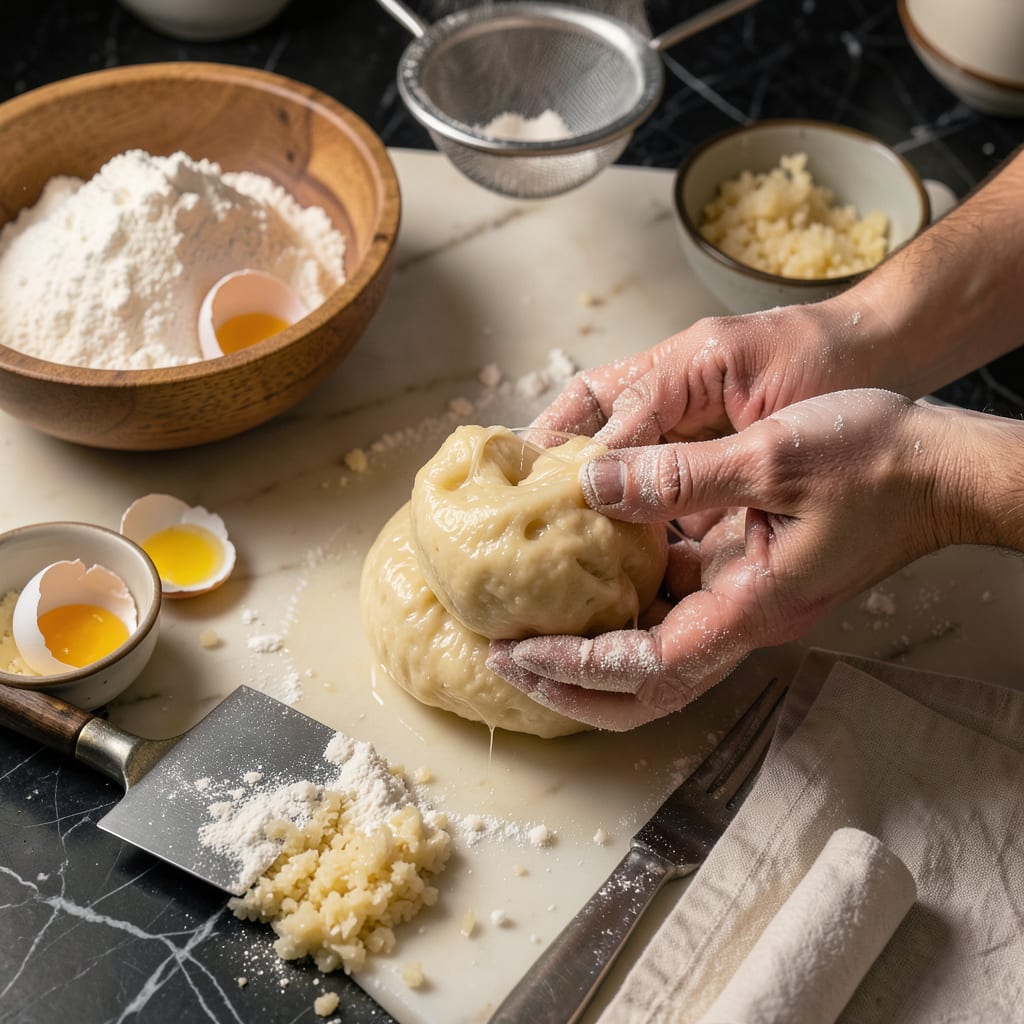
I’ll be real with you: gnocchi dough can turn into a sticky nightmare faster than you can say “pillowy potatoes.” After ruining three batches myself (and nearly giving up entirely), I finally cracked the code to perfect texture. The problem usually isn’t you—it’s excess moisture from the potatoes or overworking the dough.
Here’s the thing—great gnocchi starts with the right potato. Russets are my go-to because they’re dry and starchy, not waxy. I learned the hard way that boiling them whole (skin-on) keeps water out, and ricing while hot prevents that gummy texture. The flour ratio matters too: about 1 cup per 2 cups riced potatoes, but always start with less.
What you’re aiming for is dough that’s smooth and slightly tacky—not sticky. It should hold together when pressed but not cling to your fingers. My trick? Work quickly, handle gently, and test with one piece before shaping the whole batch. That first boiled gnocchi will tell you everything about your dough’s consistency.
Once you nail the texture, these little potato pillows become your blank canvas. Toss them in brown butter with crispy sage, pair with chunky marinara, or just drizzle with good olive oil and parmesan. The fix is simpler than you think—let’s get your gnocchi game on point.
📚 In This Guide
- What You’ll Need
- Instructions
- Tips and Common Mistakes
What Youll Need
- ● Potatoes (2 lbs / 900g): Use russet or Yukon Gold for the best texture—starchy and dry! 🥔
- ● All-purpose flour (1½–2 cups / 180–240g): Plus extra for dusting (keep it handy!).
- ○ Egg (1 large): Optional but helps bind if your dough is too wet.
- ● Salt (1 tsp): For flavor—don’t skip it!
- ● Tools: Potato ricer or fine-mesh sieve (no lumps allowed!).
- ● Mixing bowl (wide and shallow for easy kneading).
- ● Bench scraper or knife (to cut dough).
- ○ Fork (for classic gnocchi ridges—optional but fun!).
- ● Clean work surface (marble or wood works best).
- ● Prerequisites: Baked or boiled potatoes (cooled completely—hot potatoes = sticky dough!).
- ● Patience (gnocchi loves a gentle touch!).
Instructions for Fixing Sticky Gnocchi Dough
Let’s walk through the exact steps to transform your sticky mess into perfectly pillowy gnocchi.
Assess Your Dough’s Moisture Level
First, I want you to stop what you’re doing and examine your dough. Is it sticking to your hands like glue, or just slightly tacky? There’s a big difference between “too wet” and “just right.” Perfect gnocchi dough should feel soft and pliable, but not leave residue on your fingers when you touch it lightly.
Here’s what I do: take a small piece of dough and roll it between your palms. If it forms a smooth rope without sticking, you’re good. If it sticks to your hands and won’t hold shape, we need to fix it. Don’t add flour yet—that’s the most common mistake people make at this stage.
Adjust with the Right Ingredients
If your dough is truly too sticky, start by adding 1 tablespoon of all-purpose flour at a time. I can’t stress this enough—go slowly. Knead gently after each addition until just incorporated. The key is to add the minimum amount needed to achieve workable dough, not to make it stiff.
Real talk: if you’ve already added too much flour trying to fix it, your gnocchi will be dense. In that case, I’ve found that adding a small beaten egg (about 1 tablespoon) can help restore moisture balance. Work it in gently with your fingertips until the dough becomes cohesive again.
Test and Rest the Dough
Once you’ve adjusted the texture, here’s the thing—you need to test it. Take a small piece and roll it into a rope about ½-inch thick. Cut into 1-inch pieces and press each with a fork or gnocchi board. If they hold their shape without sticking to your tools, you’re ready to proceed.
Let the dough rest for 10-15 minutes before shaping all your gnocchi. This resting period allows the flour to fully hydrate and the gluten to relax, which prevents toughness. Cover the dough with a damp kitchen towel to prevent it from drying out during this time.
Shape with the Right Technique
When shaping, work with small portions of dough while keeping the rest covered. Roll each portion into a ½-inch thick rope on a lightly floured surface. I’ve found that using a bench scraper helps portion the dough cleanly without adding excess flour.
Cut the ropes into 1-inch pieces and gently roll each piece against the tines of a fork or a gnocchi board. The ridges aren’t just for looks—they help the gnocchi hold sauce better. Don’t press too hard or you’ll flatten them. The finished gnocchi should be slightly oval with visible ridges.
Cook Immediately for Best Results
Bring a large pot of salted water to a gentle boil—not a rolling boil, which can break apart your delicate gnocchi. Drop them in batches, being careful not to overcrowd the pot. They’re done when they float to the surface, which should take about 2-3 minutes.
Remove them with a slotted spoon and transfer to your sauce. I like to cook a test batch of 3-4 gnocchi first to check the texture. If they hold together and taste light and pillowy, you’ve nailed it. If they’re still gummy, you may need to adjust your dough slightly and try again.
Tips and Common Mistakes
Here’s what I’ve learned about perfecting gnocchi dough after years of trial and error in my own kitchen.
The Texture Test: In Step 1 when assessing your dough, here’s a trick I swear by—press your fingertip lightly into the dough. If it springs back slowly leaving a slight impression, you’re in the ideal zone. If it sticks to your finger or doesn’t spring back at all, that’s when you know it needs adjustment. This simple test saves me from overworking the dough every time.
Flour Addition Strategy: When following Step 2, I’ve found that using a small fine-mesh sieve to dust the 1 tablespoon of all-purpose flour over the dough helps distribute it more evenly. This prevents flour pockets that can create dense spots in your gnocchi. Work it in with your fingertips rather than pressing with your palms to avoid over-developing the gluten.
Resting Period Wisdom: That 10-15 minute rest in Step 3 isn’t just downtime—it’s when the magic happens. I always set a timer and cover the dough with a damp towel that’s been wrung out well. Too much moisture from a soaking wet towel can actually make your dough sticky again, while too dry will form a crust. The perfect dampness keeps the surface supple while the gluten relaxes.
Cooking Water Technique: For Step 5, here’s what changed my gnocchi game: use the widest pot you have and keep the water at that gentle boil mentioned. I aim for water that’s moving just enough to create small bubbles breaking the surface—this prevents the gnocchi from bumping into each other and sticking. Add a pinch of salt to the water; it should taste like the sea to properly season your gnocchi as they cook.
Pro Tips for Gnocchi Dough Too Sticky
- Here’s what I’ve learned about perfecting gnocchi dough after years of trial and error in my own kitchen.
- The Texture Test: In Step 1 when assessing your dough, here’s a trick I swear by—press your fingertip lightly into th…
- Flour Addition Strategy: When following Step 2, I’ve found that using a small fine-mesh sieve to dust the 1 tablespoo…
Frequently Asked Questions
Why is my gnocchi dough sticky even after adding flour?
Sticky dough usually means too much moisture. Potatoes with high water content (like russets) or overworking the dough can cause this. Add flour 1 tbsp at a time, kneading gently until it’s smooth but not tough. Avoid over-flouring—it makes gnocchi dense. Pro tip: Roast or microwave potatoes instead of boiling to reduce excess water!
Can I fix sticky gnocchi dough without adding more flour?
Yes! Try chilling the dough for 20–30 minutes in the fridge—this firms it up. Alternatively, dust your work surface and hands with semolina or cornstarch (less heavy than flour) for easier handling. If all else fails, roll dough into logs on parchment paper to minimize sticking.
How do I know when gnocchi dough has the right texture?
Perfect dough should feel soft but not tacky, like Play-Doh. Press a finger into it—if it springs back slightly and doesn’t stick, you’re good! Over-kneading = tough gnocchi, so mix just until combined. Test tip: Boil a small piece first to check texture before shaping the whole batch.
What’s the best flour substitute if my dough is too sticky?
Swap all-purpose flour for rice flour, potato starch, or tapioca starch—they absorb moisture better without weighing down the dough. For gluten-free options, try a 1:1 GF flour blend (add 10% more if needed). Avoid heavy flours like bread flour; they’ll make gnocchi gummy.
Can I save sticky gnocchi dough after shaping?
If shaped gnocchi stick together, toss them in fine cornmeal or flour before boiling. For extra insurance, freeze on a tray for 1 hour to firm up. Bonus: Freezing also helps them hold shape when cooking—just boil from frozen (add 1–2 extra minutes).
Sticky gnocchi dough doesn’t have to derail your pasta dreams! 🎉 The secret lies in balance—adjusting moisture, flour ratios, and handling techniques. With a few simple tweaks (like adding flour gradually or chilling the dough), you’ll be shaping light, fluffy gnocchi in no time.
Ready to put your new skills to the test? Grab your potatoes and try a small batch—practice makes perfect! For extra inspiration, check out our favorite gnocchi recipes to showcase your newly mastered dough. Happy cooking! 🍴

Trained in classic French technique but raised on slow-cooked ribs and spicy rubs, she blends culinary skill with smoke and soul.
- Recipe for Boneless Pork Chops in Cast Iron Skillet: Sear and Baste to Juicy Perfection - October 3, 2026
- Recipe for Boneless Cross Rib Roast: Slow-Roasted Beef with Herb Crust - October 3, 2026
- Hamburgers in Sauce Recipe Crock Pot: Slow-Cooked Savory Delight - October 3, 2026