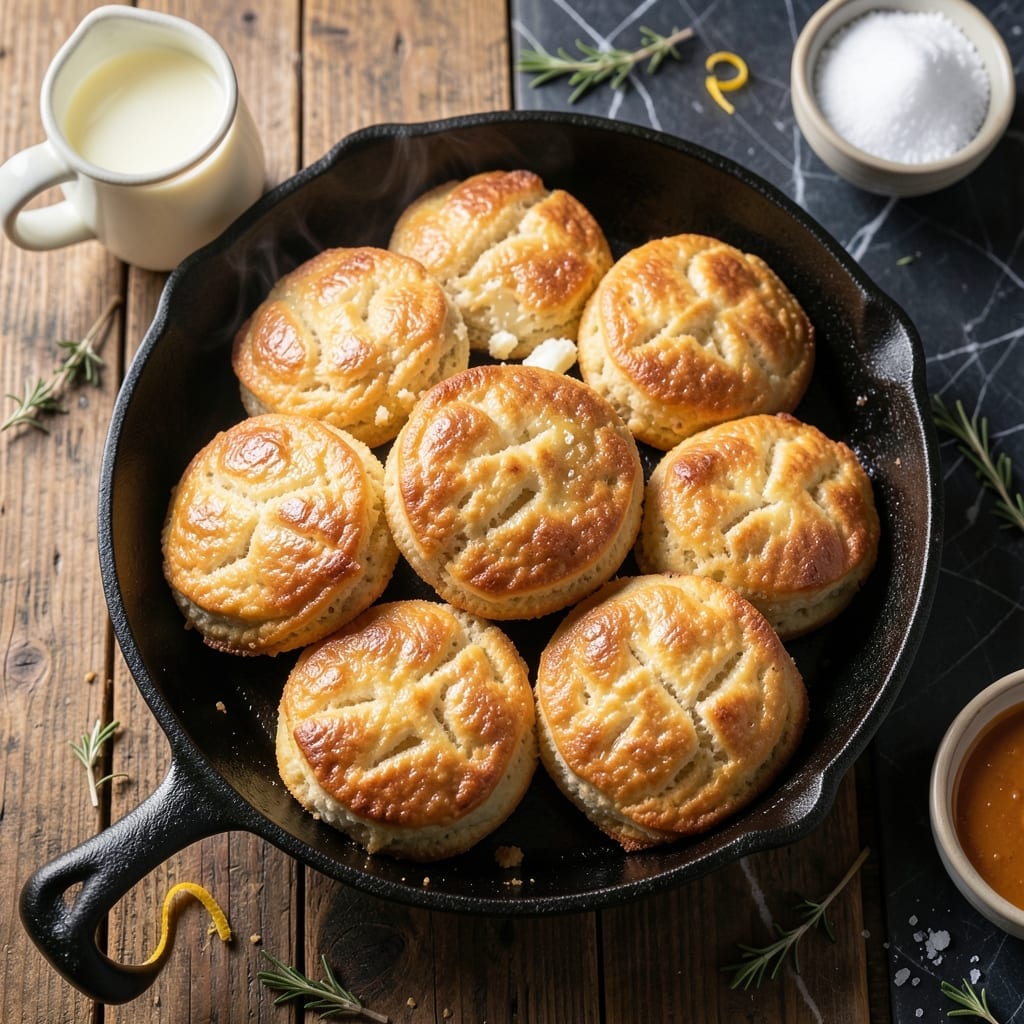
There’s nothing like the aroma of fresh biscuits pulling apart into towering layers of fluffy goodness. This method uses Gold Medal self-rising flour for consistent results.
With just a few simple ingredients and proper technique, you’ll achieve light, airy biscuits that rise high and stay tender. The secret is in the handling and baking.
Ingredients for Gold Medal Self Rising Flour Biscuit
Gold Medal self-rising flour and cold butter create those signature towering, fluffy layers everyone loves.
| Ingredient | Amount | Notes |
|---|---|---|
| Gold Medal Self-Rising Flour 🌾 | 2 cups | Plus extra for dusting surface |
| Cold Unsalted Butter 🧈 | ½ cup | Cut into small cubes |
| Whole Milk 🥛 | ¾ cup | Cold, plus extra for brushing |
| Baking Powder 🧂 | 1 tbsp | Ensures extra lift |
| Granulated Sugar 🍚 | 1 tbsp | Balances flavor subtly |
| Salt 🧂 | ½ tsp | Fine sea salt preferred |
| Buttermilk 🥛 | ¼ cup | Optional for tangier flavor |
[recipe_ingredient_scaler]
The flour is non-negotiable—Gold Medal self-rising delivers consistent rise and texture. Use it straight from the bag, no sifting required (the leavening is already perfectly distributed). For the butter, cold is critical—it should stay in visible chunks when worked into the flour. I prefer Land O’Lakes unsalted for its higher fat content, which translates to flakier layers.
No buttermilk? Whole milk with 1 tsp lemon juice works in a pinch. Short on self-rising flour? All-purpose flour plus 1.5 tsp baking powder and 0.5 tsp salt per cup mimics it. The baking powder boosts lift beyond what the flour provides—don’t skip it. For a richer flavor, substitute heavy cream for half the milk.
Dough keeps 2 days refrigerated (shape into rounds first, then chill). Baked biscuits are best fresh but reheat at 350°F for 8-10 minutes to revive. Freeze shaped dough for up to 1 month—bake straight from frozen, adding 2-3 minutes.
Why You’ll Love This Recipe
- 5-Minute Mix: I dump everything in one bowl, stir, and roll—no sifting, no waiting, no fuss.
- Buttery Layers: The cold butter creates these little pockets of flaky goodness that melt on your tongue. Honestly, I sneaked one straight from the oven and burned my fingers.
- Breakfast to Dinner: These biscuits work with jam at sunrise, as a sandwich at noon, or smothered in gravy for dinner.
- Pennywise Favorite: A bag of Gold Medal Self-Rising Flour and a stick of butter feed my family for days. I’ll be real: it’s cheaper than takeout and twice as satisfying.
Step-by-Step Instructions for Gold Medal Self-Rising Flour Biscuits
Master these precise techniques for biscuits that rise high with delicate, flaky layers.
Step 1: Combine Dry Ingredients
In a large mixing bowl, whisk together the 2 cups Gold Medal Self-Rising Flour, 1 tbsp Baking Powder, 1 tbsp Granulated Sugar, and 0.5 tsp Salt. This ensures even distribution of leavening agents for maximum lift.
I always sift the dry ingredients first when time permits, but a thorough whisking works equally well. The baking powder provides additional rise beyond what the self-rising flour already contains, creating those towering layers promised in the title.
Step 2: Cut in the Cold Butter
Add the 0.5 cup Cold Unsalted Butter (cut into small cubes) to the dry mixture. Using a pastry cutter or two forks, work the butter into the flour until the mixture resembles coarse crumbs with pea-sized butter pieces visible.
The key is keeping the butter cold—this creates steam during baking that produces flaky layers. If your kitchen is warm, briefly chill the bowl between additions. Don’t overwork the mixture; you want distinct butter pieces, not a homogeneous blend.
Step 3: Create the Dough
Make a well in the center and pour in the 0.75 cup Whole Milk. Using a wooden spoon, gently stir just until the dough begins to come together. The mixture will look shaggy—that’s exactly right.
For extra tang, replace up to 0.25 cup Buttermilk of the milk with buttermilk. The dough should be slightly sticky but manageable. Overmixing develops gluten, which makes biscuits tough rather than tender.
Step 4: Fold and Shape
Turn the dough onto a surface lightly dusted with additional Gold Medal Self-Rising Flour. Gently pat into a 1-inch thick rectangle. Fold the dough in half like a book, then pat down again to 1-inch thickness.
This folding technique creates layers in your biscuits. Repeat this fold-and-pat process two more times for a total of three folds. The dough will become smoother with each fold, but visible butter streaks should remain.
Step 5: Cut and Bake to Golden Perfection
Pat the dough to a final ¾-inch thickness. Using a 2½-inch biscuit cutter (or a glass), cut straight down without twisting. Twisting seals the edges and prevents rising.
Place biscuits on a parchment-lined baking sheet, touching slightly for softer sides or apart for crisper edges. Brush tops with a bit of the Whole Milk. Bake at 450°F for 12-15 minutes until golden brown on top. The biscuits should have risen significantly with visible layers when split open.
Pro Tips For Making Gold Medal Self Rising Flour Biscuit
- Keep Butter Ice Cold: Cut your unsalted butter into small cubes and refrigerate until ready to use—warm butter makes tough biscuits, and I learned this the hard way after ending up with hockey pucks instead of flaky layers.
- Skip Overmixing: Stir the dough just until it comes together, even if it looks shaggy. After burning three batches, I finally figured out that overworking develops gluten, turning biscuits dense instead of tender.
- Use Whole Milk: The fat in whole milk adds richness and helps create that golden crust—skimp with skim, and your biscuits will taste flat. My grandmother swore by this, and she was right.
- Fold for Layers: Gently fold the dough over itself 2-3 times before cutting. Sounds weird, but it works: this creates those beautiful, flaky layers without extra effort.
Flavor Customization for These Flavors
Herb-Infused Version
Add 2 tbsp chopped fresh rosemary or 1 tbsp dried thyme to your dry ingredients. I forage wild rosemary along the coast—its piney aroma pairs perfectly with buttery biscuits. Brush tops with garlic-infused olive oil before baking for extra depth.
Cheesy Delight
Fold in 1 cup shredded sharp cheddar after the final dough fold. For a French twist, use Gruyère and add ½ tsp Dijon mustard to the milk. The cheese melts into gooey pockets between the flaky layers.
Spicy Kick
Mix 1 tsp cayenne or 1 tbsp chopped jalapeños into the dry ingredients. I learned this trick at a Texas BBQ competition—it adds just enough heat without overpowering. Serve with honey butter to balance the spice. 🌶️
Sweet Variation
Increase sugar to 3 tbsp and add ½ cup raisins or diced apples. Brush with cinnamon-sugar milk before baking. These are perfect split open with a pat of butter for breakfast.
Garlic Lovers
Press 3 minced garlic cloves into the butter before cutting it into the flour. Finish with a sprinkle of garlic powder on top before baking. The aroma while baking will make your kitchen smell incredible.
Bacon Cheddar
Add ½ cup cooked crumbled bacon and 1 cup shredded cheddar to the dough. Use bacon grease instead of butter for brushing the tops. This is my go-to for weekend brunch—rich, smoky, and utterly irresistible. 💛
Nutrition Facts
Frequently Asked Questions
Can I use all-purpose flour instead?
Yes, but add 1.5 tsp baking powder and 0.5 tsp salt per cup. Self-rising already contains these, so you’ll need to compensate for the same rise and flavor.
Why must the butter stay cold?
Cold butter creates steam pockets during baking, forming flaky layers. If it melts prematurely, biscuits will be dense instead of light and tender.
How do I keep biscuits from spreading?
Cut straight down with your biscuit cutter—no twisting! Twisting seals the edges, preventing rise. Also, place biscuits close together on the tray for support.
Can I make the dough ahead of time?
Yes! Shape into rounds, wrap tightly, and refrigerate for up to 2 days. Bake straight from the fridge, adding 1-2 minutes to the time.

Trained in classic French technique but raised on slow-cooked ribs and spicy rubs, she blends culinary skill with smoke and soul.
- Recipe for Boneless Pork Chops in Cast Iron Skillet: Sear and Baste to Juicy Perfection - October 3, 2026
- Recipe for Boneless Cross Rib Roast: Slow-Roasted Beef with Herb Crust - October 3, 2026
- Hamburgers in Sauce Recipe Crock Pot: Slow-Cooked Savory Delight - October 3, 2026