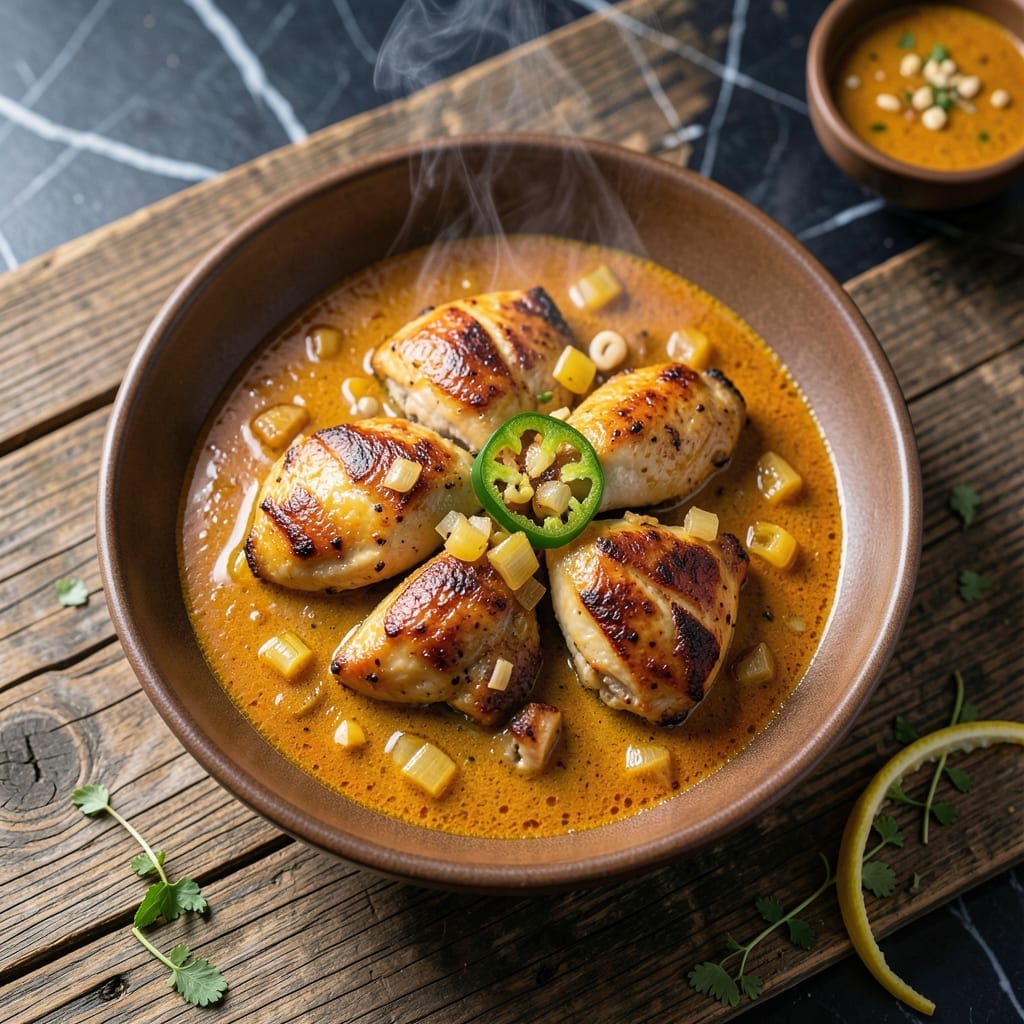
This curry delivers tender chicken in a rich, aromatic sauce that balances heat and depth perfectly. I’ve refined the method to ensure every bite is infused with layered spices.
The key lies in blooming whole spices and slow-cooking the chicken until it melts in your mouth. It’s a dish that proves restaurant-quality results are achievable at home.
Ingredients for Gordon Ramsay Chicken Curry
Rich spices and tender chicken create a restaurant-worthy dish at home with these ingredients.
| Ingredient | Amount | Notes |
|---|---|---|
| Boneless Skinless Chicken Thighs 🍗 | 1 ½ lb | Cut into bite-sized pieces |
| Vegetable Oil 🫒 | 2 tbsp | Neutral flavor for frying |
| Yellow Onion 🧅 | 1 whole | Finely diced for base |
| Garlic Cloves 🧄 | 4 cloves | Minced for aromatic base |
| Fresh Ginger 🌿 | 1 tbsp | Grated or minced finely |
| Green Chili Pepper 🌶️ | 1 whole | Seeds removed, minced |
| Ground Cumin 🌿 | 1 tsp | Toasted for depth of flavor |
| Ground Coriander 🌿 | 1 tsp | Freshly ground preferred |
| Ground Turmeric 🌶️ | ½ tsp | For color and earthiness |
| Garam Masala 🌶️ | 1 tsp | Whole or ground variety |
| Cayenne Pepper 🔥 | ¼ tsp | Adjust to heat preference |
| Canned Diced Tomatoes 🍅 | 1 can | 14.5 oz size preferred |
| Coconut Milk 🥥 | 1 can | Full-fat for creaminess |
| Fresh Cilantro 🌿 | ¼ cup | Chopped for garnish |
| Kosher Salt 🧂 | 1 tsp | Adjust to taste |
[recipe_ingredient_scaler]
The chicken thighs are essential here—bone-in adds flavor but boneless cooks faster and stays juicy. Look for thighs with good marbling at your butcher or Whole Foods. The spices must be fresh; Penzeys or a well-stocked Indian market are ideal. Whole spices toasted and ground yourself will elevate this to Gordon Ramsay standards, but pre-ground works in a time crunch.
No coconut milk? Heavy cream at half the amount gives richness but loses authenticity. Short on garam masala? Curry powder at equal amount works, though the flavor profile shifts slightly. The tomatoes can be fresh (about 3 medium, diced), but canned ensures consistency. For extra depth, add 1 tsp tomato paste with the aromatics.
This curry tastes even better the next day as flavors meld. Store in the fridge for up to 4 days or freeze for 3 months. Reheat gently to preserve the sauce’s silky texture.
Why You’ll Love This Recipe
- One Pan Wonder: I love that everything cooks in a single pot—just brown the chicken thighs, sauté the onion, garlic, and ginger, then simmer.
- Flavor Bomb: The combo of fresh ginger and garlic with those juicy thighs creates a curry that’s rich and deeply satisfying.
- Meal Prep Magic: This tastes even better the next day, so I always make a double batch for lunches.
- Budget Friendly: Chicken thighs are affordable, and a little goes a long way with the bold flavors in this dish.
Step-by-Step Instructions for Gordon Ramsay Chicken Curry
Master the technique and you’ll create a deeply flavorful dish with perfectly tender chicken every time.
Step 1: Sear the Chicken and Build the Aromatic Base
Heat the 2 tbsp vegetable oil in a large, heavy pot over medium-high heat until it shimmers. Add the 1.5 lb boneless skinless chicken thighs (cut into bite-sized pieces) in a single layer, being careful not to overcrowd the pan. Sear for 4-5 minutes until golden brown on all sides.
Remove the chicken with a slotted spoon and set aside. In the same pot, add the finely diced yellow onion and cook for 5-6 minutes until soft and translucent. This creates the flavor foundation for your curry.
Add the minced garlic cloves, 1 tbsp fresh ginger, and minced green chili pepper. Cook for 1-2 minutes until fragrant, stirring constantly to prevent burning. The aroma will be intense and inviting—this is when you know the base is ready.
Step 2: Toast the Spices for Maximum Flavor
Reduce heat to medium and add the 1 tsp ground cumin, 1 tsp ground coriander, 0.5 tsp ground turmeric, 1 tsp garam masala, and 0.25 tsp cayenne pepper. Stir constantly for 30-45 seconds until the spices become deeply fragrant.
Toasting the spices in the hot oil releases their essential oils, transforming them from raw to rich and complex. You’ll notice the color deepen slightly and the mixture become pasty—this is exactly what you want. Be careful not to let them burn, which would make the curry bitter.
Pour in the 1 can canned diced tomatoes (with juices) and stir to combine. Cook for 3-4 minutes until the mixture thickens slightly and the raw tomato smell disappears. This step marries the spices with the acidity of the tomatoes for a balanced base.
Step 3: Simmer the Curry to Perfection
Return the seared chicken to the pot along with any accumulated juices. Pour in the 1 can coconut milk and add the 1 tsp kosher salt. Stir well to combine, making sure to scrape up any browned bits from the bottom of the pot.
Bring the mixture to a gentle simmer, then reduce heat to medium-low. Cover and let it cook for 20-25 minutes, stirring occasionally, until the chicken is fall-off-the-bone tender and the sauce has thickened to your desired consistency.
The coconut milk will mellow the spices and create a creamy, velvety sauce. As it simmers, the flavors will meld together beautifully. Taste and adjust seasoning if needed, remembering that the flavors will concentrate slightly as it cooks.
Step 4: Finish and Garnish for Serving
Once the chicken is cooked through and the sauce has reached your preferred thickness, remove from heat. Let it sit for 5 minutes to allow the flavors to settle. The chicken should be incredibly tender, absorbing all the aromatic spices from the sauce.
Stir in the 0.25 cup fresh cilantro just before serving to add a bright, fresh contrast to the rich curry. The cilantro will wilt slightly from the heat but retain its vibrant color and citrusy flavor.
Serve hot with steamed basmati rice or naan bread to soak up every last bit of the fragrant sauce. The final dish should have a deep golden color from the turmeric, with visible flecks of herbs and spices throughout.
Pro Tips For Making Gordon Ramsay Chicken Curry
- Brown the Chicken Well: Get the thighs golden in batches—crowding the pan steams them instead of searing. I learned this the hard way after my first curry tasted boiled.
- Grate the Ginger: Sounds tedious, but fresh ginger grated fine blends into the sauce better than minced. My grandmother swore by this, and she was right.
- Skip Raw Garlic: Cook the garlic with the onions until soft before adding liquids—raw bits stay harsh and ruin the sauce. After burning three batches, I finally figured out the timing.
- Use Thighs, Not Breasts: The fat in boneless thighs stays juicy through the long simmer. I was skeptical until I tried it, but breasts just dry out.
Dietary Considerations for These Flavors
Gluten-Free Friendly
This creation is naturally gluten-free as written, using no wheat-based thickeners or additives. All spices and ingredients are inherently safe, but always double-check labels on garam masala blends for hidden fillers. I source mine from Penzeys or local Indian markets for purity.
Dairy-Free Adaptation
The recipe uses coconut milk instead of cream, making it fully dairy-free. For extra richness, you could add 2 tbsp cashew cream at the end. I’ve tested this with Native Forest coconut milk—it has the perfect consistency for curry. 🌱
Lower-Carb Option
To reduce carbs, skip the traditional rice or naan and serve over cauliflower rice instead. You can also bulk it up with extra diced bell peppers or zucchini for a heartier, low-carb meal. The flavors hold up beautifully.
Spice Level Control
Adjust the heat easily by reducing or omitting the cayenne pepper and green chili. For a milder version, I replace the chili with ½ tsp mild paprika. Kids love it this way, and the aromatic depth remains intact.
Allergen Note
This dish is free from common allergens like nuts, dairy, and gluten. However, if you have a coconut allergy, substitute heavy cream or cashew milk. Always verify ingredient sources to avoid cross-contamination. 💡
Make It Keto
For a keto-friendly version, serve with shirataki noodles or extra roasted vegetables. The chicken and sauce are already low-carb—just watch your portion of coconut milk, as it contains natural sugars. A ¼ cup serving per plate keeps it keto-compliant.
Nutrition Facts
Frequently Asked Questions
Can I use chicken breast instead of thighs?
Yes, but thighs stay juicier. If using breasts, reduce cooking time to 15-18 minutes to prevent dryness. Thighs have more fat, which keeps the meat tender during the longer simmer.
How do I make it spicier?
Increase the cayenne pepper to ½ tsp or add 1 tsp red pepper flakes. For extra heat, include the chili seeds when mincing. Taste before serving and adjust with more fresh chili if needed.
Can I make this ahead of time?
The flavors deepen overnight. Store in an airtight container in the fridge for up to 4 days. Reheat gently on the stove, adding a splash of water if the sauce thickens too much.
What if my sauce is too thin?
Simmer uncovered for 5-10 minutes to thicken. Alternatively, mix 1 tsp cornstarch with water and stir in. Avoid boiling vigorously after adding cornstarch to prevent a gluey texture.

Trained in classic French technique but raised on slow-cooked ribs and spicy rubs, she blends culinary skill with smoke and soul.
- Recipe for Boneless Pork Chops in Cast Iron Skillet: Sear and Baste to Juicy Perfection - October 3, 2026
- Recipe for Boneless Cross Rib Roast: Slow-Roasted Beef with Herb Crust - October 3, 2026
- Hamburgers in Sauce Recipe Crock Pot: Slow-Cooked Savory Delight - October 3, 2026