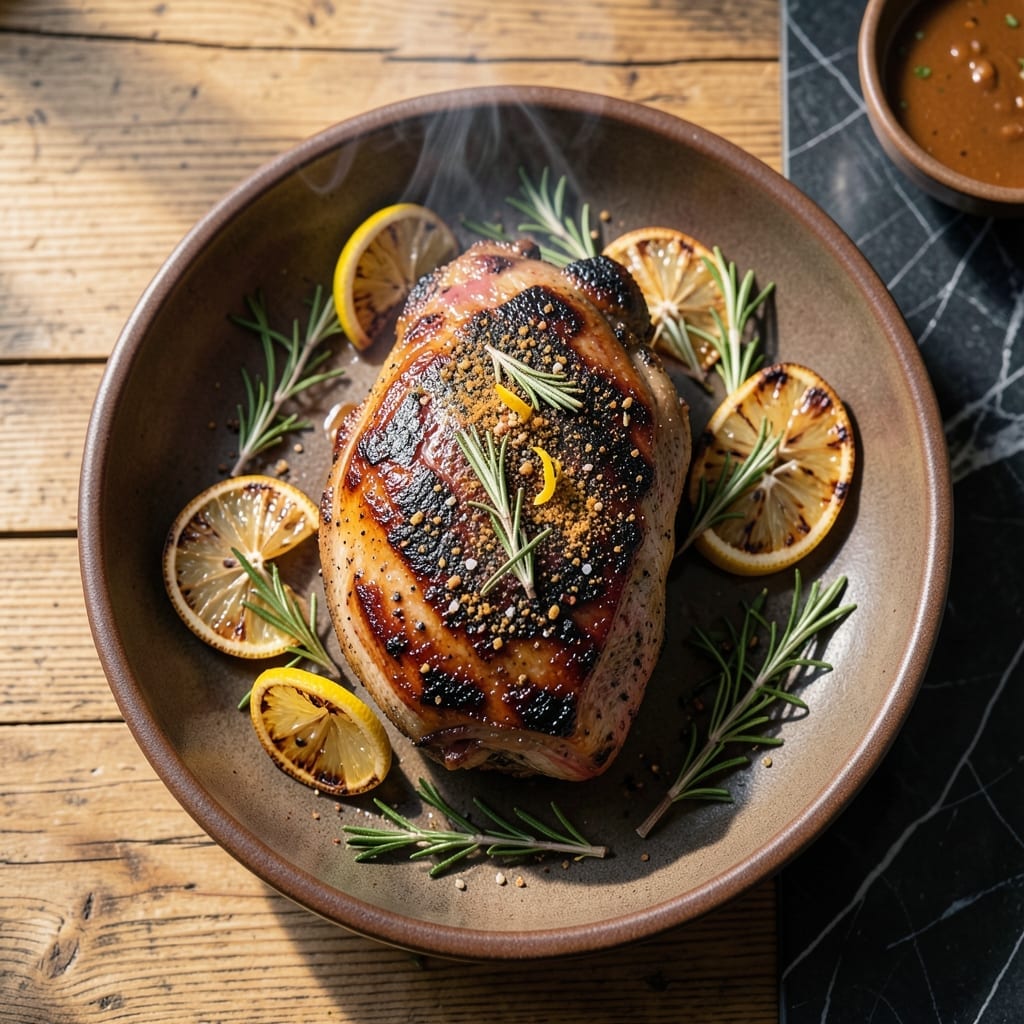
This grilled beef arm roast delivers juicy slices with a charred herb crust that’s hard to resist. The secret lies in a simple dry rub and precise grilling technique that locks in moisture while creating a flavorful exterior.
I developed this method after years of perfecting my approach to tougher cuts of beef. The arm roast, when treated right, becomes incredibly tender with a robust beef flavor that shines through the smoky char.
The result is a perfectly cooked roast with a beautiful crust and tender, juicy interior. Each slice reveals the care put into its preparation, with herbs and spices complementing the natural beef flavor.
Serve with your favorite sides for a meal that’s sure to impress at any gathering.
Ingredients for Grilled Beef Arm Roast
Pantry raid time for this one. Most of these are probably in your cupboard already.
| Ingredient | Amount | Notes |
|---|---|---|
| Beef Arm Roast 🥩 | 3 lb | Bone-in, well-marbled preferred |
| Kosher Salt 🧂 | 1 ½ tbsp | Diamond Crystal or Morton |
| Black Pepper 🌶️ | 1 tbsp | Freshly ground coarse |
| Garlic Powder 🧄 | 1 tbsp | Not garlic salt |
| Onion Powder 🧅 | 1 tbsp | Freshly ground preferred |
| Dried Rosemary 🌿 | 1 tbsp | Crushed between fingers |
| Dried Thyme 🍃 | 1 tbsp | Rubbed between palms |
| Smoked Paprika 🌶️ | 1 tsp | Sweet or hot variety |
| Olive Oil 🫒 | 2 tbsp | Extra-virgin for richness |
| Fresh Rosemary Sprigs 🌿 | 2 whole | For garnish and aroma |
| Fresh Thyme Sprigs 🍃 | 4 whole | For garnish and aroma |
| Lemon Wedges 🍋 | 4 pieces | For serving and brightness |
[recipe_ingredient_scaler]
The beef is everything here. Arm roast from Costco or a local butcher gives you the best marbling and flavor. Look for bone-in if you can find it—adds richness. Most grocery stores carry it in the roast section, but ask the meat counter if you’re unsure. The dry rub spices should be fresh (if your paprika smells like nothing, it’s time to replace it).
No fresh herbs for garnish? Dried work in a pinch—just sprinkle them on before serving. Short on time? Pre-made beef rub from Penzeys saves a step. The olive oil can be any neutral oil if that’s what you’ve got. The key is getting that crust, so don’t skip the rub even if you swap spices.
Leftovers keep 4-5 days in the fridge, but honestly this tastes best the day it’s made. Freeze slices for up to 3 months (thaw overnight before reheating). Let the roast rest before slicing—keeps all those juices inside where they belong.
Why You’ll Love This Recipe
- Set It and Forget It: I just season the roast with salt, pepper, garlic and onion powder, toss it on the grill, and let it do its thing.
- That Smoky Crust: The combo of black pepper and garlic powder forms this ridiculous crust that’s crispy outside, juicy inside.
- Feeds My Crew: One beef arm roast and I’ve got Sunday dinner plus leftovers for sandwiches the next day.
- Budget Hero: Honestly, it’s cheaper than steak cuts but still feels like a special meal.
Step-by-Step Instructions for Grilled Beef Arm Roast
This method ensures a juicy roast with a crust so flavorful, you’ll want to savor every bite.
Step 1: Season the Beef Arm Roast Generously
Pat the 3 lb Beef Arm Roast dry with paper towels—this helps the seasoning adhere and creates a better sear. In a small bowl, combine the 1.5 tbsp Kosher Salt, 1 tbsp Black Pepper, 1 tbsp Garlic Powder, 1 tbsp Onion Powder, 1 tbsp Dried Rosemary, 1 tbsp Dried Thyme, and 1 tsp Smoked Paprika.
Rub this mixture all over the roast, pressing firmly so it sticks to the surface. I crush the dried herbs between my fingers as I go to release their oils and maximize flavor. Let the seasoned roast sit at room temperature for 30-45 minutes while you prep the grill—this takes the chill off the meat for more even cooking.
Step 2: Sear the Roast on High Heat
Preheat your grill to high heat (about 450-500°F). Brush the grates clean and oil them lightly to prevent sticking. Place the roast on the grill and sear for 4-5 minutes per side until you see a deep, charred crust forming.
This high-heat sear locks in juices and develops those complex, smoky flavors we’re after. Keep the lid closed as much as possible to maintain temperature. If flare-ups occur, move the roast to a cooler part of the grill temporarily—safety first, but don’t let it scare you off the heat entirely.
Step 3: Slow-Grill to Juicy Perfection
Once the roast has a good sear on all sides, reduce the heat to medium-low (around 300-325°F). If using a charcoal grill, bank the coals to one side for indirect heat. Brush the roast with 2 tbsp Olive Oil to keep it moist during the slower cooking phase.
Close the lid and cook for 1.5-2 hours, or until the internal temperature reaches 130-135°F for medium-rare. I check the temperature in the thickest part of the roast, away from the bone. The meat should feel slightly firm but still springy when pressed.
Step 4: Rest and Serve with Fresh Herbs
Transfer the roast to a cutting board and tent it loosely with aluminum foil. Let it rest for 15-20 minutes—this is non-negotiable for juiciness. The internal temperature will rise another 5-10°F during this time, and the juices will redistribute throughout the meat.
Slice against the grain into ½-inch thick pieces. Garnish with the 2 whole Fresh Rosemary Sprigs, 4 whole Fresh Thyme Sprigs, and 4 pieces Lemon Wedges for a bright, aromatic finish. The lemon adds a perfect pop of acidity to cut through the richness.
Pro Tips For Making Grilled Beef Arm Roast
- Dry the Roast: Pat the beef arm roast completely dry with paper towels before seasoning—I learned this the hard way after my first few attempts ended up steaming instead of searing.
- Use a Meat Thermometer: Pull it off the grill at 130°F for medium-rare, then let it rest. I used to guess and either overcooked it to shoe leather or served it too rare.
- Season Generously: Don’t be shy with the kosher salt, garlic powder, and onion powder—this cut can handle bold seasoning. I skip the black pepper until after grilling to prevent bitterness.
- Rest Before Slicing: Give it a solid 10-15 minutes under foil after grilling. Sounds tedious, but it keeps the juices in the meat instead of all over your cutting board.
Common Mistakes When Making Perfect Results
Skipping the Rest
The biggest mistake I see? Slicing straight off the grill. That 15-20 minute rest isn’t optional—it lets juices redistribute. Skip it, and you’ll watch all that flavor pool on your cutting board instead of staying in the meat. 💡
Uneven Seasoning
Don’t just sprinkle the rub on—press it in firmly so it sticks. I crush the dried herbs between my fingers as I go to release their oils. A light dusting won’t create that charred herb crust we’re after.
High Heat Too Long
That initial sear needs 450-500°F for 4-5 minutes per side, but then you must reduce to medium-low. Too long on high heat and you’ll burn the outside before the inside cooks.
Ignoring Internal Temp
Guessing don’t cut it. Use a meat thermometer and aim for 130-135°F in the thickest part. I check away from the bone—hitting bone gives false readings. The temp will rise another 5-10°F while resting.
Skipping the Oil
Brushing with 2 tbsp Olive Oil after searing keeps the exterior moist during the slow cook. Without it, your beautiful crust can dry out. I use extra-virgin for its rich flavor.
Not Preheating Properly
Your grill needs 10-15 minutes to reach proper temperature. Cold grates cause sticking and poor sear. I always preheat with the lid closed to ensure even heat distribution. 🔥
Nutrition Facts
Frequently Asked Questions
What’s the ideal internal temperature for medium-rare?
Aim for 130-135°F in the thickest part, away from the bone. The temperature will rise another 5-10°F while resting. This ensures a perfect medium-rare with a juicy interior.
Can I use a gas grill for this recipe?
Set burners to high heat for searing, then reduce to medium-low for slow cooking. Use indirect heat by turning off one burner if needed. Gas grills work just as well as charcoal for this method.
How do I prevent the roast from sticking to the grates?
Preheat your grill for 10-15 minutes and brush the grates clean. Lightly oil the grates before placing the roast. Pat the meat dry first—the drier the surface, the better the sear and release.
What if my roast is smaller than 3 pounds?
Reduce cooking time proportionally. For a 2 lb roast, check for doneness after about 1 hour of slow grilling. Always use a meat thermometer to confirm the internal temperature.

Trained in classic French technique but raised on slow-cooked ribs and spicy rubs, she blends culinary skill with smoke and soul.
- Recipe for Boneless Pork Chops in Cast Iron Skillet: Sear and Baste to Juicy Perfection - October 3, 2026
- Recipe for Boneless Cross Rib Roast: Slow-Roasted Beef with Herb Crust - October 3, 2026
- Hamburgers in Sauce Recipe Crock Pot: Slow-Cooked Savory Delight - October 3, 2026