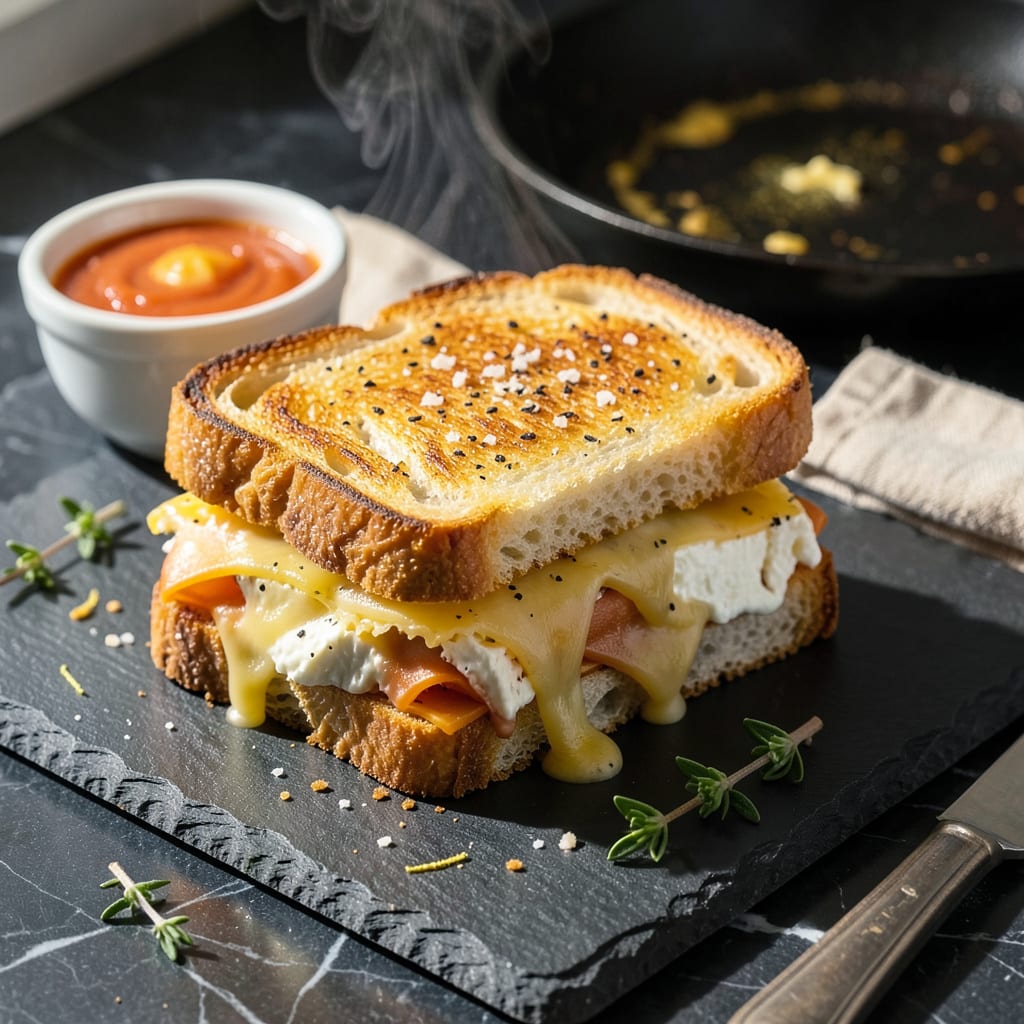
I’ve made more grilled cheese sandwiches than I can count, but this hack changed everything. No more sad, soggy bread or cheese that refuses to melt properly. This method delivers perfectly crispy exteriors and gooey, fully melted centers—every single time. And here’s the kicker: it takes half the usual effort.
Between you and me, the secret isn’t fancy cheese or artisanal bread. It’s all about technique. I discovered this by accident during a late-night kitchen experiment when I was too impatient to wait for the pan to heat properly. Turns out, that “mistake” led to the best grilled cheese of my life.
What you get is a sandwich with golden, shatteringly crisp bread that gives way to stretchy, melted cheese. The kind that pulls apart in those satisfying strings when you take a bite. No special equipment needed—just a skillet and about 10 minutes of your time.
This works with any cheese blend and bread type, making it endlessly customizable. Whether you’re feeding picky kids or hosting a fancy brunch, this hack guarantees restaurant-quality results at home. Let’s get that pan hot and make some magic happen.
📚 In This Guide
- What You’ll Need
- Instructions
- Tips and Common Mistakes
What Youll Need
- ● Bread: 2 slices of sturdy white, sourdough, or brioche (avoid flimsy sandwich bread!)
- ● Cheese: 1–1.5 oz (2–3 slices) of melty cheese per sandwich—think sharp cheddar, American, Gruyère, or a mix! 🧀
- ● Butter: 1–2 tbsp unsalted butter (or mayo for extra crispiness—trust us!)
- ● Pan: 1 nonstick or cast-iron skillet (8–10 inches for even cooking)
- ● Spatula: 1 thin, flexible metal or silicone spatula (for easy flipping)
- ● Heat source: Stovetop with medium-low to medium heat (no scorching allowed!)
- ● Garlic powder or grated Parmesan (for flavor-packed crusts)
- ● Cooking spray (for light, even buttering)
- ● Cheese grater (if using block cheese for faster melting)
- ● Lid or foil (to trap heat for extra-gooey results)
Instructions
This method delivers that ideal balance of golden crust and gooey cheese—faster than you think possible.
Choose the Right Bread and Cheese
Start with a sturdy, crusty bread like sourdough or country white—it holds up to high heat without burning. Avoid pre-sliced sandwich bread; its soft texture can’t create that satisfying crunch we’re after. Cut two ½-inch thick slices per sandwich.
For the cheese, I recommend a combination of sharp cheddar and Gruyère for optimal meltability and flavor complexity. Shred the cheese yourself rather than using pre-shredded—it melts more smoothly and creates that perfect stretch. You’ll want about ½ cup of cheese total per sandwich.
Preheat Your Pan Properly
Place a heavy-bottomed skillet (cast iron works best) over medium-low heat and let it preheat for 5 full minutes. This even heating prevents hot spots that could burn your bread before the cheese melts. The pan is ready when a drop of water sizzles and evaporates immediately upon contact.
While the pan heats, spread a thin layer of mayonnaise on the outer sides of your bread slices instead of butter. I know it sounds unconventional, but mayonnaise contains emulsifiers that create a more even, golden-brown crust while preventing sogginess. Trust me on this—it’s the secret to that perfect crisp.
Assemble and Cook with Precision
Place one bread slice mayo-side down in the preheated pan. Immediately sprinkle the shredded cheese evenly over the bread, then top with the second slice mayo-side up. Press down gently with a spatula to ensure good contact between cheese and bread.
Cook undisturbed for 3-4 minutes until the bottom is deep golden brown and the cheese begins to melt around the edges. Here’s the key: when you see tiny bubbles forming in the mayo on the top slice, it’s time to flip. This visual cue means the second side will crisp perfectly in the same amount of time.
Finish and Rest for Optimal Texture
Flip the sandwich carefully and cook for another 3-4 minutes until both sides are uniformly crispy and the cheese is fully melted. You’ll know it’s done when the sandwich compresses slightly when pressed with your spatula, and you can see cheese oozing from the edges.
Transfer to a cutting board and let rest for 2 minutes before slicing. This brief rest allows the cheese to set slightly so it doesn’t all rush out when you cut into it. The exterior will stay crisp while the interior remains perfectly gooey. Cut diagonally for maximum cheese pull in every bite.
Tips and Common Mistakes
These small but mighty adjustments will transform your sandwich from good to restaurant-quality perfection.
Heat Control: The 5 full minutes of preheating at medium-low heat in Step 2 isn’t just a suggestion—it’s the foundation of even cooking. I’ve found that cast iron retains this heat beautifully, but if you’re using stainless steel, you might need to adjust slightly lower to prevent hot spots. The water droplet test mentioned in the instructions is your best indicator of proper pan readiness.
Cheese Selection Insight: The sharp cheddar and Gruyère combination in Step 1 creates that ideal balance of tang and nuttiness, but here’s what nobody tells you—freshly shredded cheese melts at different rates. Shred the cheddar slightly finer than the Gruyère so they melt in harmony during those critical 3-4 minutes of cooking. This prevents the cheddar from over-melting before the Gruyère gets gooey.
Visual Cues Matter: During the 3-4 minutes per side cooking in Step 3, watch for two things: the mayo bubbles forming on the top slice (your flip signal) and the cheese just beginning to escape at the edges. That escape isn’t a mess—it’s your visual timer. When you see that first ooze, you’ve got about 30 seconds before perfect doneness. I learned this the hard way after burning three sandwiches waiting for “more melt.”
Resting Technique: Those 2 minutes of resting in Step 4 aren’t just about preventing cheese spill—they’re about texture transformation. Place your sandwich on a wire rack rather than a plate during this time. The air circulation prevents the bottom from steaming and losing crispness while the cheese sets. Cutting diagonally after resting isn’t just for looks; it creates the maximum surface area for that first glorious cheese pull.
Pro Tips for Grilled Cheese Hack
- These small but mighty adjustments will transform your sandwich from good to restaurant-quality perfection.
- Heat Control: The 5 full minutes of preheating at medium-low heat in Step 2 isn’t just a suggestion—it’s the foundati…
- Cheese Selection Insight: The sharp cheddar and Gruyère combination in Step 1 creates that ideal balance of tang and …
Frequently Asked Questions
Can I make a grilled cheese without butter?
Swap butter for mayonnaise (yes, really—it creates a crispier crust!) or use olive oil for a lighter option. Vegan? Try coconut oil or vegan butter. Just brush it on the bread like you would with butter—same golden results!
Why does my grilled cheese burn before the cheese melts?
Too-high heat is the usual culprit! Cook on medium-low (not high) and cover the pan with a lid for 1–2 minutes to trap heat. This melts the cheese faster without scorching the bread. Patience pays off—aim for 3–4 minutes per side.
What’s the best cheese for extra stretchy melts?
Go for a mix of low-moisture mozzarella (for stretch) and sharp cheddar (for flavor). American cheese melts smoothly too! Pro tip: Shred your own—pre-shredded cheese has anti-caking agents that can make it clumpy.
How do I keep my grilled cheese crispy if I’m packing it for lunch?
Let it cool completely, then wrap it in parchment paper (not foil) to avoid sogginess. For extra crunch, reheat in a toaster oven or air fryer for 2–3 minutes. Skip the microwave—it’ll turn your masterpiece into a sad, limp sandwich.
Can I make a grilled cheese in an air fryer?
You bet! Set the air fryer to 350°F, butter the bread, and cook for 4–5 minutes, flipping halfway. Spritz the basket with oil first to prevent sticking. It’s faster than a pan and gives that perfect crispy-melty combo!
Who knew a simple tweak could turn your grilled cheese from good to unforgettable? 🧀✨ With the right technique—like pre-shredding cheese or using mayo instead of butter—you’re just minutes away from that golden, crispy, melty masterpiece. No more soggy bread or uneven melting!
Ready to put this hack to the test? Grab your skillet and try it tonight—your taste buds (and maybe even your Instagram followers) will thank you. For more game-changing kitchen tricks, check out our quick snack upgrades next! 👩🍳🔥

Trained in classic French technique but raised on slow-cooked ribs and spicy rubs, she blends culinary skill with smoke and soul.
- Recipe for Boneless Pork Chops in Cast Iron Skillet: Sear and Baste to Juicy Perfection - October 3, 2026
- Recipe for Boneless Cross Rib Roast: Slow-Roasted Beef with Herb Crust - October 3, 2026
- Hamburgers in Sauce Recipe Crock Pot: Slow-Cooked Savory Delight - October 3, 2026