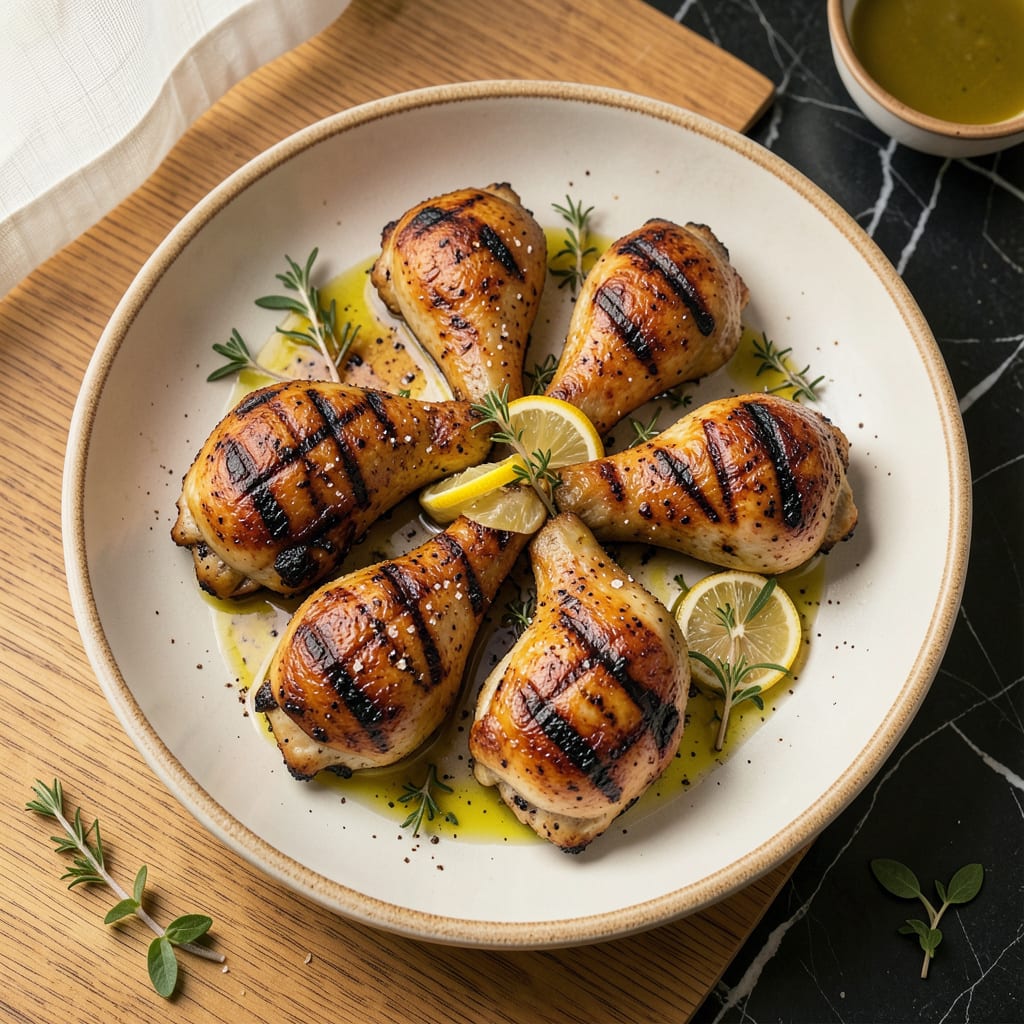
There’s nothing quite like the smell of chicken thighs sizzling on a hot grill—especially when they come out juicy inside with that perfect charred crust. I’ve cooked more thighs than I can count, and the secret is all in the heat control and timing. No fancy equipment needed, just a good grill and about 20 minutes of your time.
What makes these thighs special is how forgiving they are. The dark meat stays moist even if you overshoot the timing a bit, and that skin? It crisps up beautifully over direct heat. I’ll walk you through exactly when to flip, how to check doneness, and why letting them rest makes all the difference. This is the kind of simple, foolproof grilling that’ll have you making them every week.
Ingredients for Grilled Chicken Thighs
Bone-in thighs, bold spices, and a hot grill—everything you need for that perfect charred crust.
| Ingredient | Amount | Notes |
|---|---|---|
| Bone-In, Skin-On Chicken Thighs 🍗 | 2 lb | About 6-8 thighs, patted dry |
| Kosher Salt 🧂 | 1 ½ tsp | Diamond Crystal preferred for even seasoning |
| Freshly Ground Black Pepper 🌶️ | 1 tsp | Coarse grind for texture |
| Garlic Powder 🧄 | 1 tsp | Not garlic salt |
| Smoked Paprika 🌶️ | 1 tsp | For depth and subtle smokiness |
| Olive Oil 🫒 | 2 tbsp | For coating before grilling |
| Lemon 🍋 | 1 whole | Cut into wedges for serving |
| Fresh Parsley 🌿 | ¼ cup | Chopped, for garnish |
| Vegetable Oil 🫒 | 1 tbsp | For grill grates (high smoke point) |
| Brown Sugar 🍚 | 1 tsp | Optional, balances smokiness |
| Onion Powder 🧅 | ½ tsp | Enhances savory notes |
| Cayenne Pepper 🔥 | ¼ tsp | Adjust for heat preference |
[recipe_ingredient_scaler]
The chicken thighs are the star here—bone-in, skin-on for maximum flavor and juiciness. I grab mine from Whole Foods or Costco (their organic thighs are consistently great). Look for pieces that are similar in size so they cook evenly. The skin should be smooth and dry (pat it with paper towels before seasoning). For the spices, Penzeys has incredible smoked paprika, but any grocery store brand works in a pinch (just check the freshness date).
No smoked paprika? Regular paprika plus a pinch of cumin gets you close. Out of garlic powder? Fresh minced garlic (2 cloves) works too—just mix it with the oil before coating. Brown sugar can be swapped for honey (though not strictly vegan) or skipped entirely. The cayenne is optional, but that tiny bit of heat balances the smokiness. If you’re using boneless thighs, reduce cooking time by about 25% (they dry out faster).
Seasoned thighs can sit in the fridge for up to 12 hours before grilling—great for prepping ahead. Leftovers keep for 4 days (reheat gently in a skillet to crisp the skin). The dry rub mix? Make extra and store in a jar for 6 months. I double the batch and keep it next to my grill tools—ready whenever the craving hits.
Why You’ll Love This Recipe
- Five-Minute Prep: I’m not kidding—just pat the thighs dry, shake on the salt, pepper, garlic powder, and that smoky paprika, and you’re done. No marinating, no fuss, just straight to the grill while I pour myself a drink.
- Crispy Skin, Juicy Bite: That skin-on magic? It renders down to golden perfection while the bone keeps the meat stupidly tender. The smoked paprika adds this deep, almost bacon-like warmth that’ll have you sneaking bites before it hits the table.
- Meal Prep MVP: I grill a double batch Sunday night—shred some for tacos, slice others for salads, and keep a few whole for sandwiches. Honestly, it’s the only protein that stays interesting all week, even when I’m sick of leftovers.
- Budget Hero: Bone-in thighs cost half what breasts do, and they’re way harder to overcook. I feed four for under $10, and the leftovers stretch into two more meals. Here’s what sold me—my grocery bill dropped, but my family’s requests for this dish didn’t.
Step-by-Step Instructions for Grilled Chicken Thighs
Here’s the foolproof method I use to get perfectly charred, juicy thighs every time.
Step 1: Season the Chicken Thoroughly
Start by patting the bone-in, skin-on chicken thighs completely dry with paper towels. This step is crucial—any moisture will prevent that perfect crispy skin we’re after. Place the thighs in a large bowl and drizzle with the 2 tbsp olive oil, tossing to coat evenly.
In a small bowl, combine the 1.5 tsp kosher salt, 1 tsp freshly ground black pepper, 1 tsp garlic powder, 1 tsp smoked paprika, 0.5 tsp onion powder, 1 tsp brown sugar, and 0.25 tsp cayenne pepper. Sprinkle this mixture generously over all sides of the chicken, rubbing it into the meat and under the skin. Let the seasoned thighs sit at room temperature for 15-20 minutes while you prepare the grill.
Step 2: Prepare the Grill for Two-Zone Cooking
Clean your grill grates thoroughly with a wire brush, then fold a paper towel into a small square, dip it in the 1 tbsp vegetable oil, and use tongs to rub it over the grates. This creates a non-stick surface and helps prevent the chicken from sticking.
Set up your grill for two-zone cooking: heat one side to medium-high heat (about 400°F) and leave the other side unlit or on low. This setup gives you both direct and indirect heat zones. For charcoal grills, pile the coals on one side. The two-zone method lets you sear the thighs first, then finish cooking gently without burning the skin.
Step 3: Sear and Cook to Perfection
Place the chicken thighs skin-side down on the hot side of the grill. Close the lid and let them cook undisturbed for 6-8 minutes until the skin develops a deep golden-brown color and releases easily from the grates. Resist the urge to move them—this is when that beautiful crust forms.
Flip the thighs and move them to the cooler side of the grill. Cover and cook for another 10-12 minutes, or until the internal temperature reaches 175°F when measured at the thickest part near the bone. The thighs are done when the juices run clear and the meat pulls away slightly from the bone.
Step 4: Rest and Serve with Fresh Garnishes
Transfer the cooked thighs to a clean platter and let them rest for 5 minutes before serving. This brief rest allows the juices to redistribute throughout the meat, ensuring every bite stays moist and flavorful.
While the chicken rests, chop the 0.25 cup fresh parsley and cut the lemon into wedges. Arrange the thighs on a serving platter, sprinkle with the chopped parsley, and serve with lemon wedges on the side. The bright acidity from the lemon perfectly balances the smoky, savory flavors of the chicken.
Make-Ahead Tips for This Dish
Prep Ahead Seasoning
You can mix the dry rub up to 2 weeks ahead and store it in an airtight container. I like to use small mason jars—I keep one in my spice cabinet and another in my grill caddy. Just combine the 1.5 tsp kosher salt, 1 tsp black pepper, and all the other spices as listed. When you’re ready to grill, just shake the jar and sprinkle directly onto your oiled chicken. 🌶️
Overnight Dry Brine
For even more flavor and juiciness, season your thighs up to 12 hours before grilling. After coating with the rub, place them on a wire rack over a baking sheet (this lets air circulate) and refrigerate uncovered. The salt penetrates deeper overnight, and the skin dries out slightly for extra crispiness. I do this when I know I’ll be busy the next day—it’s a game-changer for texture.
Pre-Cooked Convenience
Grilled thighs reheat beautifully, so I often cook extra for quick meals. Let them cool completely, then store in airtight containers for up to 4 days. To reheat, place them skin-side down in a cold skillet, cover, and warm over medium-low heat for 5-7 minutes. The skin will crisp back up while the meat stays juicy. I pack these for lunch with a simple salad—no sad desk meals here.
Freezer-Friendly Batches
For longer storage, freeze cooked thighs in single layers on a tray first, then transfer to freezer bags. They’ll keep for 3 months without losing quality. Thaw overnight in the fridge before reheating. I always freeze with a slice of lemon between each piece—it prevents freezer burn and adds freshness when you reheat. This is how I meal prep for those weeks when grilling isn’t an option.
Grilled Thigh Salads
Slice leftover thighs and toss them into salads for a protein boost. My favorite combo is mixed greens, avocado slices, cherry tomatoes, and the grilled chicken with a simple lemon vinaigrette. The smoky flavor from the grill transforms a basic salad into something special. I make this at least once a week—it’s my go-to after a big grilling session. 🥗
Meal Prep Protein
Cook a double batch specifically for meal prep. Shred the meat and portion it into containers with different bases: rice one day, quinoa the next, or wrapped in tortillas for tacos. The flavors hold up well, and you can customize each meal. I like to add a spoonful of the pan drippings to each container—it keeps the meat moist when reheated. This is how I turn one grilling session into 5 different meals.
Nutrition Facts

Trained in classic French technique but raised on slow-cooked ribs and spicy rubs, she blends culinary skill with smoke and soul.
- Recipe for Boneless Pork Chops in Cast Iron Skillet: Sear and Baste to Juicy Perfection - October 3, 2026
- Recipe for Boneless Cross Rib Roast: Slow-Roasted Beef with Herb Crust - October 3, 2026
- Hamburgers in Sauce Recipe Crock Pot: Slow-Cooked Savory Delight - October 3, 2026